Last updated: June 2026
Quick answer: Cinematic black bars crop your video to a 2.39:1 widescreen (CinemaScope) look. On a 1920×1080 video, add a ~138 px black bar to the top and bottom (visible frame becomes 1920×804). You can add resizable cinematic bars to any video free in Typito — no fixed-size PNG needed.
Have you ever watched a music video of your favorite artist on YouTube and wondered how it looks like it is straight out of a movie? Next time this crosses your mind, be sure to pay a little attention to the screen. 8 out of 10 times it might be because of the black spaces at the top and bottom of the screen. These black spaces, which practically change your viewing experience, are called black bars.
If you are someone into video editing (or just starting), here’s what you need to know about black bars and, more importantly - how to add black bars to your videos with absolutely zero effort.
What are Black Bars?
They are blank spaces, either at the sides of a video or at the top and bottom, for multiple reasons. To know that, let us look at how they originated in the first place, shall we?
How it all started...
When television and cinema coexisted, a similar aspect ratio was observed between the two during the first few years. But as years went by, movies shifted to the widescreen ratio for a better experience. But the television screens were in square dimensions.
For movies to be telecasted, they had to fit the TV screens. Since the option of cropping the video was out of the equation, the concept of black bars that fill the screen came into action. For 50 odd years, movies were displayed on television with the black bar at the top and bottom.
When widescreen TVs came into the scene, they could support the wide frame movies. But the sizes of the widescreens in consideration were not uniform. They were of different ratios or rectangle shapes. To fill out the gaps that came when a video was fit into a screen, black bars were widely used.
Here’s everything we’ll cover in the next couple of sections:
- How to add black bars to your video online
- How to make custom formats with letterboxes online
- How to Add Black Bars to a Square or Vertical Video
- How to remove black bars from videos
- Why do we need black bars
- Quick guide on aspect ratios
How to Add Black Bars to Your Video Online
When you decide your video needs the cinematic black bars, there are two ways you can get it done:
1. During Production while shooting your video
2. Post Production when you’re editing your video
The first way is to shoot the video keeping the aspect ratio in your mind and choosing the right dimension. Most video players are capable of accommodating videos of a different ratio to fit the screen by adding black bars on their own.
You can also reframe the footage in the post-production on video editing software to enable black bars. Depending on the software you use, this can be fairly easy.
Here’s how you can add black bars to your video in 4 simple steps online:
Step 1: Head over to Typito to get started
Click the Get Started button and then directly upload your images and videos.

If you already have an account, you can log in, click Custom Format to create the video with black bars.
Step 2: Add black bars to your video
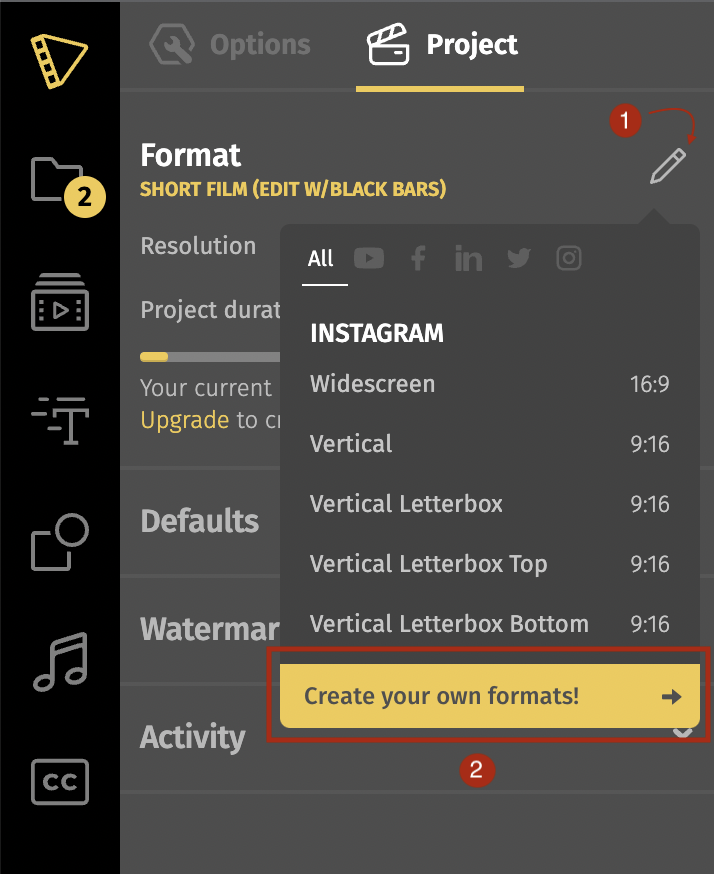
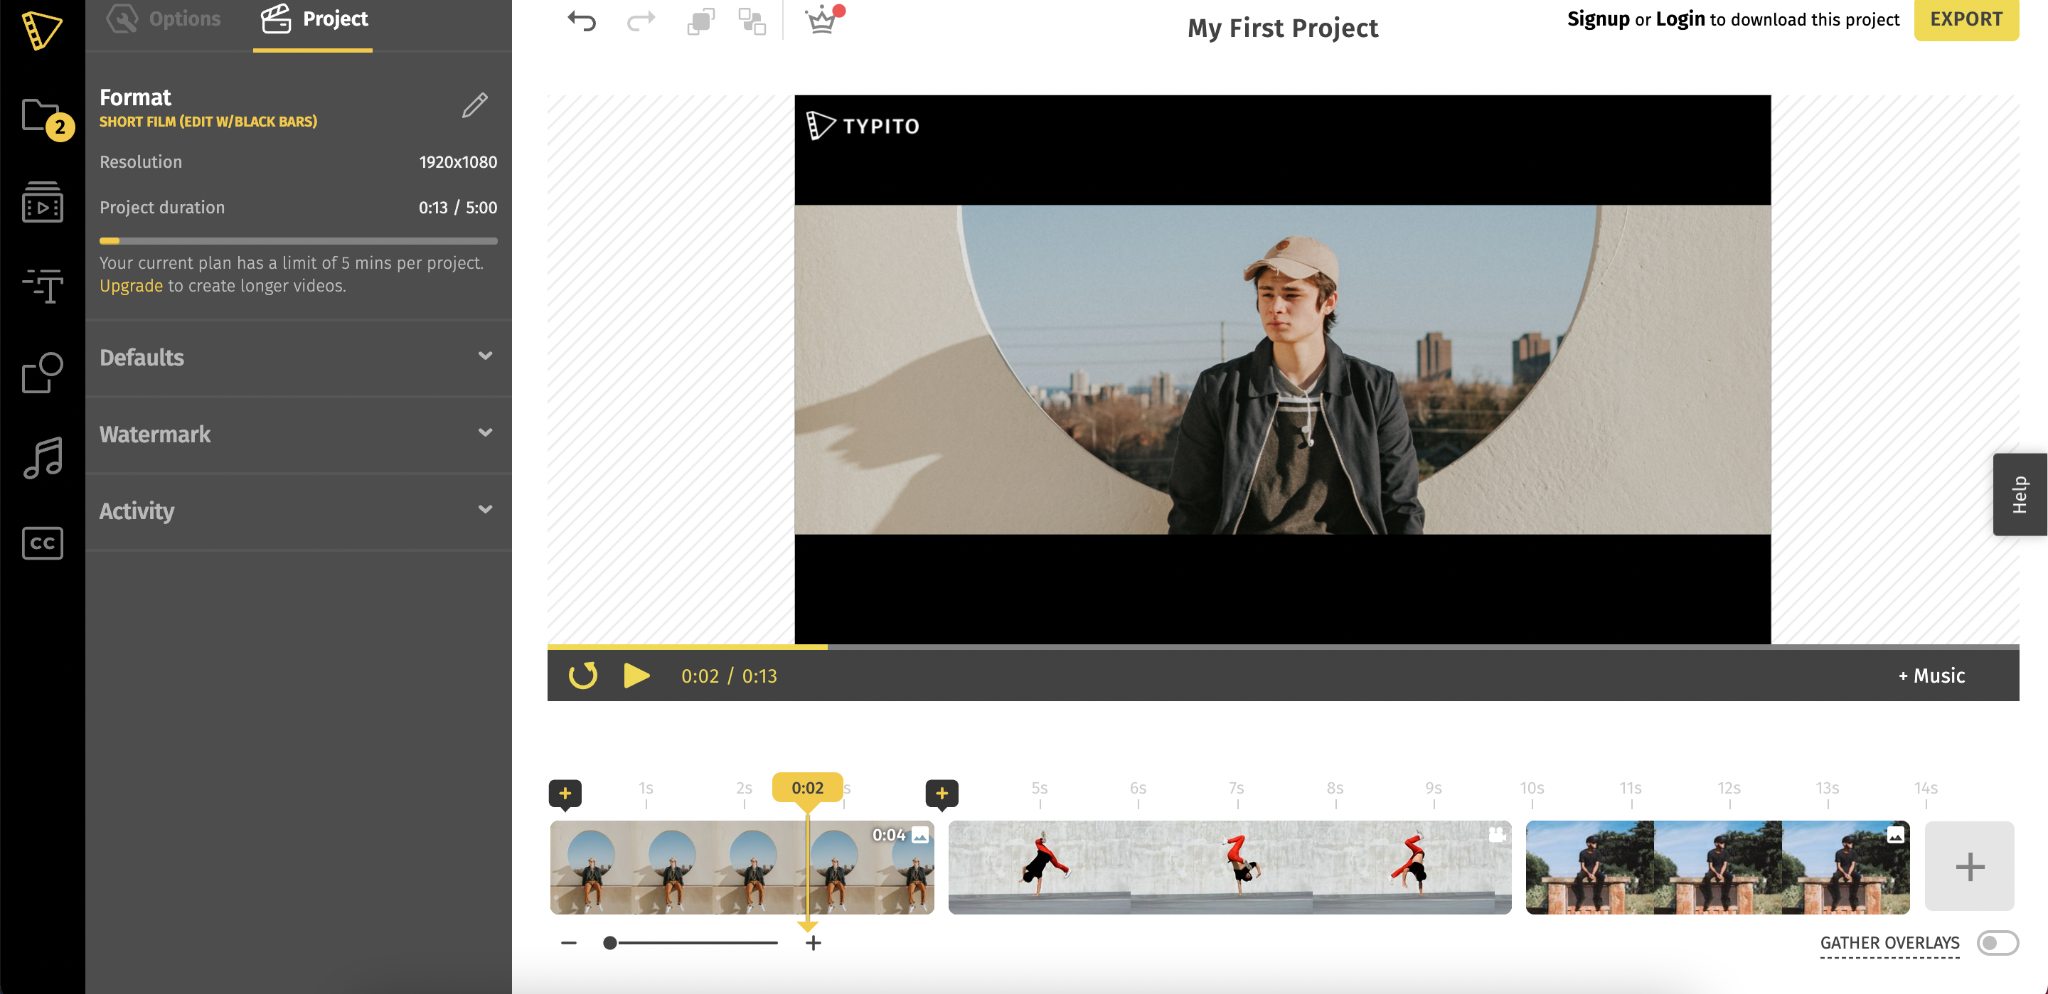
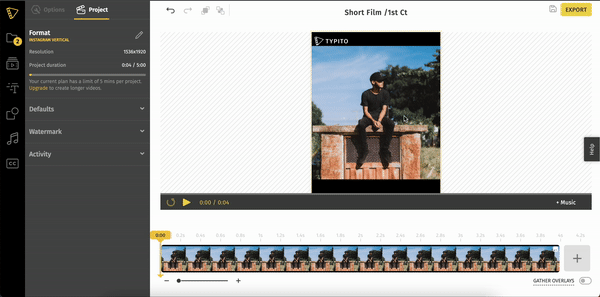
Click the Format edit icon (labeled as 1 in the image below) from the left panel and then click Create your own formats (labeled as 2 in the image below).
Fill in a title and a short description so you can reuse this video format to create videos with black bars for any other similar video projects.
You can also enter the exact width and height of the video dimensions or video aspect ratio you want in pixels. The default dimensions entered here are the standard dimensions for a widescreen video -1920 x 1080 pixels.
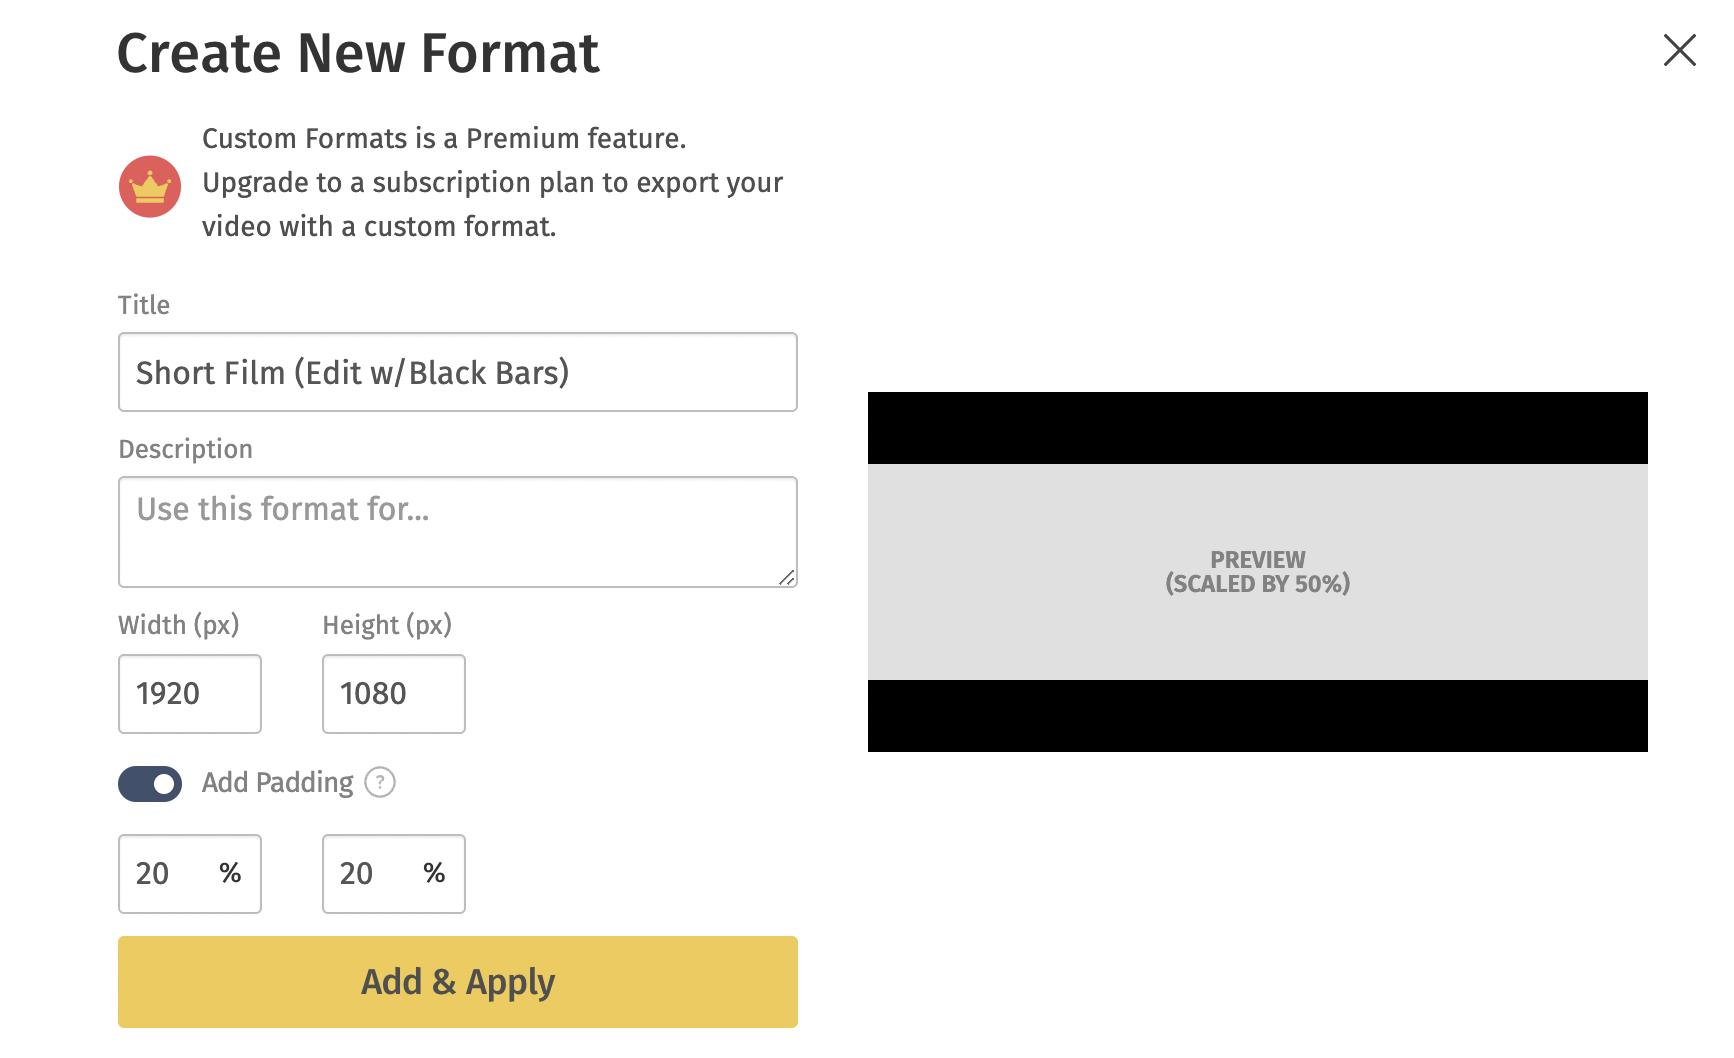
Next, enable the Add Padding toggle to add black bars to the video.
Step 3: Adjust the black bars on your video
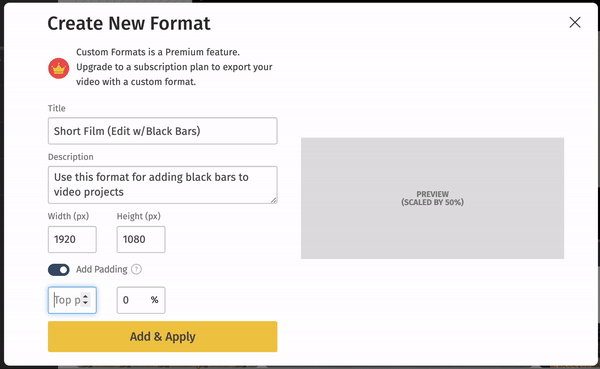
Adjust the black bars at the top and bottom to the exact percentage you want. You can see how your frame will look on the right pane. Make changes accordingly.
Click on Add & Apply. You can add your video to this video format now.
When editing on Typtio the black bars stay intact irrespective of your media’s dimensions.
Pro-Tip If your video has closed captions or subtitles, you can place them on the black bars to keep it visible without distractions. Here’s how to easily add captions to video.
Once you’re done editing your video, click the Export button and your video will soon be ready to be downloaded and shared.
How to Add Black Bars to a Square or Vertical Video
With Typito, you can add black bars to the top and bottom of your Square or Vertical video easily using the video resize tool.
This automatically resized your video to fit it with black bars at the top and bottom of your video.
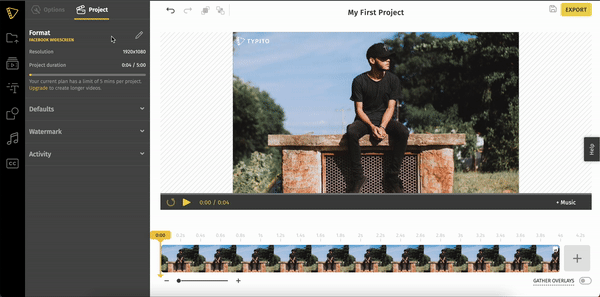
Click the Format icon and choose a letterbox format that could fit your requirement.
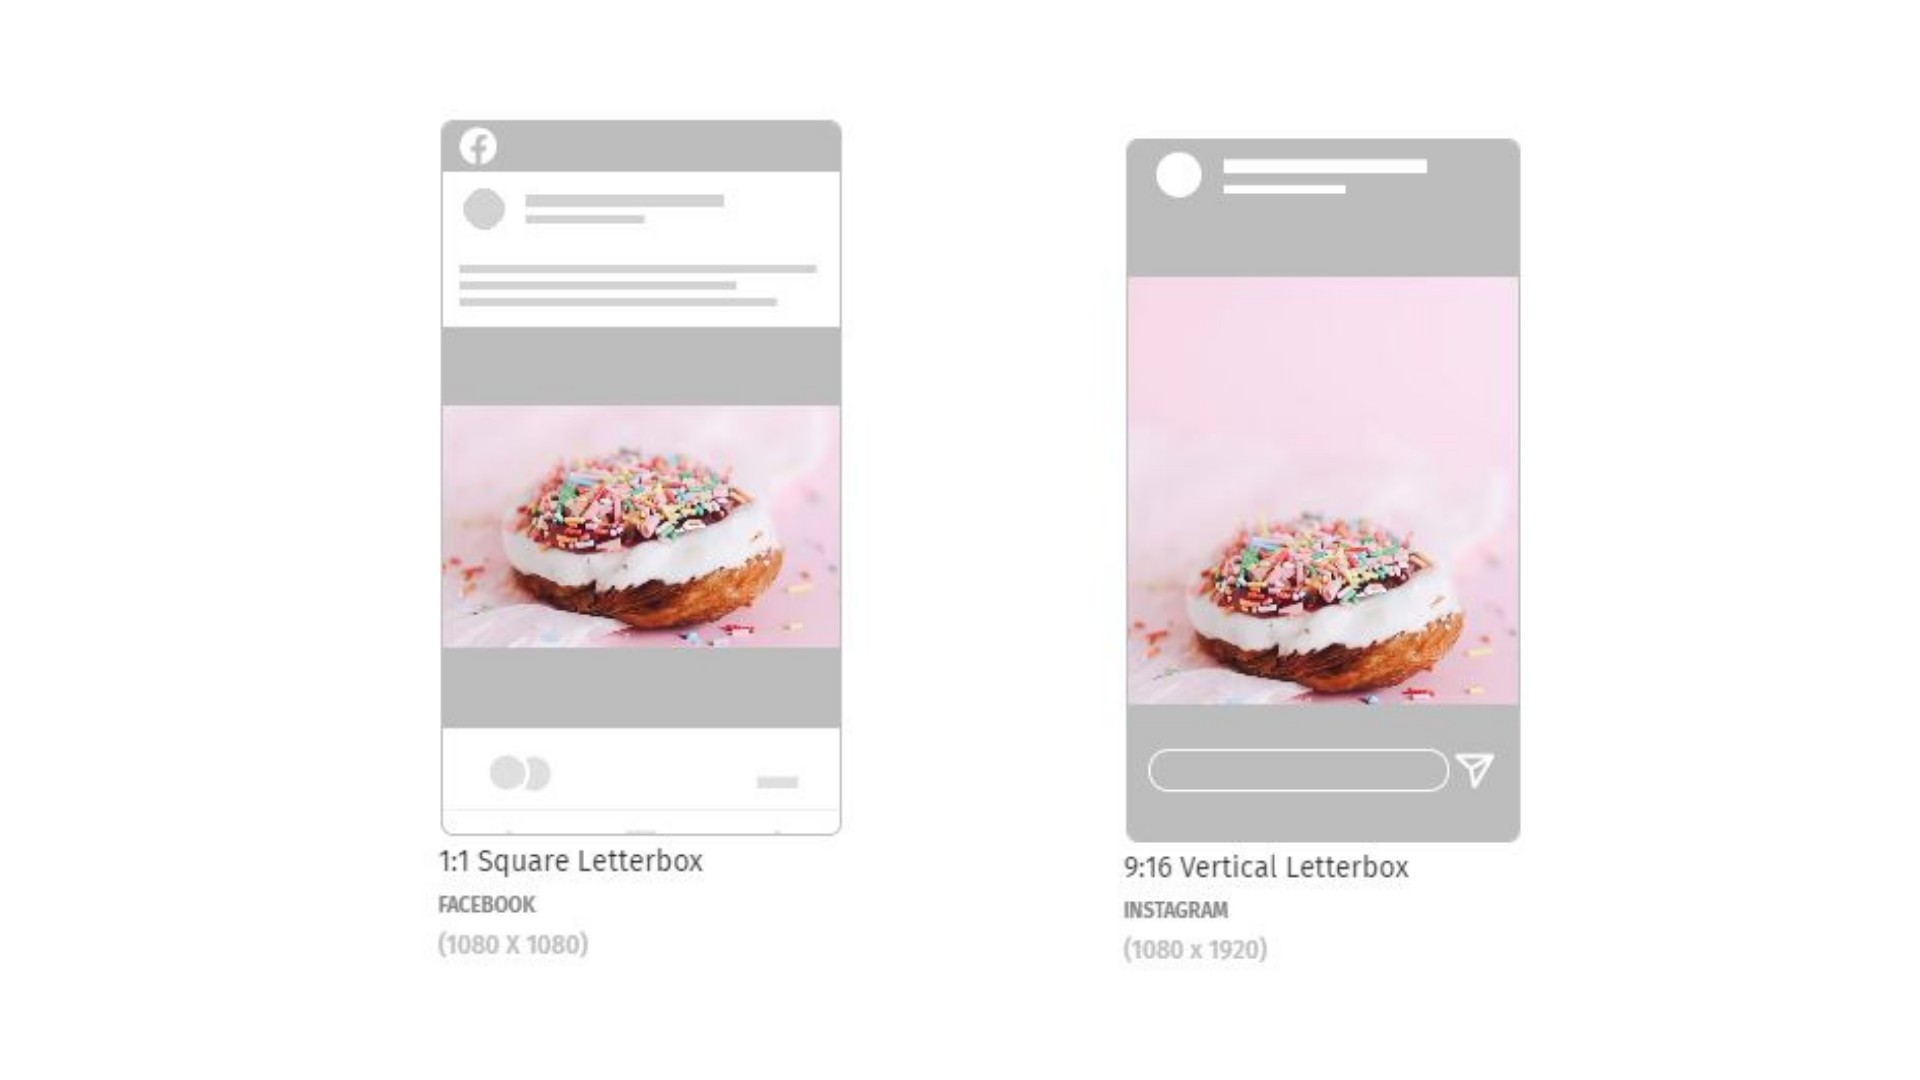
Left: 1:1 Square Letterbox in Typito. Right: 9:16 Vertical Letterbox in Typito.
Typito has a handful of choices for you. Black boxes on the sides, top, and the bottom, only the top or the bottom - we got everything covered.
How to Remove Black Bars from Videos
Now that we know how to add them, let us see how to remove them in 3 quick steps without cropping the media.
Step 1: Upload your video
Head over to Typito and upload the video you want to edit.
Step 2: Resize the video
There are 2 ways to do this: 1. Resize with a video format 2. Crop video to remove black bars
- You can resize the video and choose any of our video aspect ratio presets that do not have black bars. Typito adjusts your video accordingly. To do this: Click the Format edit icon and choose an appropriate format. Since this is a square video with black bars, we’ll choose a widescreen to remove them.
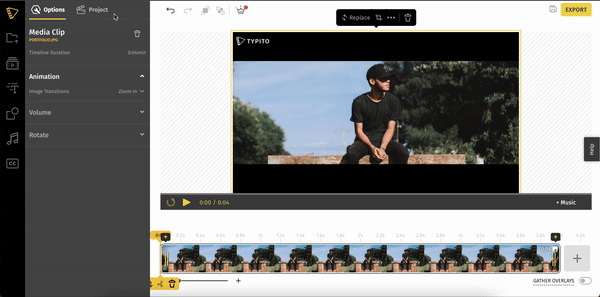
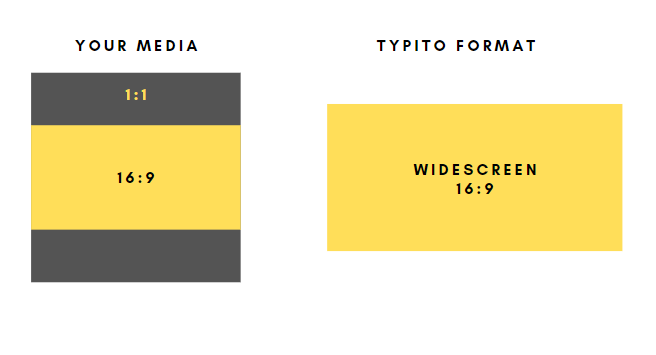
Your original media on the left, the Typito format you'll have to pick on the right.
2. Crop your video to resize it accordingly.
To do this: Click the video on the canvas and then use the crop video tool to adjust your frame accordingly.
Step 3: Preview, edit, and export
Once you’ve adjusted your video to automatically resize the dimensions and remove the bars, you can edit your project as needed to add text, music, and more.
Edit your project and export it once you are done.
So, why do we need black bars now?
Here are 3 reasons why black bars could one-up your video and get the views it deserves.
1. Black bars create an awesome cinematic effect
We’ll tell you why. After years of watching movies with black bars, the human mind was accustomed to associating them mainly with cinema.
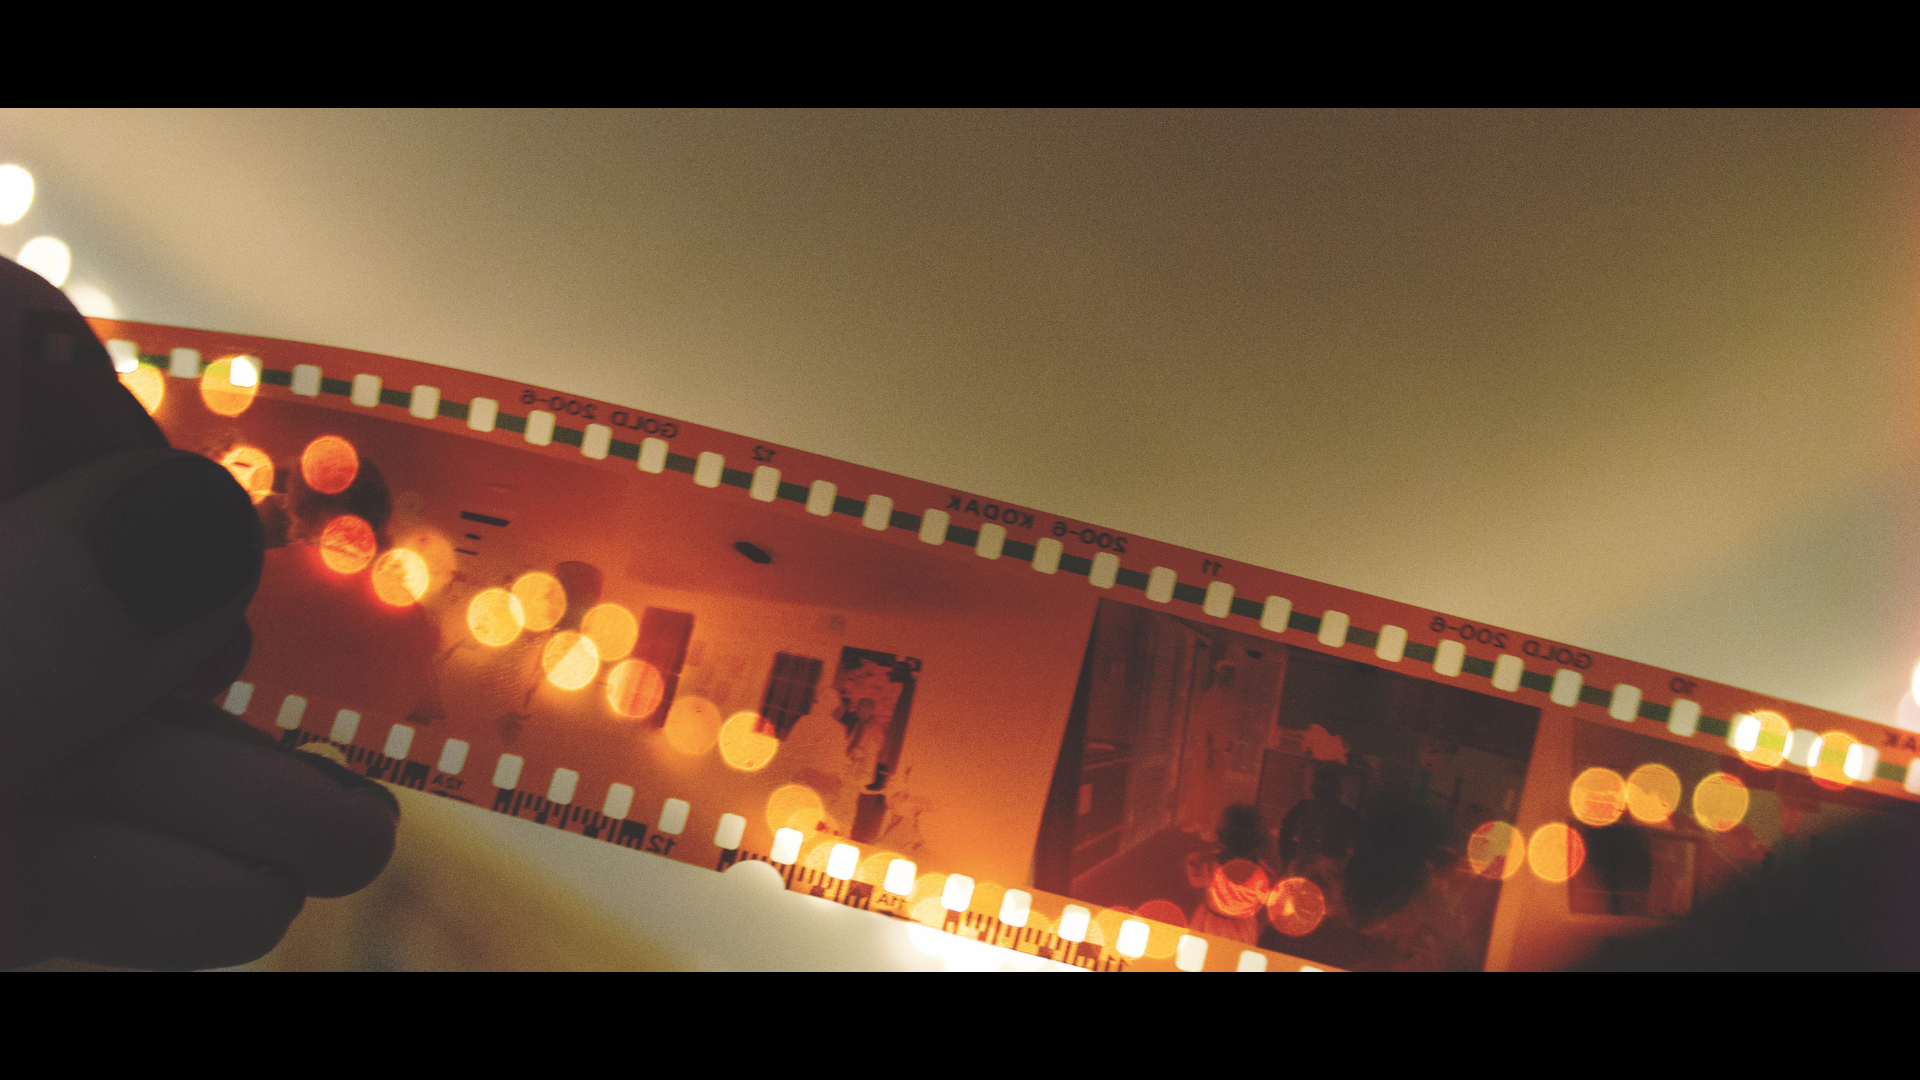
Video producers in modern times consciously began adding them to their videos to impart a cinematic effect to them. These kinds of black bars were called Cinematic black bars. They film videos of dimensions 2.35:1, 2.39:1, or 2.4:1 for 16:9 frames and add black bars to fill up the extra space.
Here are a few examples if you had missed them in the past.
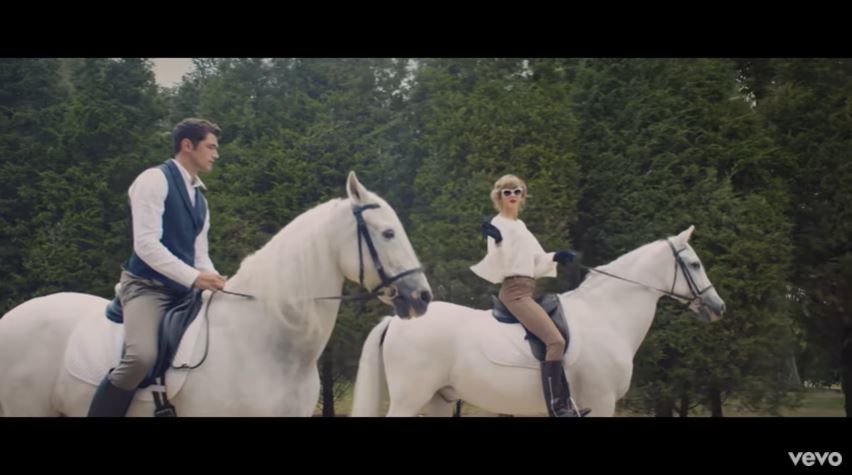
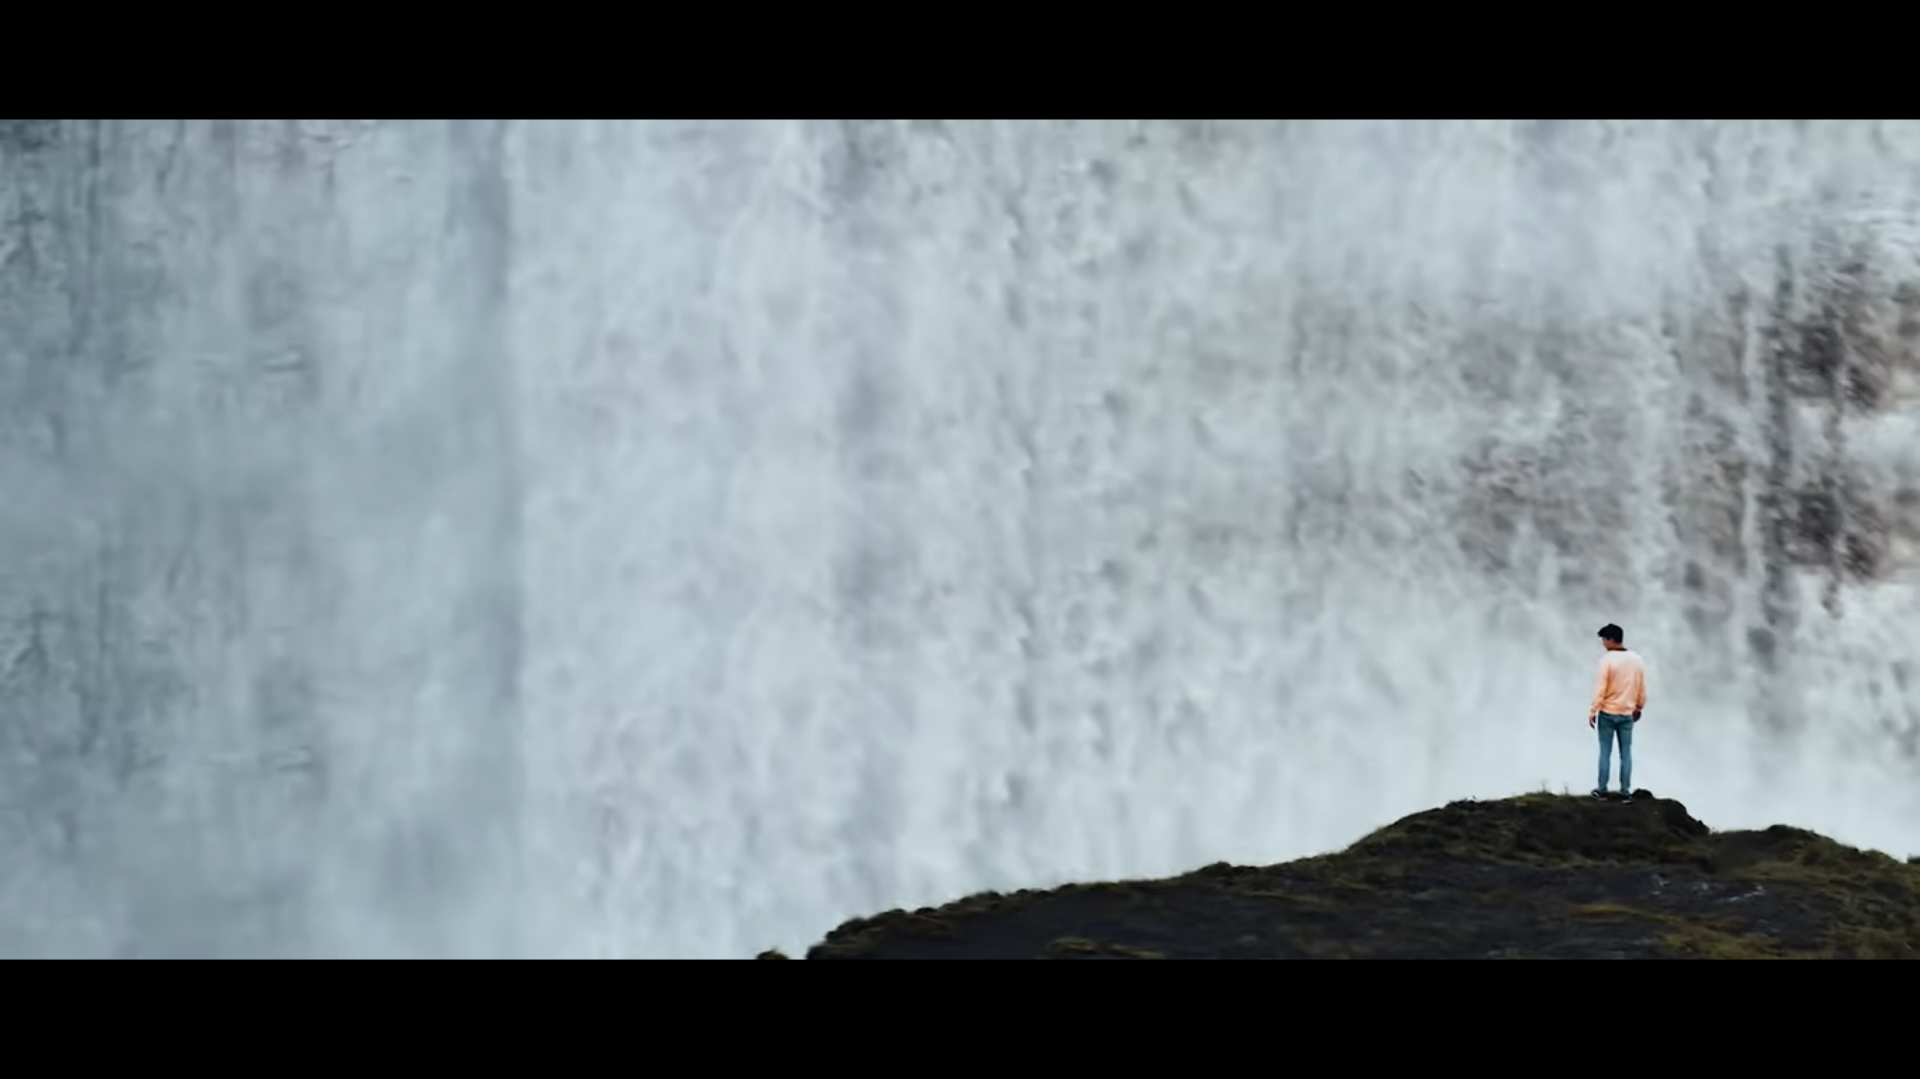
Blank Space, Taylor Swift. Source: YouTube
Taylor Swift’s all-time hit Blank Space music video has black bars at the top and bottom to give a cinematic feel to the video.
2. Black bars make a great canvas for captions, subtitles, and logos
They also can act as a background for closed captions and subtitles for videos. The text against a plain background makes reading a lot more convenient than on the video itself.
Without black bars on your screen, the text might clash with the video content and disrupt the viewing or simply make it hard to read the subtitles or notice a logo.
Not only captions but logos, watermarks can also be placed against the black bars without meddling with the video.
3. Black Bars fix the mismatched aspect ratios of videos and screens
When you shoot a video, keep in mind that screens that stream it may spread over a range of sizes. Your video could be of dimensions 1:1 but phone screens that are used to watch them are never the same ratio.
When viewed in full screen, black bars are necessities at the top and bottom to be able to play the video. This kind is automatically fixed by the screens.
If you have a video of ratio 16:9, but would like to post it on Instagram with a 1:1 ratio, it could be easily carried out after adding black bars.
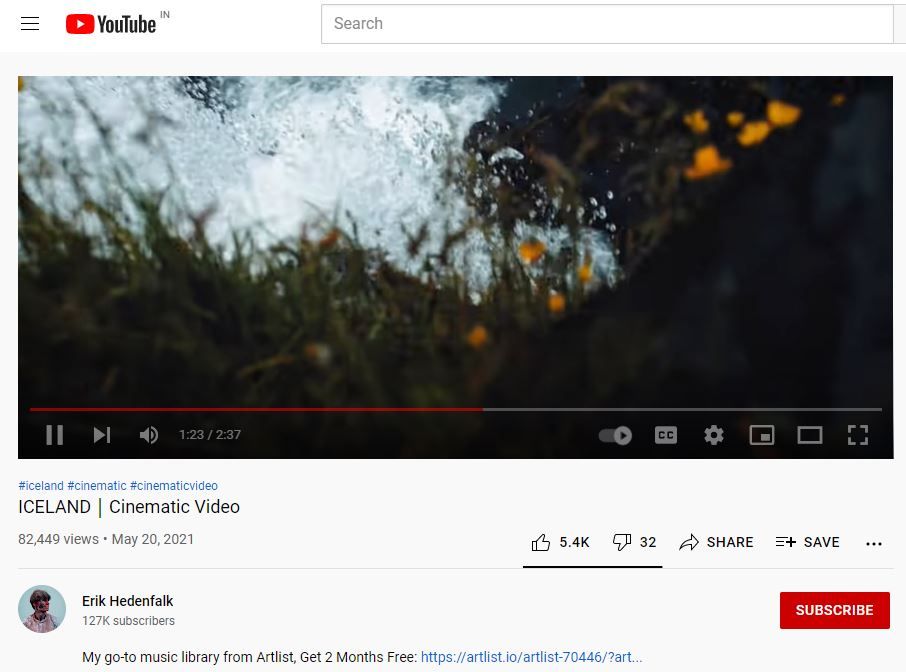
The video played in default video without black bars. Source: Erik Hedanfalk, YouTube.
Here the video plays in its original aspect ratio when played in the default view. When we play the video in the fullscreen mode, black bars appear automatically to fit the screen as shown below.
The video when played in full-screen mode has black bars.
If you feel all this is getting a little confusing, here’s a guide to aspect ratio to make your life easier.
Cinematic Black Bar Sizes & Ratio
Cinematic (“letterbox”) black bars crop the frame to a wide 2.39:1 ratio — the modern CinemaScope standard (classic film uses 2.35:1). Here are the exact bar heights for a true cinematic frame at common resolutions:
| Video resolution | Target ratio | Bar height (top & bottom) | Visible frame |
|---|---|---|---|
| 1920×1080 (1080p) | 2.39:1 | ~138 px | 1920×804 |
| 1280×720 (720p) | 2.39:1 | ~92 px | 1280×536 |
| 3840×2160 (4K) | 2.39:1 | ~276 px | 3840×1608 |
Prefer the classic film look? Use ~131 px bars on 1080p for 2.35:1. Because Typito’s bars are resizable, you don’t need a fixed-size “black bars PNG” overlay — you can match any ratio exactly.
A Quick Refresher Guide on Video Aspect Ratios
Any content on the Internet falls under one of the aspect ratios generally used. Social media like Instagram, Facebook, YouTube to popular OTT platforms like Netflix use standard dimensions for their content. Let us look closer into them and understand black bars work for them.
Note: Aspect ratio consists of two numbers separated by a colon. The first number stands for the media’s width and the second number denotes the height.
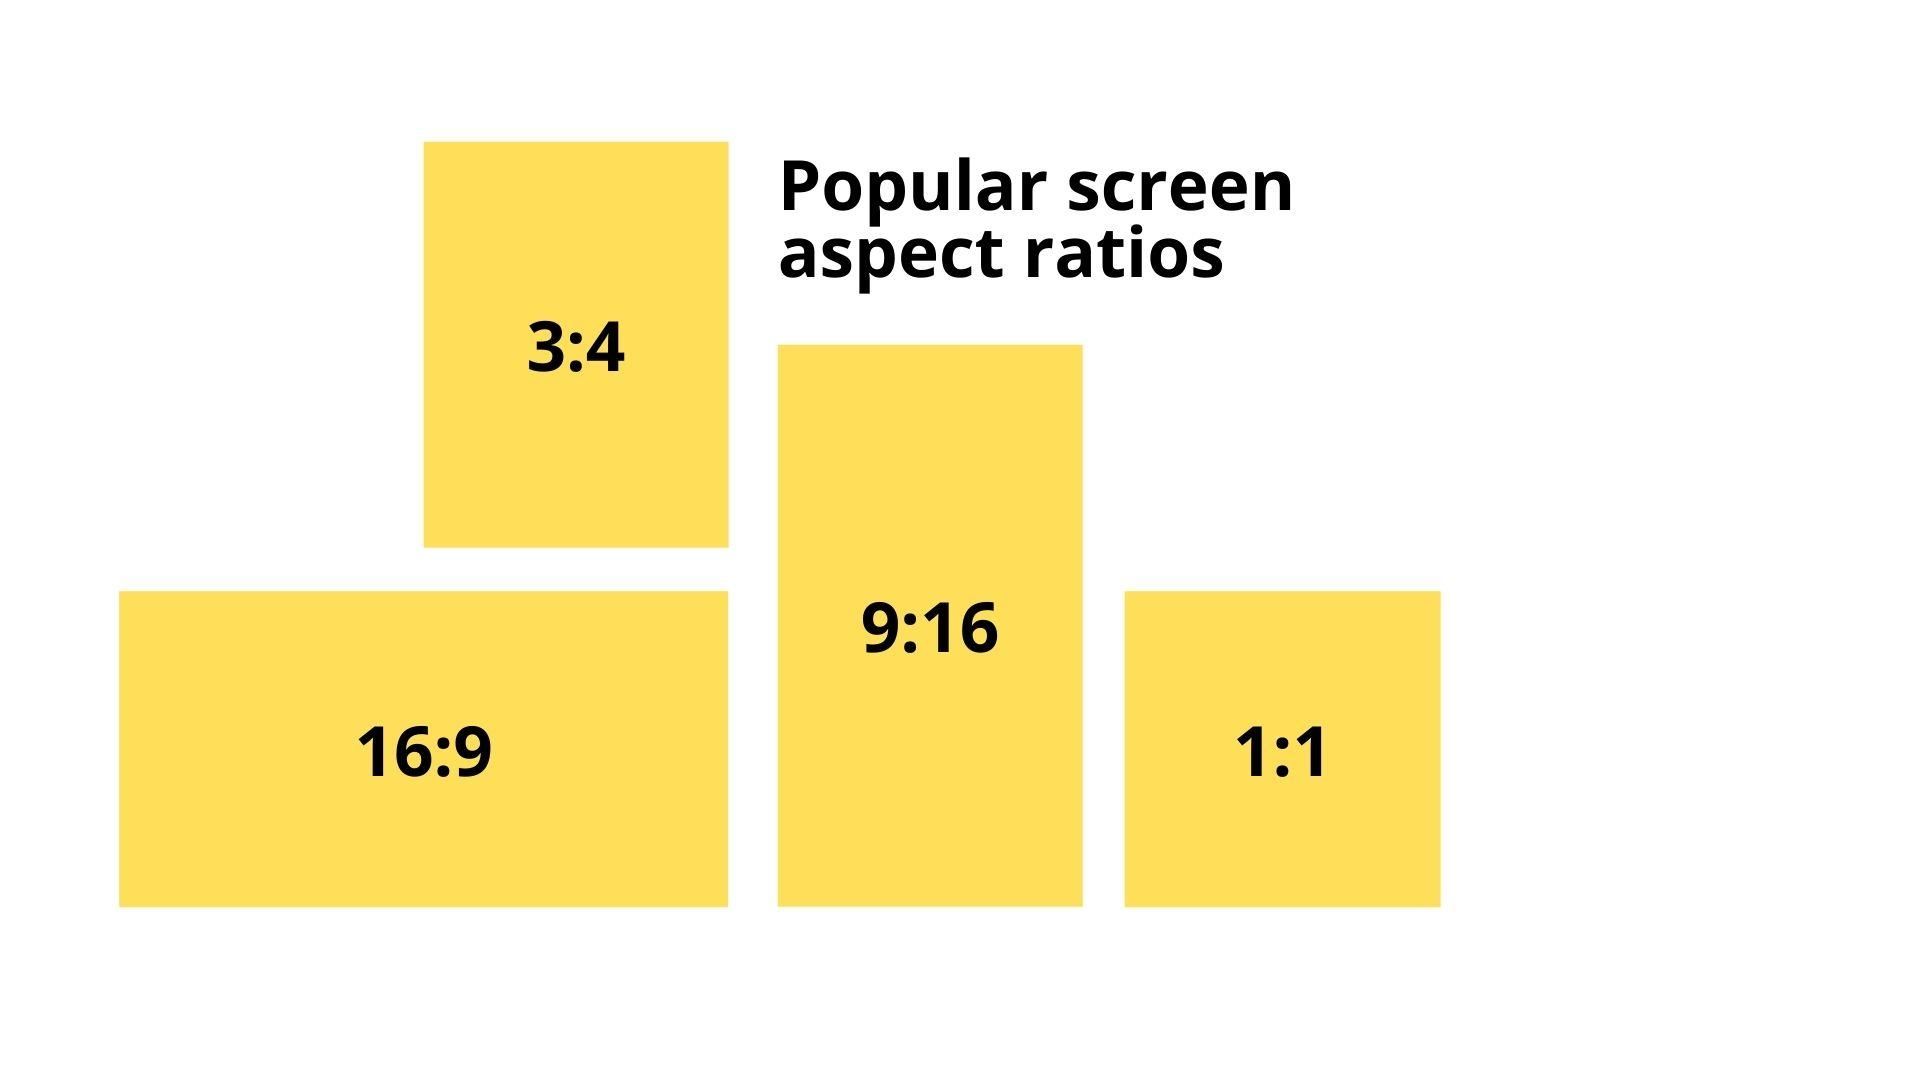
1:1
1:1 ratio or square-shaped media has become very popular in recent years after the advent of social media like Instagram, Pinterest where the layout is generally structured in squares. The pixel count requirement slightly varies with respect to the place where we use the square media. For example, a square post on Instagram requires a media size of 1080x1080 but the profile picture needs only a 320x320 size image.
3:4
This is a widely used format for posters and documents as it is close to the A4 size which, again, is immensely popular. It is a little longer than a square post but not too long to fill up your entire phone screen.
16:9
Widescreen content, to a very large extent, comes in a 16:9 ratio to fit TV, computer, and laptop screens. It also fits the landscape phone screen making phones a comfortable option to watch movies and YouTube, whose videos are mostly in 16:9. Besides video content, social media also uses 16:9 in aspects like uploading a cover picture for your profile. The common pixel size for 16:9 is 1920x1080.
9:16
Social media mainly focuses on this ratio as people generally prefer their phones for using their social accounts. 9:16 covers the vertical full screen of the phone. Instagram stories, reels come in a 9:16 ratio. Its size in pixels is 1080x1920.
Let us see how these frequently used aspect ratios accommodate black bars in them when the media size is different from the frame size.
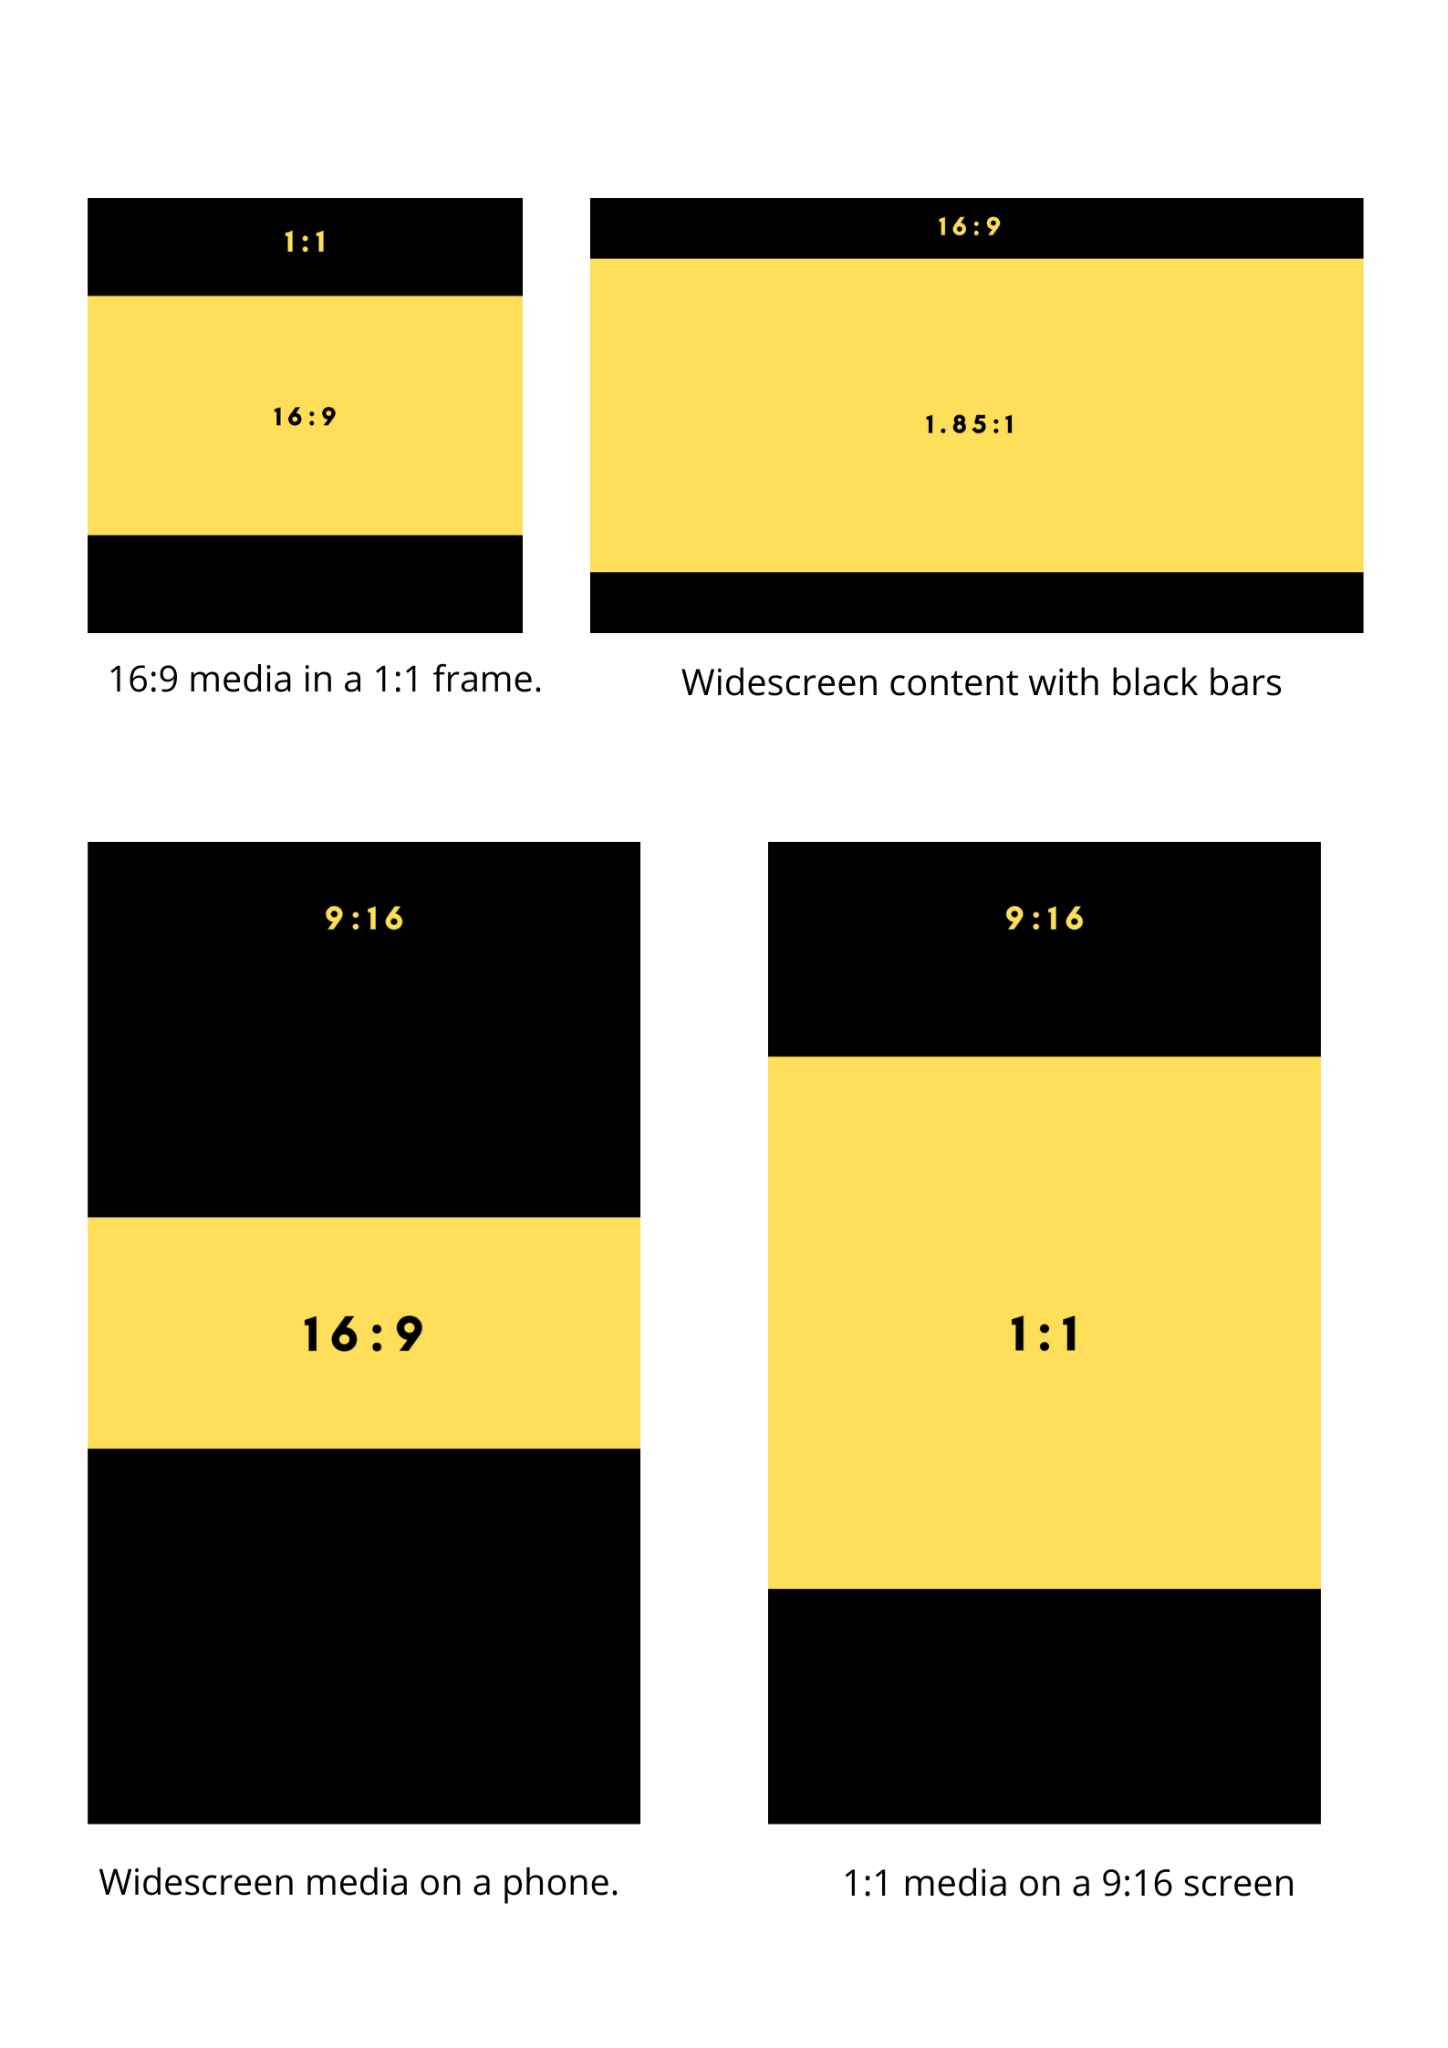
Different types of media in different frames.
Cinematic Black Bars FAQ
What aspect ratio are cinematic black bars? 2.39:1 (modern CinemaScope widescreen). Classic films use 2.35:1.
What size are cinematic black bars on a 1080p video? About 138 px on the top and bottom, leaving a 1920×804 visible frame.
How do I add cinematic black bars for free? Add resizable bars to any video in Typito — no fixed-size PNG overlay needed.
Do black bars reduce video quality? No. They don’t alter your footage — they just letterbox the frame for the cinematic look.
To wrap things up,
If you are rewatching your videos a million times to find what is missing, adding cinematic black bars could be the difference. They influence the minds of the audience and enhance the experience of watching the video by giving it a nice cinematic touch. At the same time, they keep the subtitles away from the videos. It is a win-win situation, for sure! Head to Typito to add or remove black bars in seconds right now.
Video Marketing is a powerful tool and continues to grow. Typito can help you make professional-grade videos without the hassle of complex video editing. Want to experience smooth and simple video editing? Head over to Typito.