You got a brilliant theme or topic for the next YouTube video and you got a winning script for the video ready. You shot the video clips with your high resolution video recording device (smartphone / DSLR / GoPro, doesn't matter! They all do a great job today.) It was a hectic day and you totally deserve a beer for wrapping up half the job.
'Wait, hold on! Did you just say half the job? After so much of effort put into ideating, scripting and shooting my next winner video? That's mean!'
Welcome to the tough world. Ask any YouTube creator and they'll talk about the post-production nightmare. Nightouts of caffeine to take you through the ordeal of editing, adding captions, lower thirds, stitching the right music and finally publishing the video on YouTube with the right title and metadata. While post-production takes a lot of time, it also ends up getting costly. For most YouTube creators like Olga Kay, post production and editing costs around 25% of the revenue. While it's manageable for YouTube creators like Kay with around a million subscribers and more, it wouldn't pan out well for many upcoming YouTube creators with steady content and 25000+ subscriber count. Hence it's important to trim down costs on post-production and create videos that cross the decent quality barrier for your channel.
We would look at this problem using the lean YouTuber approach - what are the tools that a YouTube creator should use to minimise costs and maximise benefits. Here's our recommended list of things you should do to wrap up your post-production within 3 hours using free tools:

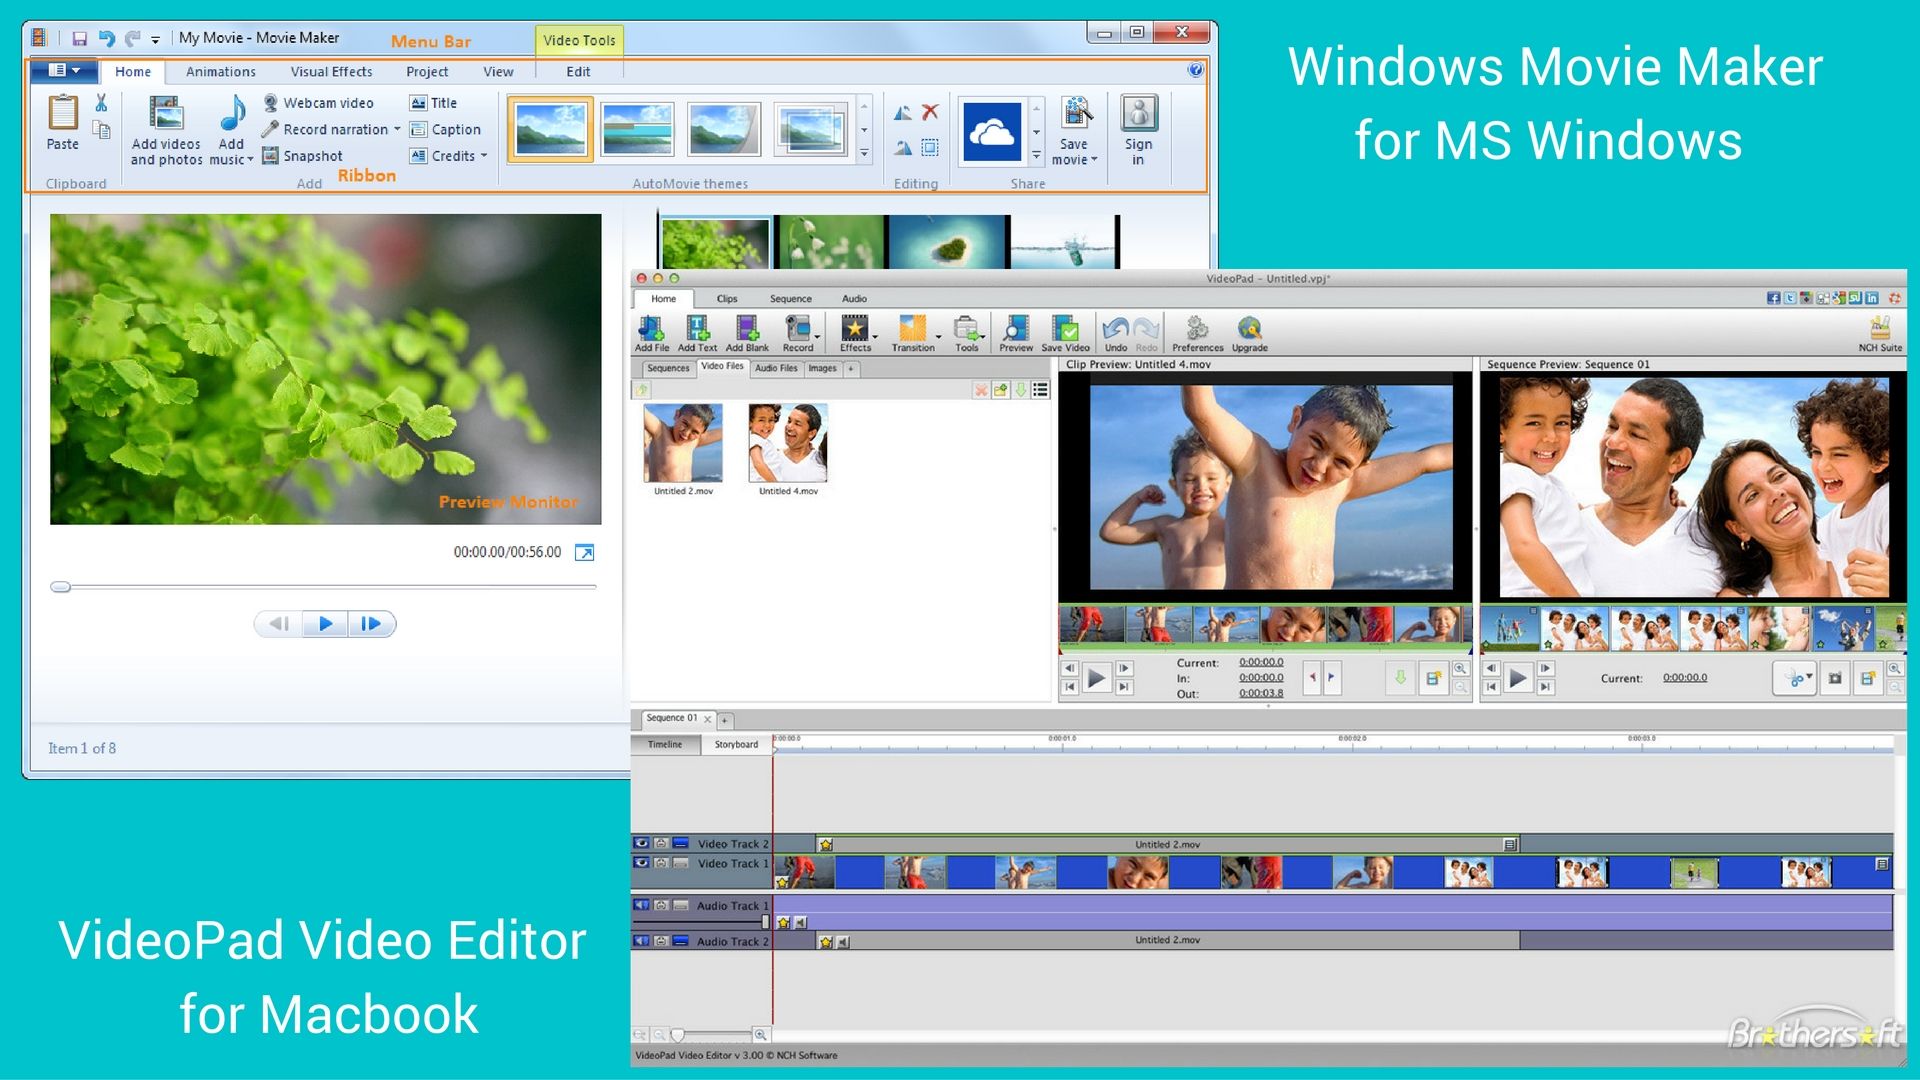
1. Edit your Videos, Add Music [Offline] - Windows Movie Maker, VideoPad Video Editor Free (Mac)
Sort out your recordings, cut out the part you don't need and stitch them together to create a video canvas of favourable duration (260 seconds is the average YouTube video duration, but your requirements can vary.) Once you are done with the basic video canvas, it's time to add music. You can check out YouTube's free audio library and download a audio track that goes well with the video. Use the editor to stitch it with the video and you are 33.3% done! VideoPad editor works great for Macbook users. You can find some good beginner's guide to get started here. Windows users can resort to the legendary home movie creator software Windows Movie Maker.

Windows Movie Maker and VideoPad Video Editors can help you stitch videos and music with ease.
This should take you 60 - 120 mins based on the complexity of editing and duration of videos. And you can do it all FREE.
2. Add Text and Graphics [Online] - Typito
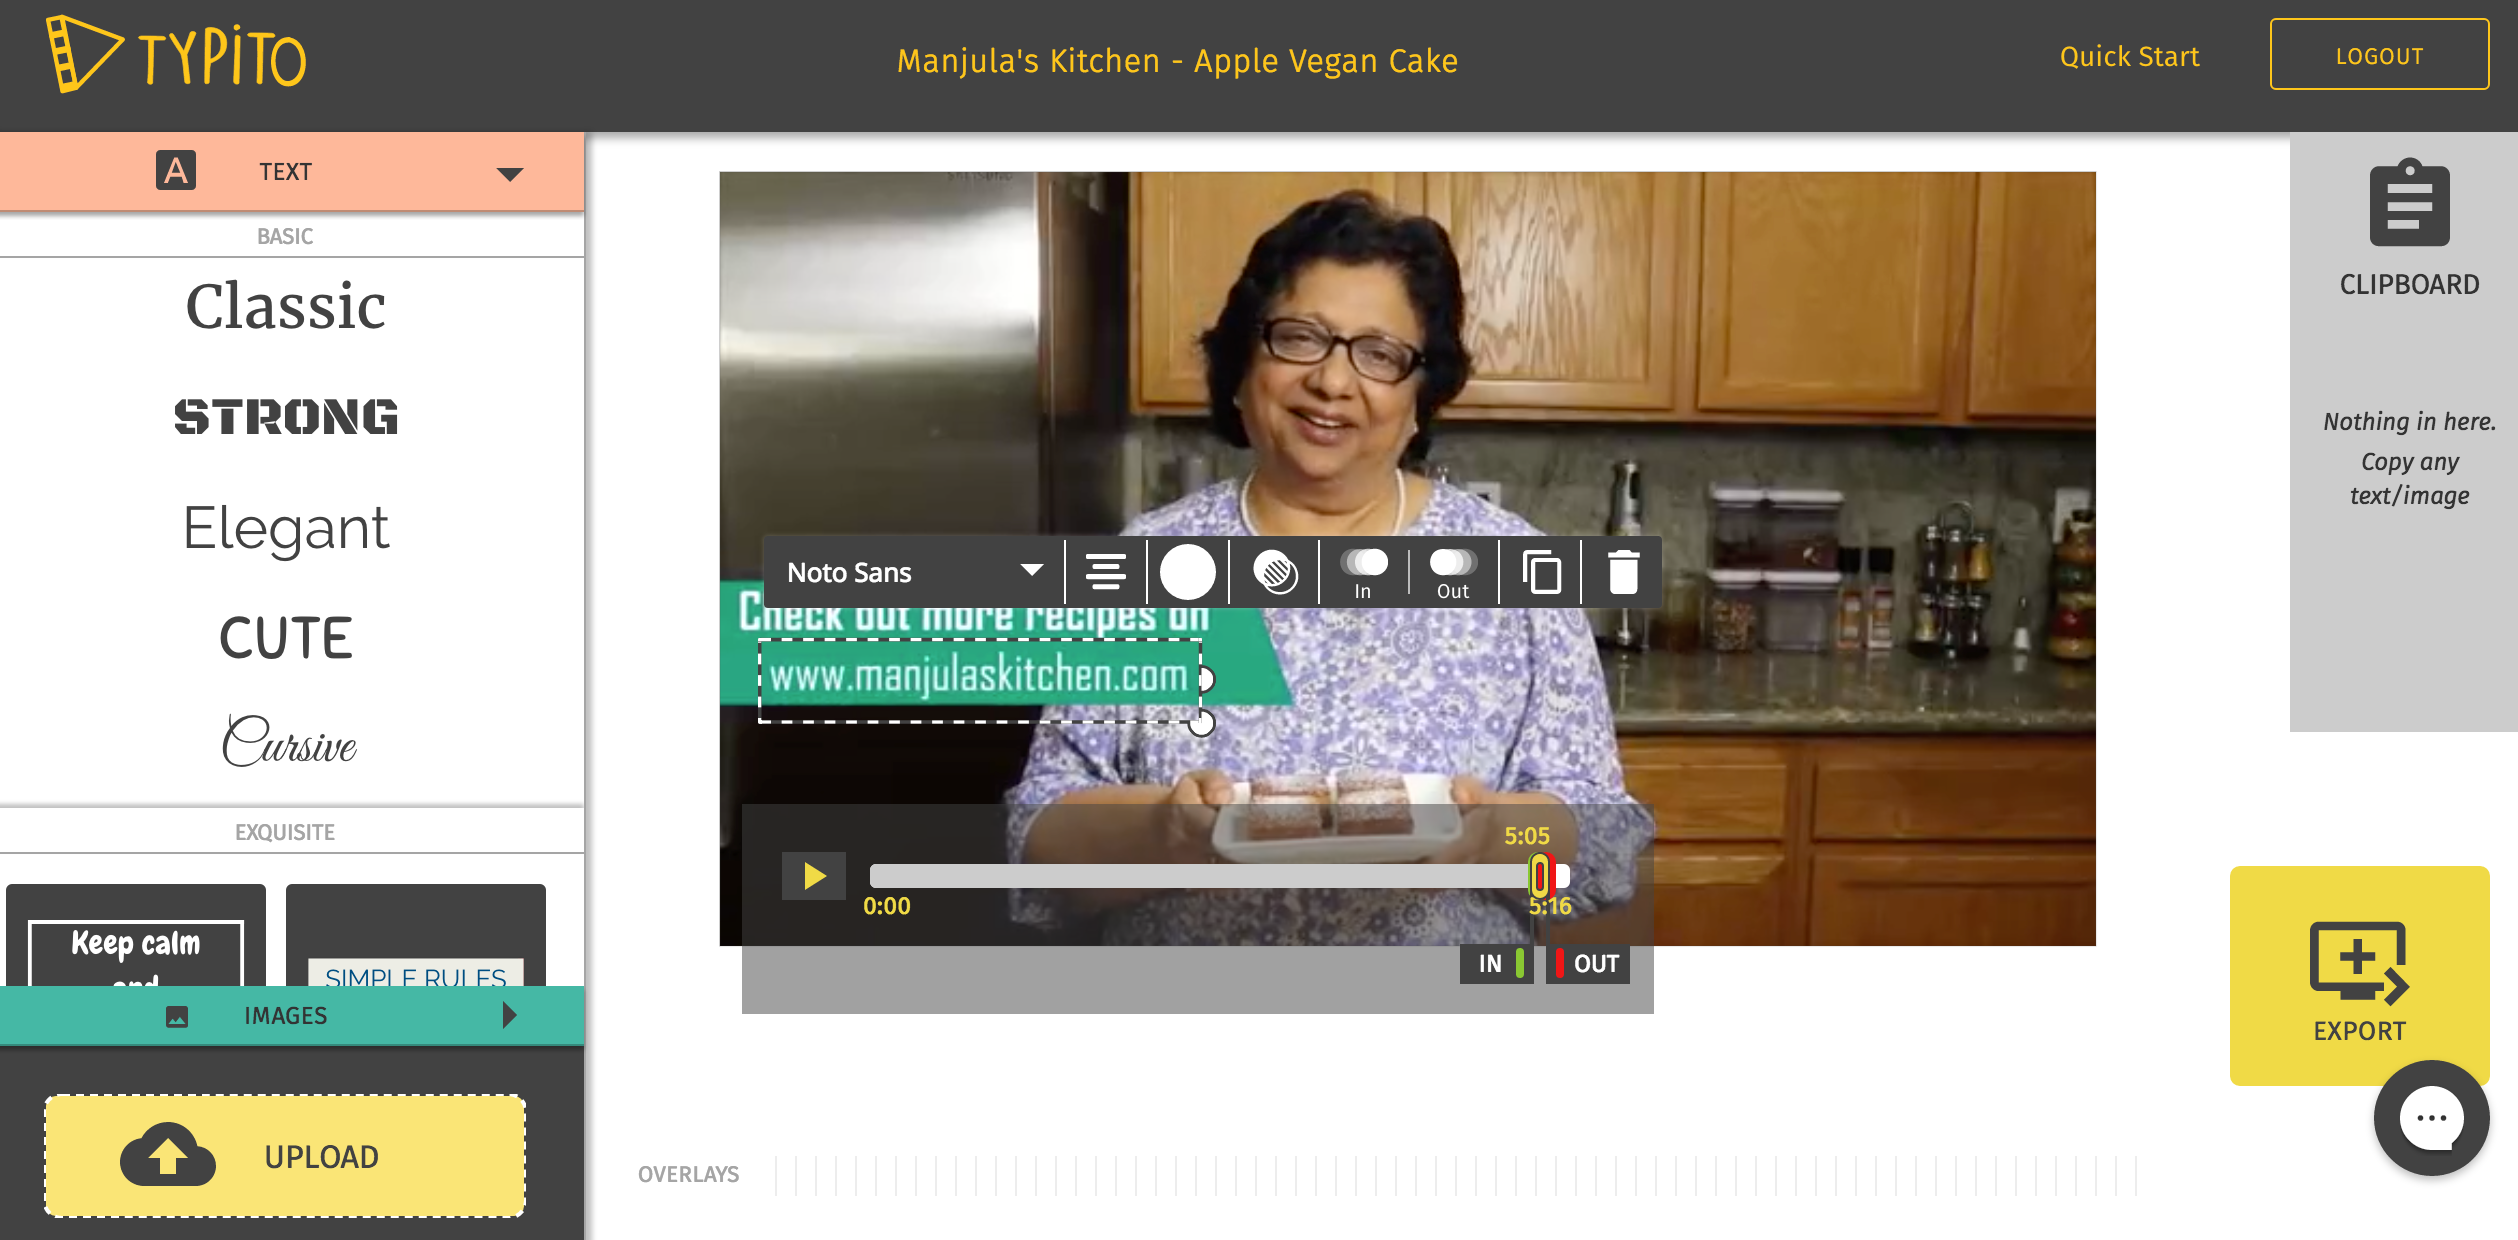
Most YouTube videos would need a text treatment to ensure you drive home the content perfectly. For audience to retain the content well, it's important to use lower thirds and other text/typography formats which would improve content retention and engagement for your subscribers. Typito is a free tool that's built precisely for this - overlay your videos with the right motion graphics, icons, images and text. Once the overlay graphics is done, you can upload the HD video directly on YouTube via Typito thereby reducing the overhead of repeated downloads/uploads.

Typito lets you add text and other motion graphics on the video easily.
Note - You can save a lot of time by preparing a rough script of what text to add at what time of the video before actually adding text and graphics using Typito. Here's a sample script used by Manjula's Kitchen for adding graphics and text on her Apple Vegan Cake YouTube video.
This should take you 30 - 60 mins based on the duration of the video.
3. Don't forget to add Closed Captioning [Online] - YouTube Editor
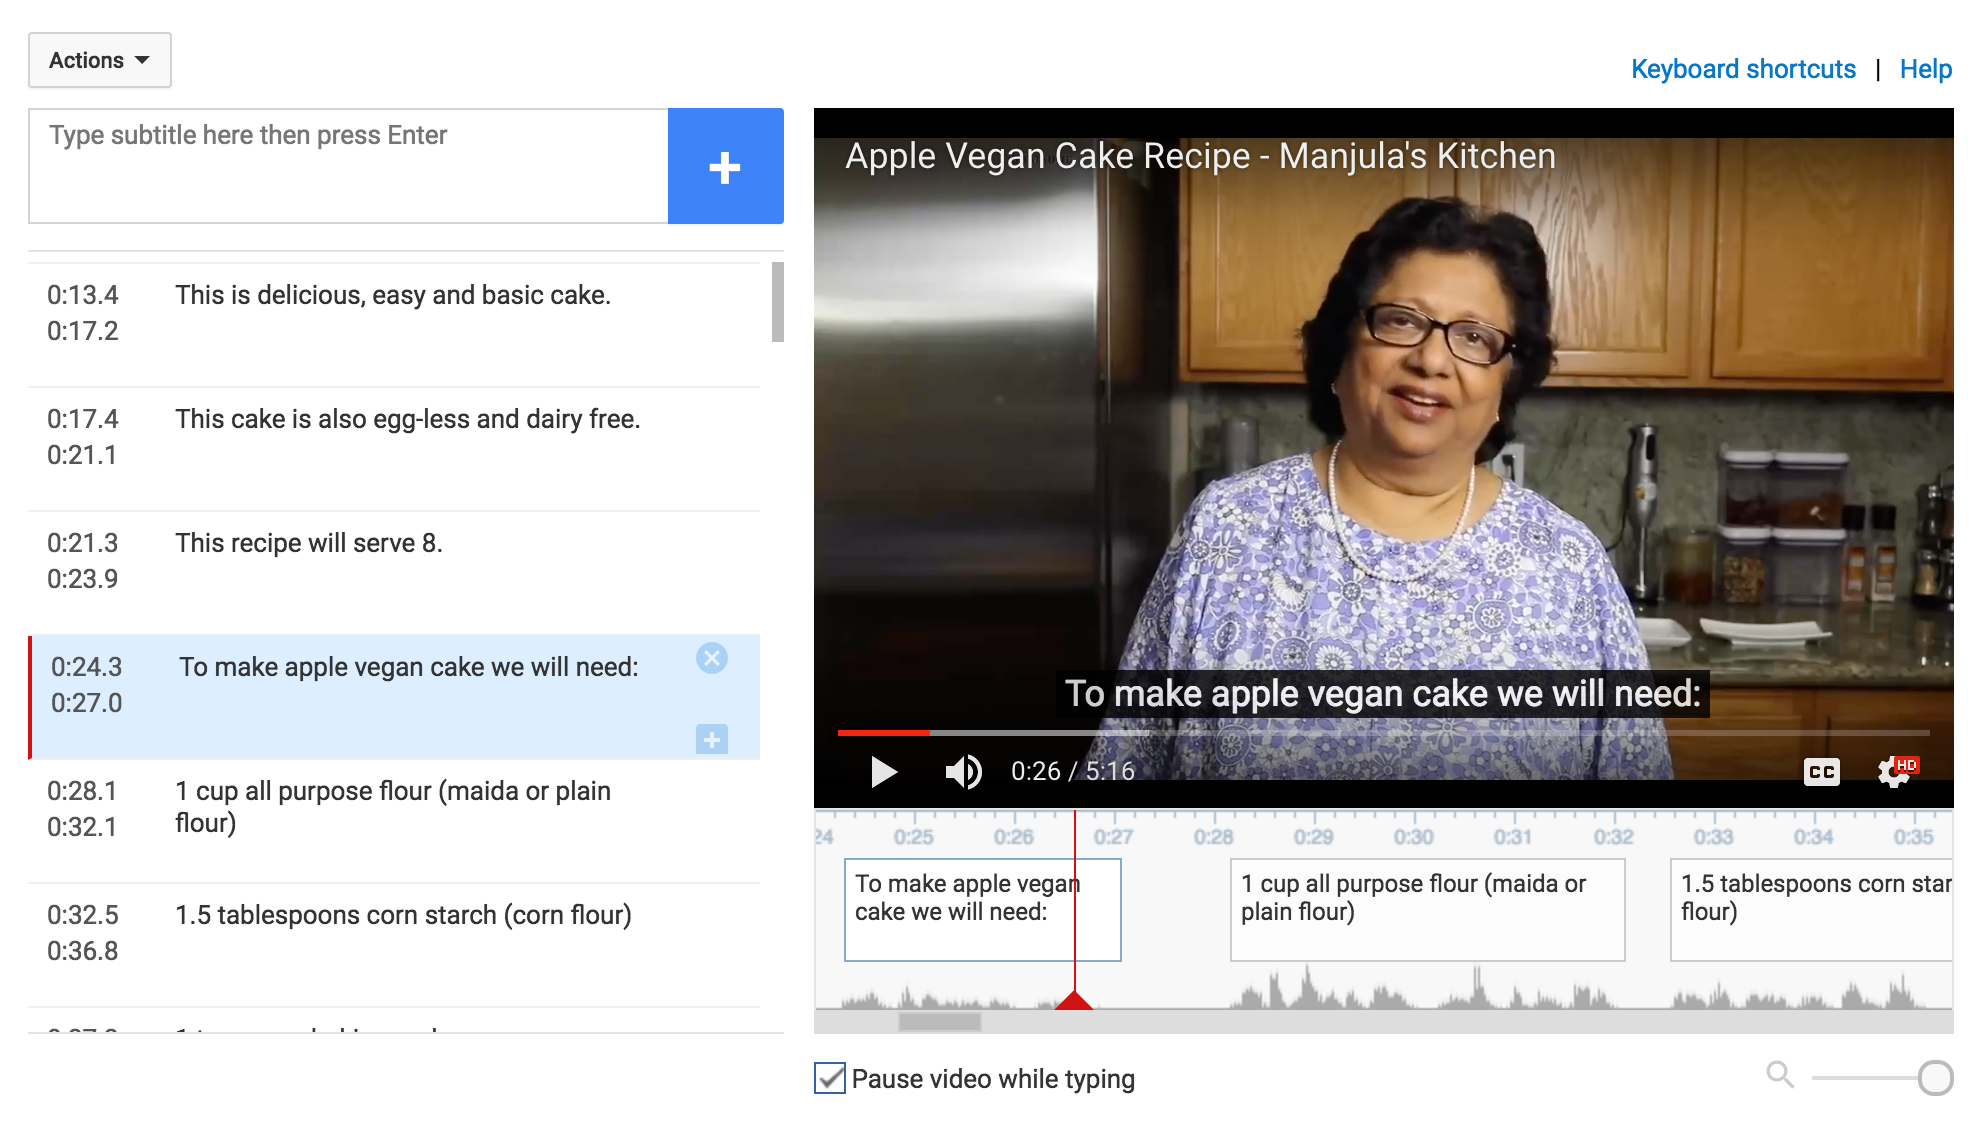
Closed captioning is super important for your videos since they help with 2 things: a. Helps your audience get what you are saying better. b. SEO, it's a lot of text that could help pop your video up there on Google search. SEO, which stands for search engine optimization, is something that can help you become more visible online. There are many a SEO Company out there and with the ever increasing demand they aren't hard to find; there are also many tools that can help you improve your SEO, closed captioning is only one element. If you decide to implement other SEO tactics, you can always monitor your progress on sites like SEMRush. To learn more about SEMRush, this site can be quite helpful, https://www.matthewwoodward.co.uk/seo/reviews/semrush/. Anyhow, back to the captioning. Even though Youtube offers to give your auto-generated sub-titles, they don't work well in many cases, especially for folks with non-US English accents. But no worries! You can either do the research yourself and generate good captions or, YouTube gives you one of the best closed captioning tools on the planet. It gives an option to transcribe and sync and works really well.

YouTube CC tool is one of the best if you want to transcribe the text yourself.
This should take you 30 - 60 mins again.
With all the three steps done, your video is ready to get published (made public) on YouTube with 2 hours of quality post-production!
It's not over yet! - YouTube Analytics
If you thought your job is done in 2 hours, you are wrong. Once the video is published, it's important that you spend a daily dose of 10 - 20 mins understanding how your video's doing. And the best free tool to help you with that is YouTube Analytics. YouTube Analytics helps you understand how your audience found your video, how long could you hold their attention and which videos of yours got shared the most. This helps you understand what your audience like and these insights can be used to prepare an awesome content calendar for the upcoming videos. YouTube's Creator Academy has created a kick ass 8 video series to teach you the basics of YouTube analytics. You should check it out! If you think you need to have more insights about how your competitors are doing, who their subscribers are etc, you can check out Vidooly and other platforms that offer you actionable insights based on YouTube data.
A hack post should end with a hack again. We've been talking about wrapping up post-production within 2 hours and it always works better with a timer on. I use Timer-Tab to keep check of hourly deadlines online and you should check it out too - add a countdown for each of the 3 steps and you will see magic happening! Let us know how the 120 min free 3-step post-production hack worked out for you. You can share your thoughts below in the comments section.

