How to Merge Videos into One Online in a Few Easy Steps
Whether you’re creating a video for professional use or personal, there’s a high chance you will find yourself looking for a good tool to merge different files together. Combining multiple videos might seem like a tedious task but actually, it isn’t. With the right tools, it could only take you about 5 minutes. That said, we will show you how to merge videos into one online in simple steps.
But before that, here’s a quick definition of video merging.
What is Video Merge?
Video Merge is the process of combining or joining multiple video files into a single video file. The tool or software that does this job should be able to support various video formats with similar frame size, audio rate, or different frame rate.
Whether it’s just two video files or a whole slew of them, Typito lets you combine or merge video clips in a few minutes.
To give you a quick overview, Typito is a user-friendly, drag-and-drop web-based tool that helps you create engaging videos with different video formats, beautiful typography, and images. It’s more like Canva but exclusively for videos!
So, let’s get started.
How to Merge Videos into One Online
With Typito, learning how to combine multiple videos into one online is a no-brainer. The steps are easy to follow and are outlined clearly below.
Step 1: Login and create a new project
- Go to Typito.com and log in to your account. If you haven’t registered yet, just sign up for free.
- Click on the New Project button.
- Next, you will be redirected to choose your video’s aspect ratio. Pick one of the video formats and click Create (pops up when hovered over).
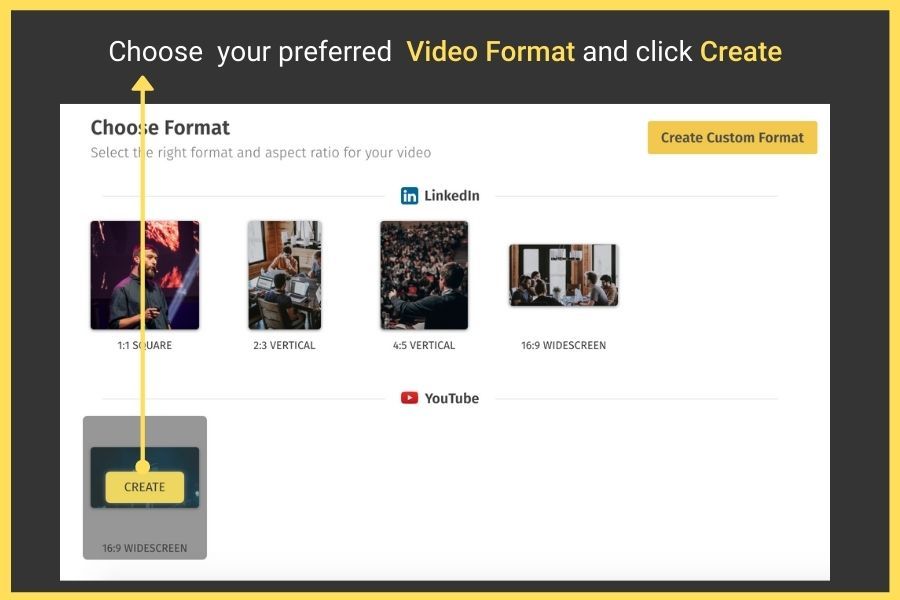
Note: With Typito, you don’t have to research for a video’s aspect ratio or dimensions. The dimensions for popular social media platforms—YouTube, Facebook, Instagram, or any social platform are all prebuilt. If you don’t want to go with any of these platform-based formats, you also have an option to set a custom size for your video.
Step 2: Choose videos from the gallery or upload from your computer
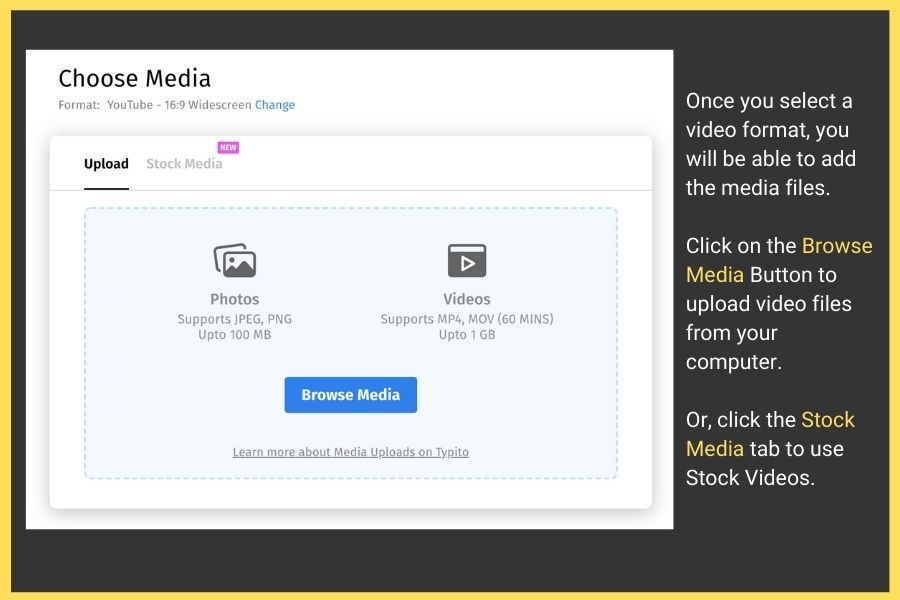
Once you select the video format, Typito gives you two options to add the video files.
- Upload: Allows you to upload videos or images from your computer
- Stock Media: Allows you to choose videos or images from the integrated stock footage library
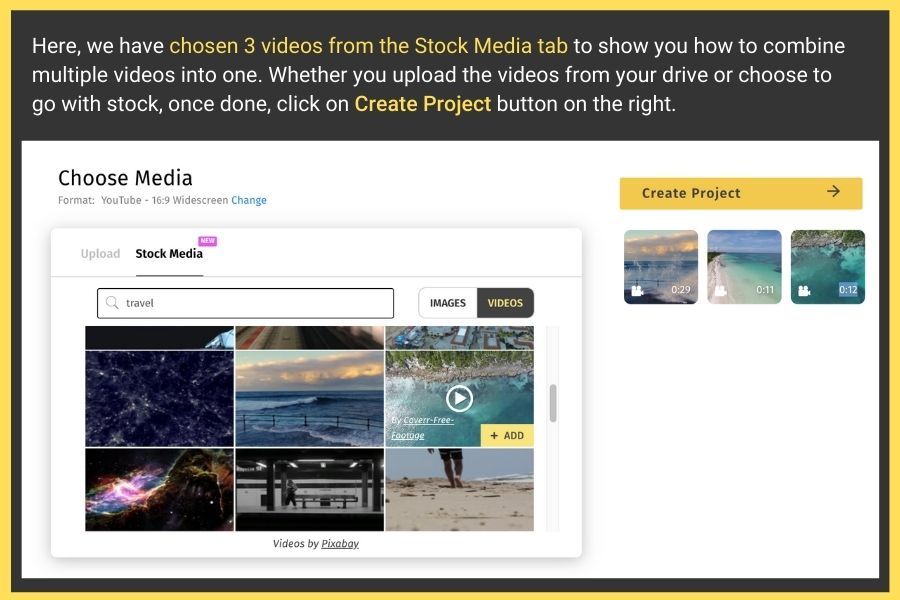
Depending on the size of the videos you upload or choose, the process might take a few seconds or a couple of minutes. Once it’s uploaded, click on the Create Project button.
Step 3: Play around with different features on the merged video
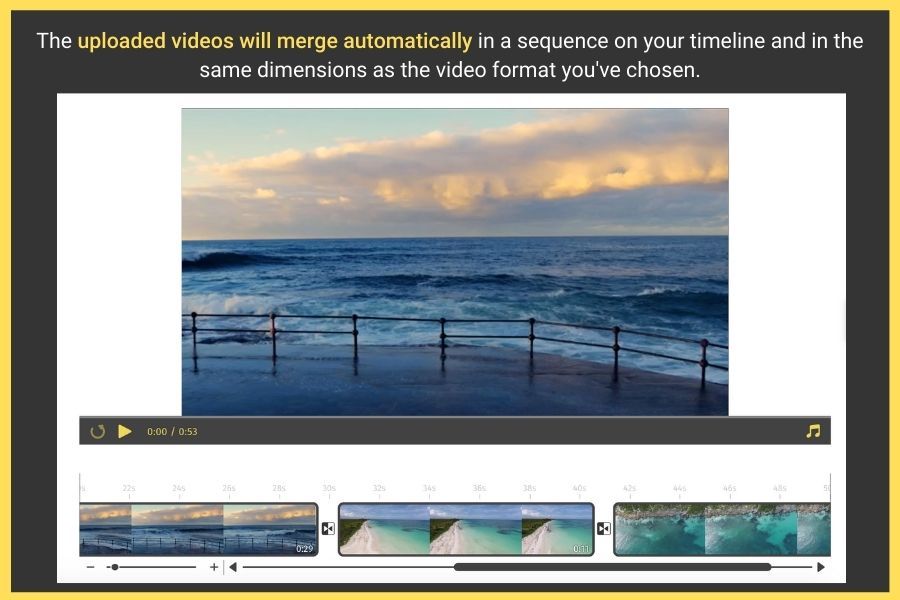
The beauty of Typito is that, once you upload the videos in the sequence you want them to be and click the create project button, they just appear in sequence in the timeline automatically.
You will still be able to move the individual clips around. The dashboard is fully-fledged, with the entire video project on the screen. The uploaded videos will show up one after the other, each split automatically along with the timeline highlighted at the bottom.
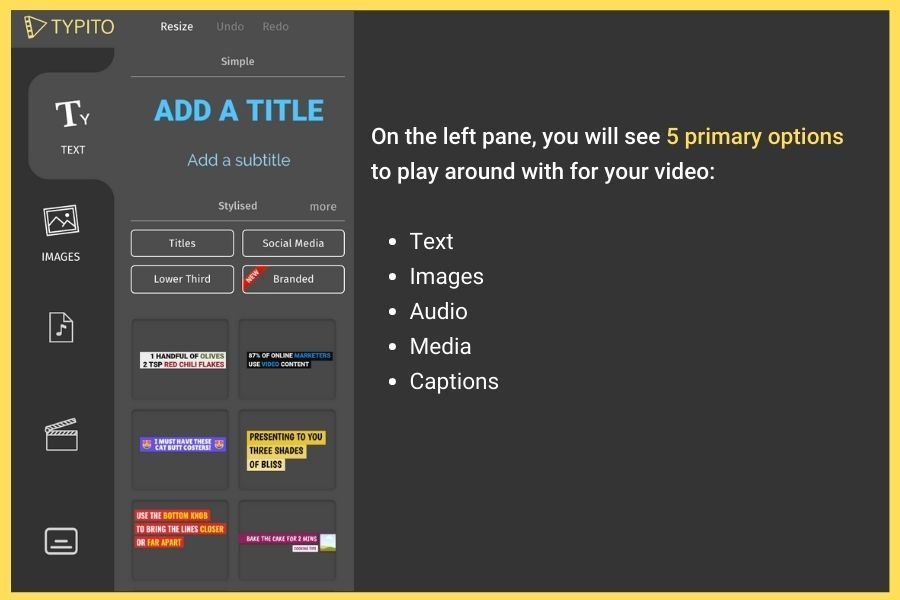
Note: On the left pane, you will see 5 primary options to play around with for the video:
- Text: Gives you a list of built-in animated text templates you can use on your video.
- Images: Lets you upload images, add icons, and shapes.
- Audio: Lets you add music files or upload one from a music library.
- Media: Displays all the videos or images that are uploaded to the work area. You can add more videos in case you previously missed any.
- Captions: Includes a list of built-in templates to help you add captions to your video.
Note: If you don’t have anything to tweak or edit on the merged video, all you have to do is “export” (see step 5). However, if you want to split or want to zoom a specific portion of the video (perhaps, on a particular timing), check step 4.
Step 4: Split or focus any portion of the video
Besides helping you to merge multiple videos into one automatically, Typito lets you do a couple of other things too, which include Split, Zoom In, and Delete.
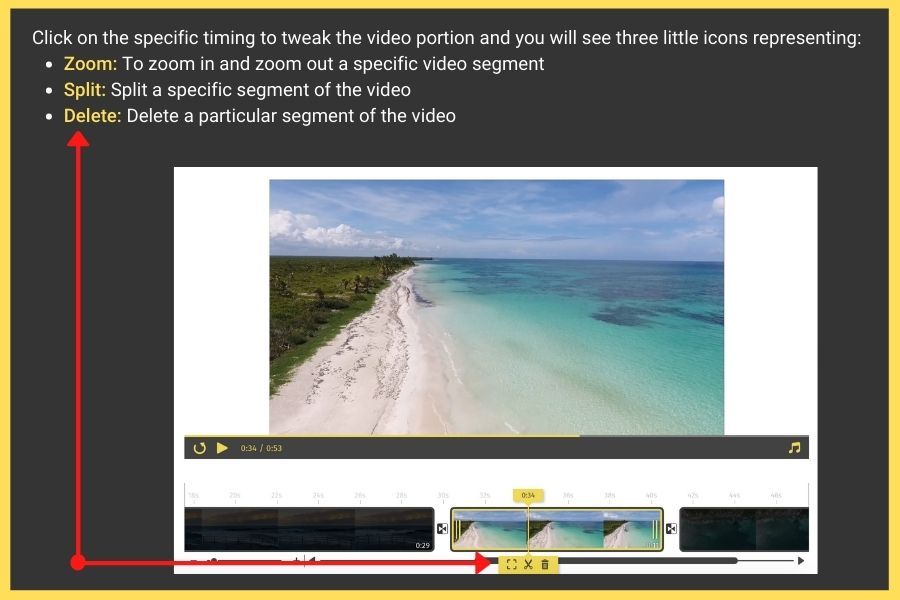
Use the video timeline to choose a specific point in the video clip. Just click on the specific timing where you wish to tweak the video portion and you will see three little icons indicating:
- Zoom In: Lets you zoom in and zoom out a specific video clip to crop a video.
- Split: Lets you split a specific part of the video into separate clips.
- Delete: Lets you delete a selected video clip.

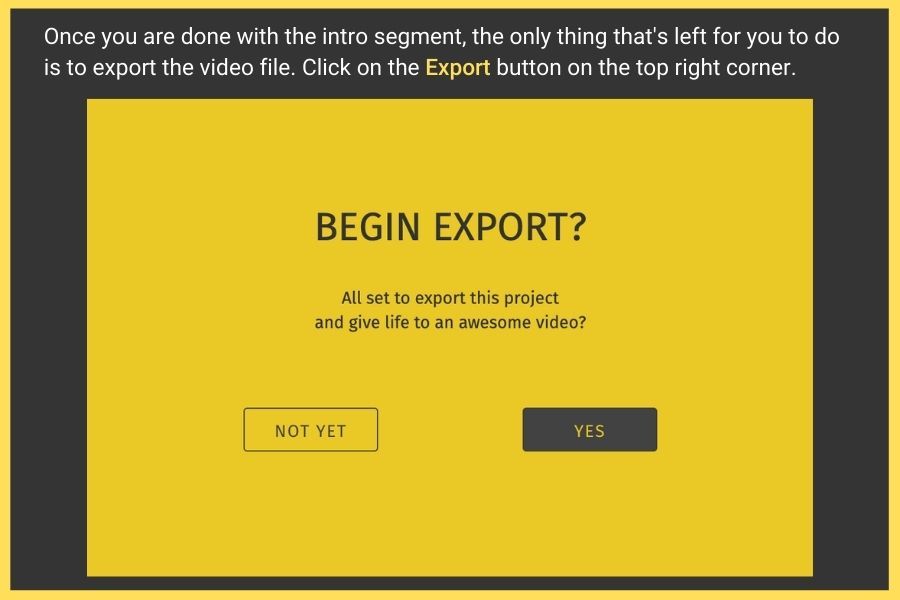
Step 5: Export your merged video
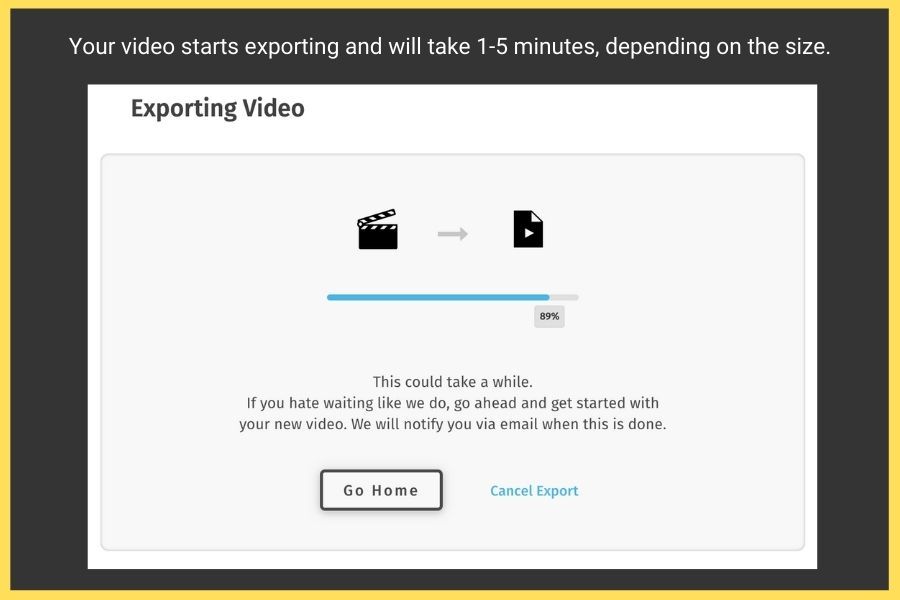
After you have made a few edits and merged all your videos into one, it’s time to export it. Just click on the Export button at the top right corner.
Based on the entire video size, the export process will take from a few seconds to minutes.
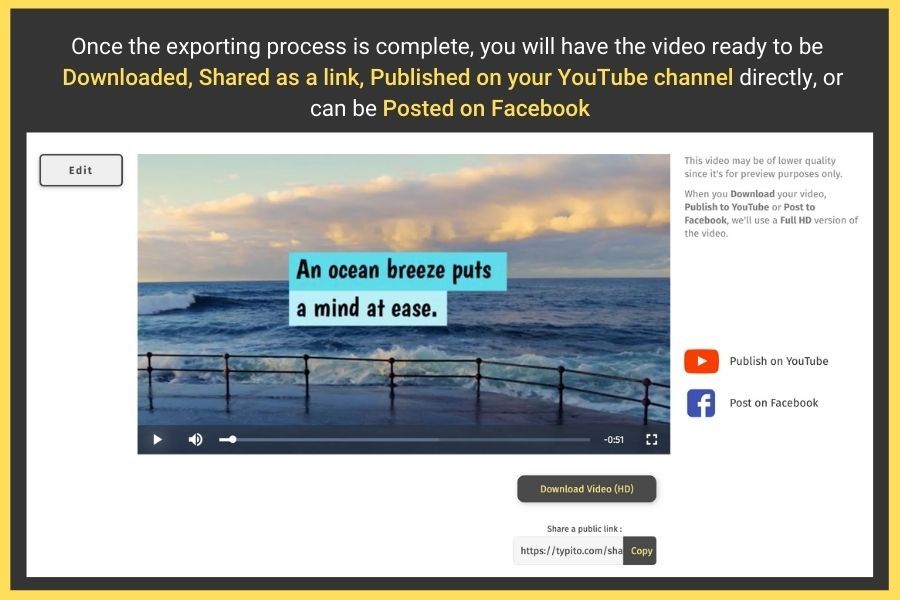
Once the export process is complete, your video is ready to be:
- Shared as a link publicly
- Downloaded and saved on your computer
- Published on your YouTube channel
- Published on Facebook
Typito enables you to do a lot of things when it comes to designing videos. From creating videos for different social media platforms to optimizing and beautifying them, Typito lets you design videos at breakneck speed!
Tips to Add Transitions Between Video Clips
Nearly every video created today—whether a two-minute ad commercial or a big-budget production—is generally composed of multiple individual shots merged and edited together to make the final outcome.
There are exceptions though. For instance, music videos. They are often shot in a single and continuous long take. But most of the time, video editors find several ways to join one shot to the other in a way to move the story forward and guide the viewers from one scene to the next. Transitions and cuts help achieve this.
Note: Video transitions are crucial for any size or type of videos. From merging two stories, to building a mood for higher engagement, to spicing up the storyboard, video transitions progress the video story smoothly, add profundity to the storyline, and provide better clarity to the viewers.
While it can be enticing to use multiple transition effects on a video, remember, “less is more.” Here are a couple of important tips to ensure that you use video transitions wisely.
- Maintain consistency with transitions: Too many cooks spoil the broth and that’s exactly what happens when you try to use multiple transition effects for the scenes. So ensure that you’re consistent throughout the video or else it might just look like amateur work.
- Keep the transitions subtle: Unless you are going for a particular effect, it is best to apply transitions sparingly. Transitions are used only when they serve the purpose of storytelling.
- Understand the meaning of every transition type: You can have fun using different transition styles but also understand what each transition symbolizes so that you use it appropriately.
For any video creator, the transition is a precious feature, as it helps with these three factors:
- Move the story from one scene to the other
- Convey the tone or mood to the viewers
- Set the stage for the upcoming scenes
Every transition has a meaning, so it must be utilized thoughtfully and always serve the storyline.
Types of Transitions to Use in a Video
Here’s a quick overview of various transitions styles of effects you can apply on a video:
1. Fade in or out
“Fade” is applied when you want the scene to gradually turn to one color—which is either white or black. While fade-ins are applied at the beginning of a scene or film, fade-outs occur in the end.
- The most common type is the “fade to black” transition, which is quite dramatic and often signifies either completion or an elapse. It is used when you want to move an emotional or dramatic scene to another scene.
- On the other hand, the “fading to white” transition is used for creating a sense of hope or ambiguity.
2. Dissolve or Crossfade
A “dissolve” effect overlaps two scenes or shots, helping you to gradually transition from one to the next. The “dissolve” transition helps show the viewers that two scenes or narratives are linked. It is generally used in the “end of a scene” or in the “beginning of the next scene.”
- You can use crossfade to show time passing by or to shift from one location to the other. Video editors also use “quick dissolves” to show the scenes that occur after a few minutes or hours. A long dissolve, on the other hand, may symbolize an extended duration of either months or years between two scenes.
- One of the advanced forms of “dissolve” is called “match dissolve,” a transition effect where similarly-shaped objects will dissolve to the other. For example, a soccer ball slowly fading to a moon but ensuring that they both match in terms of position and size on the screen.
3. Wipe
Wipe is a transition effect that’s used when a scene moves from one side of the frame to another, replacing the preceding scene. While “fade” denotes completion, “wipe” shows that an action is not resolved.
- Wipe effects can help you show the transition between the storylines (especially the ones that take place in various locations) with ease.
- Wipe transitions also help in establishing a conflict or tension. A good example of “wipes” transition is the original Star Wars trilogy.
4. Whip Pan
Whip pan transitions are used when the camera swiftly pans to create a nice, blur effect between two scenes. Though it is similar to wipe, it’s much faster. This type of transition is used during comedic effects or to convey a fast-paced action. Whip pan transitions can generate additional energy in a scene, serving the simple purpose of building momentum for a story.
- Whip pan (or swish pan) moves rapid enough to blur the imagery and can transition through space and time. It has the ability to simulate fast-moving objects smoothly.
- Though whip pan shots rely on the overall effects of directionality and blurred movements, comprehending the desired results will help you create the right whip pan transitions for your video.
Note: Typito lets you create incredible videos with transition effects like fade in/out and dissolve/crossfades in seconds. Be it a vertical ad banner, a small display ad for a website, or a larger-than-life billboard ad, video transitions are absolutely free to use in Typito. If you are eager to create transitions between two clips in minutes, then click here.
Importance of Editing Your Video
There are multiple factors that go into creating a perfect video. From owning a great camera to having an excellent script, to adding music, background effects, and directing, there are multiple aspects that help in making a video successful.
One of the most crucial processes where everything comes together in forming a coherent story is certainly during the process of “editing.”
Video editing is more of an art form, as it requires attention to details. When combining technical skills with craftsmanship and creativity, the choices that an editor makes can leave a huge impact on the:
- The overall tonality of the video
- Emotions that the creators wish to evoke
- Timing and rhythm of the video
- Transformation of the cohesive product
Editing is where the footage that you shoot is crafted into a nice story. Revisit the script and understand what you’re trying to convey with your video.
Editing helps you to trim the information into a precise message. Now, this could be done by chopping off a few clips or merging clips of that footage in between.
Here are 3 key reasons video editing is one of the most important phases:
1. Helps you review your audio and footage
The process of video editing lets you look over every little piece that you shot. When you film, you tend to overlook a few shots and that’s understandable from the fact how fast-paced a shoot is.
However, the video editing phase lets you review the content carefully and formulate them in a way to bring them together.
2. Helps your video to be perfect for your audience
Believe it or not, editing is the stage where you can actually make or break the video. Also, this is the stage where all your content comes together in an expressive way and brings disparate clips into a good cohesive story.
Interestingly, there might exist a couple of shots you would have never paid attention to but they actually create magic in the editing room. Also, this is the phase where you make decisions about coloring, transitions, visual effects, etc for your video.
3. Helps you make creative decisions
Well-edited video projects will have a flow and tend to be crisp with greater precision. The decisions that you have made throughout the pre-production and post-production will shine only after it’s been edited to its final form.
Video editing is an extremely time-consuming process and requires attention to detail. But things can get really easy and quick if you have the right tool handy.