Videos are taking over the digital world. The use of subtitles and captions on social media videos makes them pop out, and boost viewer engagement. 80% of U.S. consumers are more likely to watch an entire video when captions are available.
Instapage also found that captioned videos on Facebook had 16% higher reach than those without. And CTA clicks generally fell by 26% when captions were removed. But the truth is that the process of transcribing all that speech in the video to text subtitles is time-consuming and often, very frustrating.
Not anymore.
We could go on and on with more numbers like that, but it’s better to show you how to autogenerate subtitles for your video using Typito.
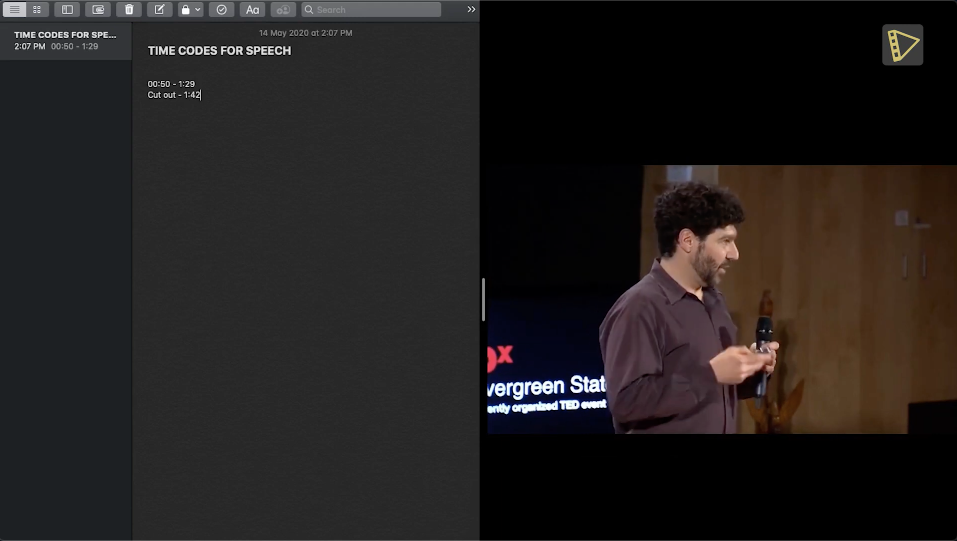
First things first - Source the video. Then go through the video and note down the time-codes of parts you want to cut out. This ensures that the video is concise and easier to follow.
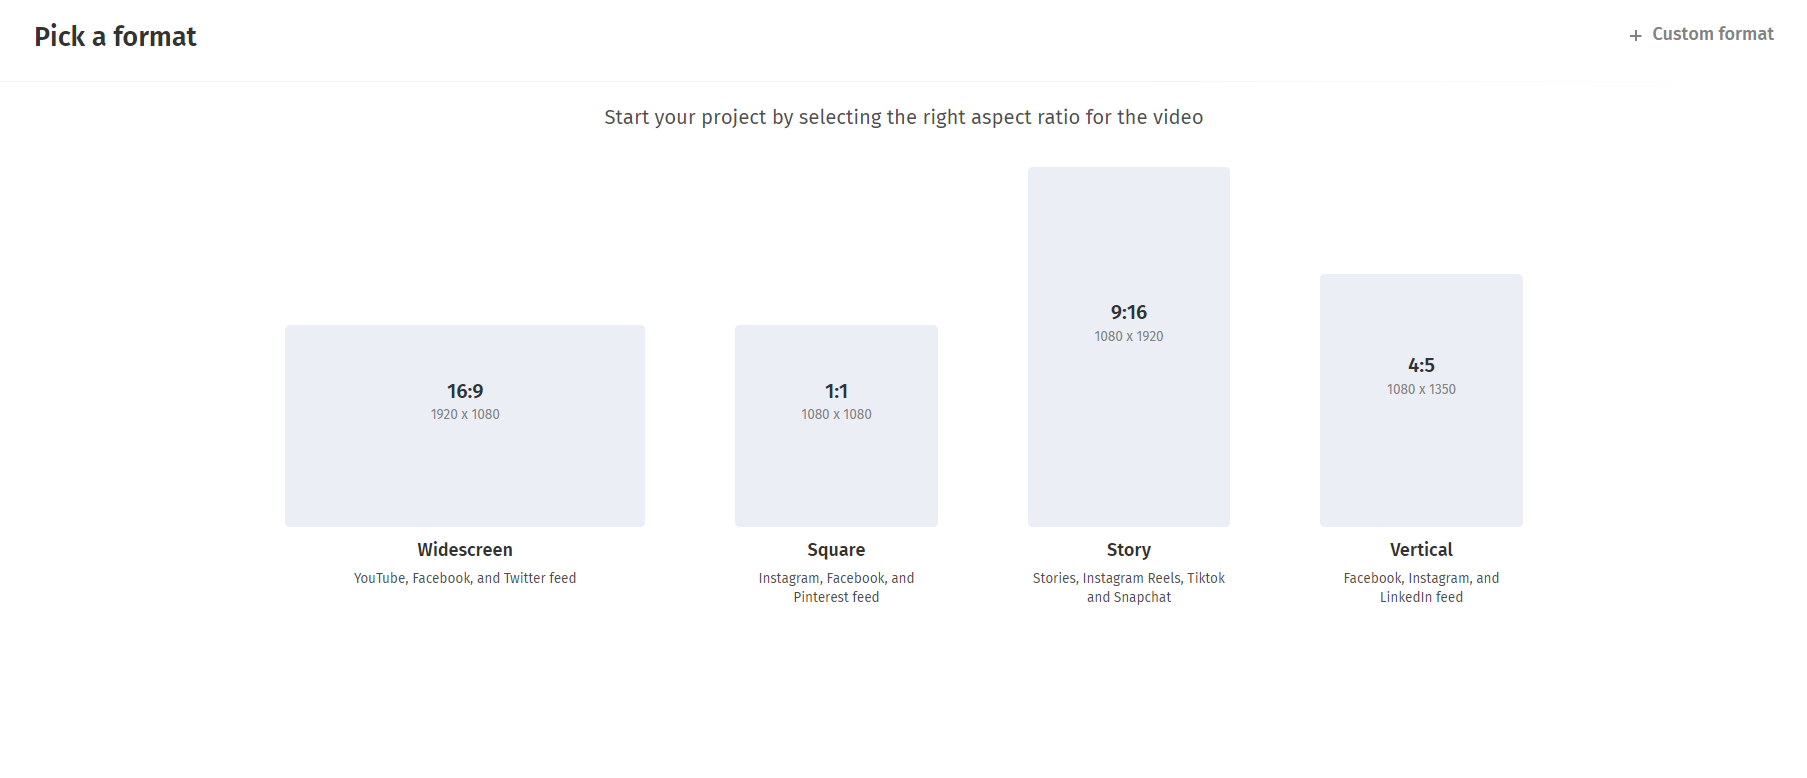
Next, go to Typito.com and choose an appropriate format. Choose the format for the video according to the platform you will publish it in.
Upload the video and click continue. This opens up the editing workspace. On the basis of the notes you previously took - trim off the beginning by a few seconds and a little from the end as well.

Auto-Generated Captions
Let's see how you can create captions automatically
STEP 1: Click the Captions menu at the bottom left.
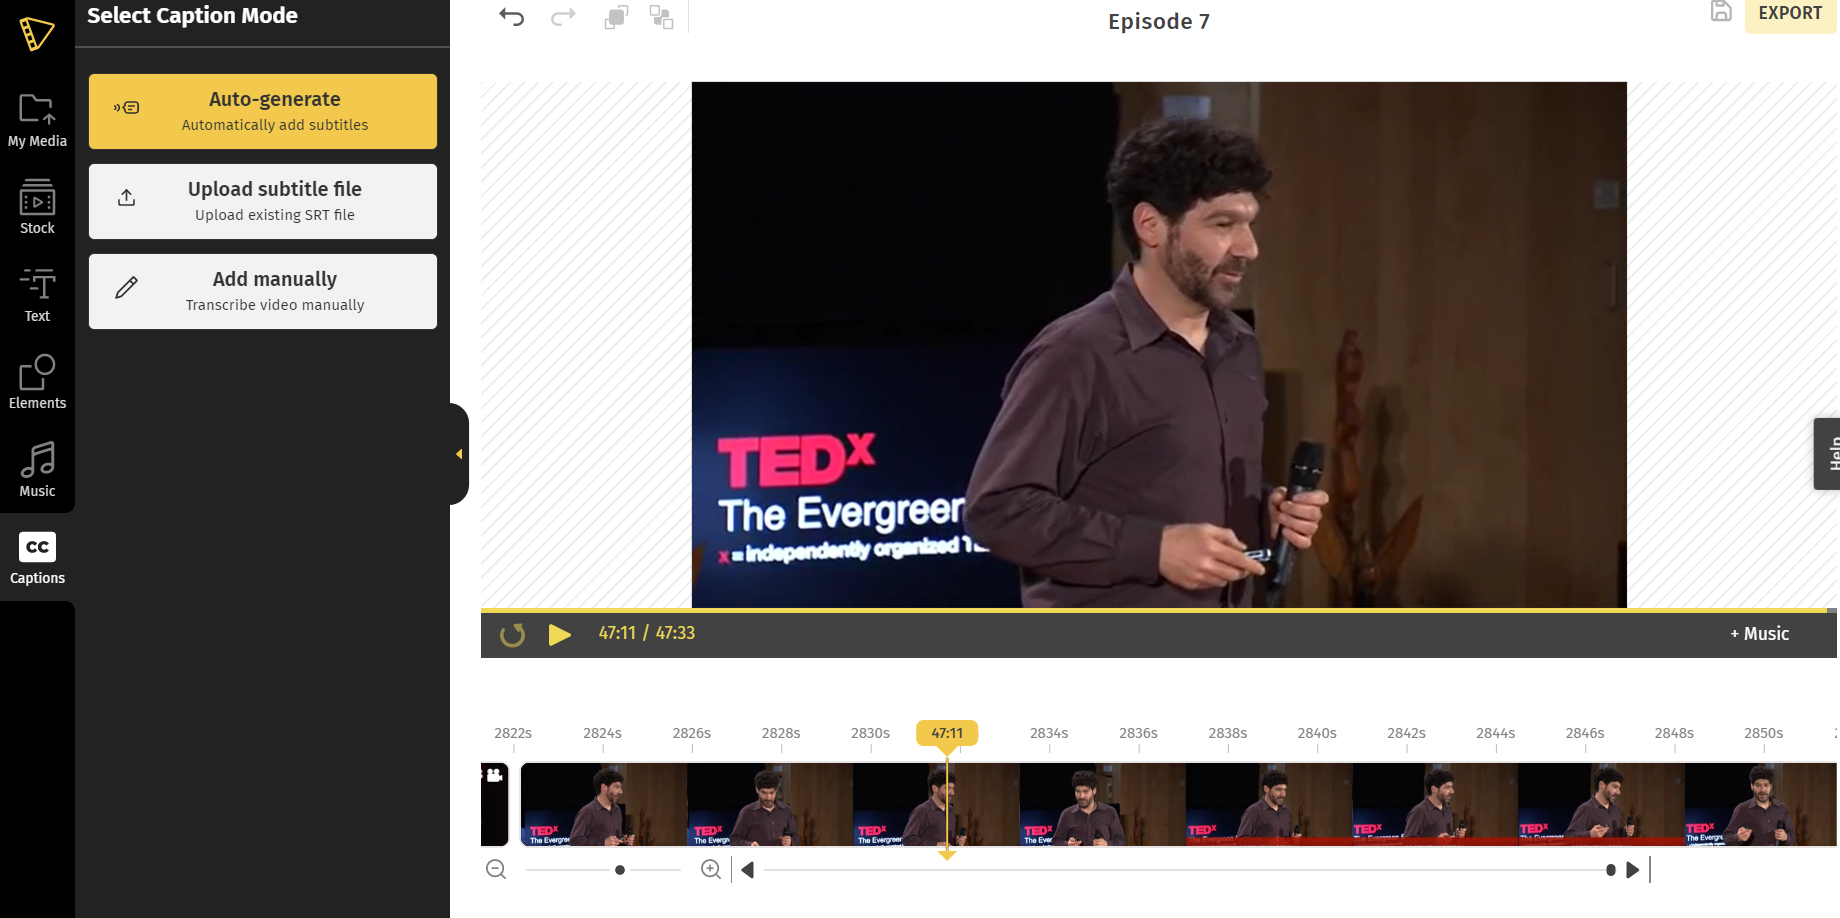
Typito offers three different ways to add subtitles - One way would be to upload a SRT File. Another way is to add the subtitles manually.
For this example we'll choose auto-captioning to show you how quickly you can add captions to a video.
STEP 2: Set your caption language

Choose the language you want to generate captions in. If you want to add translated captions - choose the language of translation.
STEP 3: Choose a theme
Choose one that compliments your video the best. The highlight caption seems like the right choice.
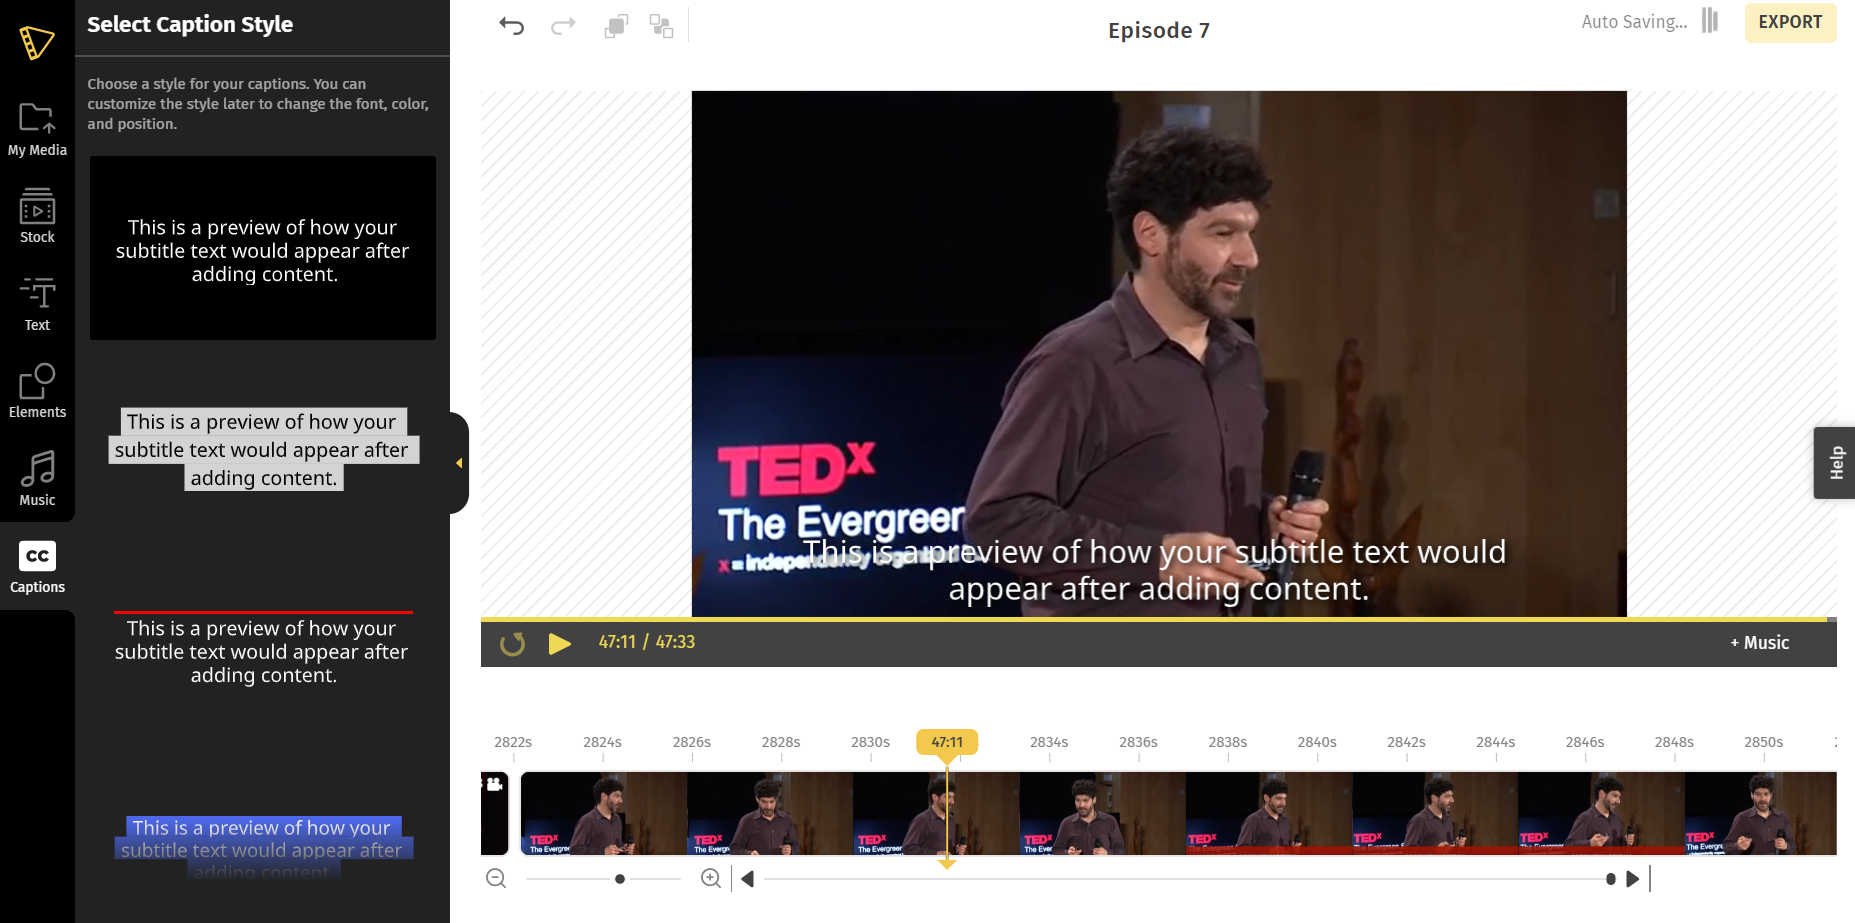
We can edit the theme to change how it appears later.
STEP 4: Click Start

And done. Yep. Pinch yourself. It is really that easy.
STEP 5: Review, Edit & Style your Captions
Now all you have to do is review the video - and make sure everything is in order.
I might move a few words from here to there - just to get it perfectly synced. Though the automatic transcription is quite accurate, you might need to fix a few proper nouns or punctuations as well.
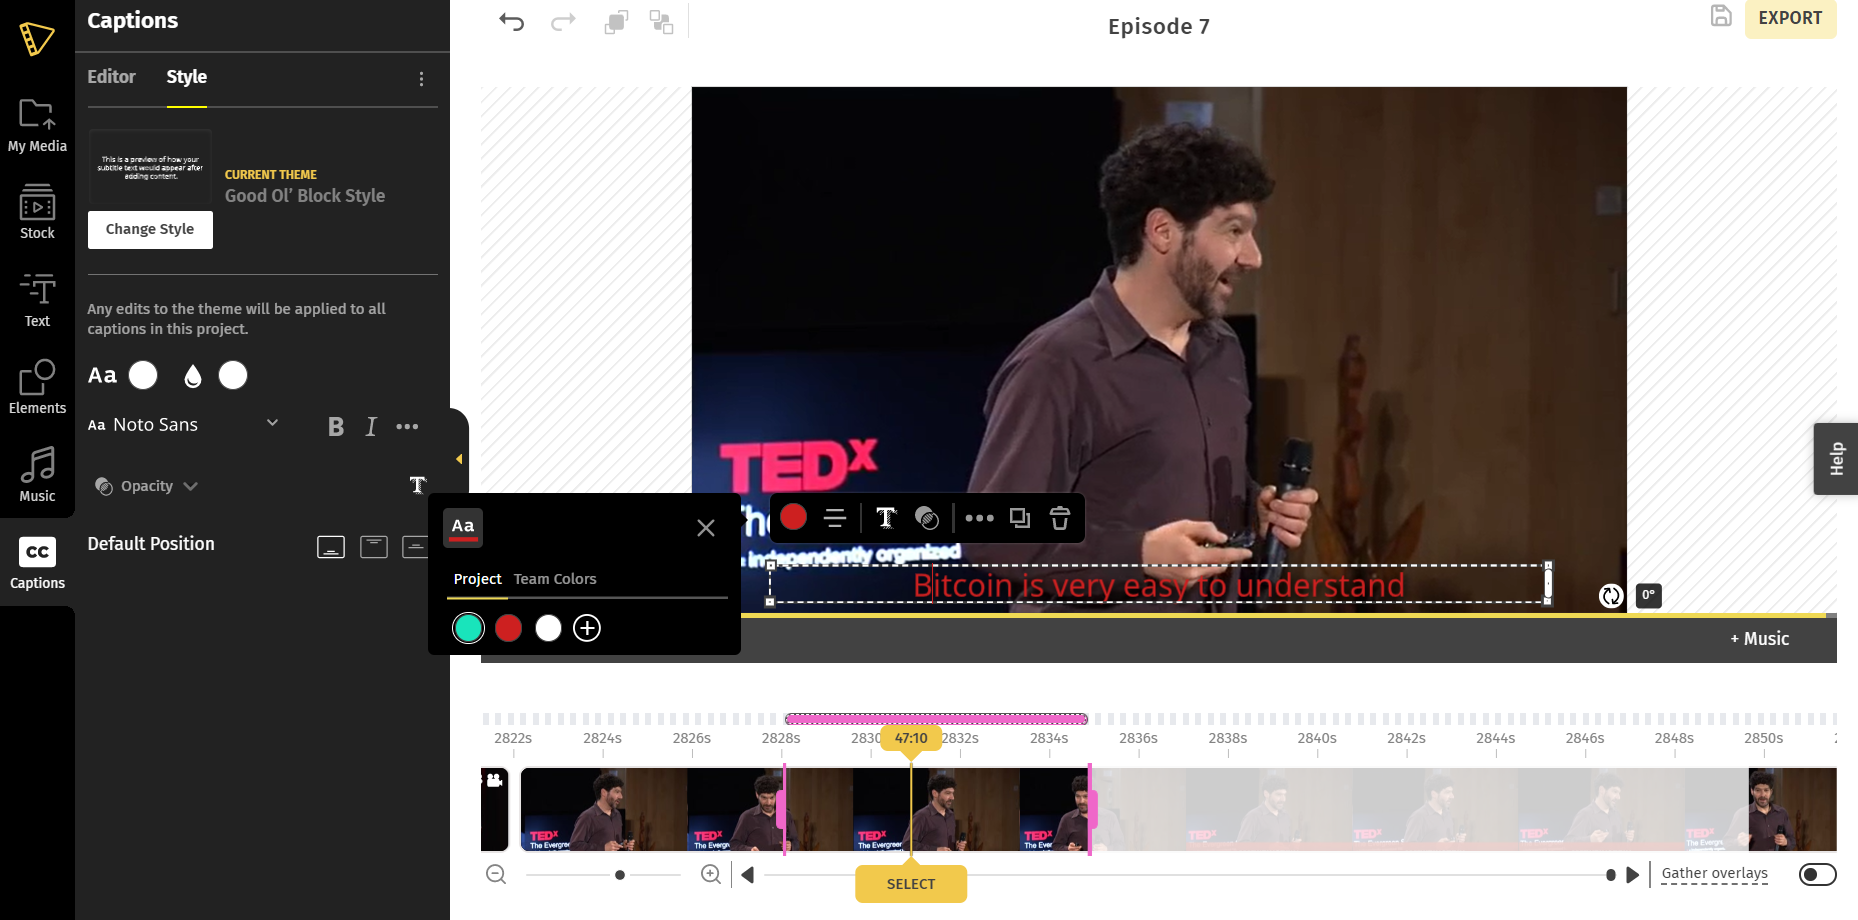
Position the captions at the bottom, top, or the middle. Captions at the bottom look the best for this video.
Now let’s make the captions brand compliant. Choose a font that is already available or upload your brand font. Next, and move on to the color of my text as well as the highlight. White and black look like a good fit. Yep. This is good. Real good.
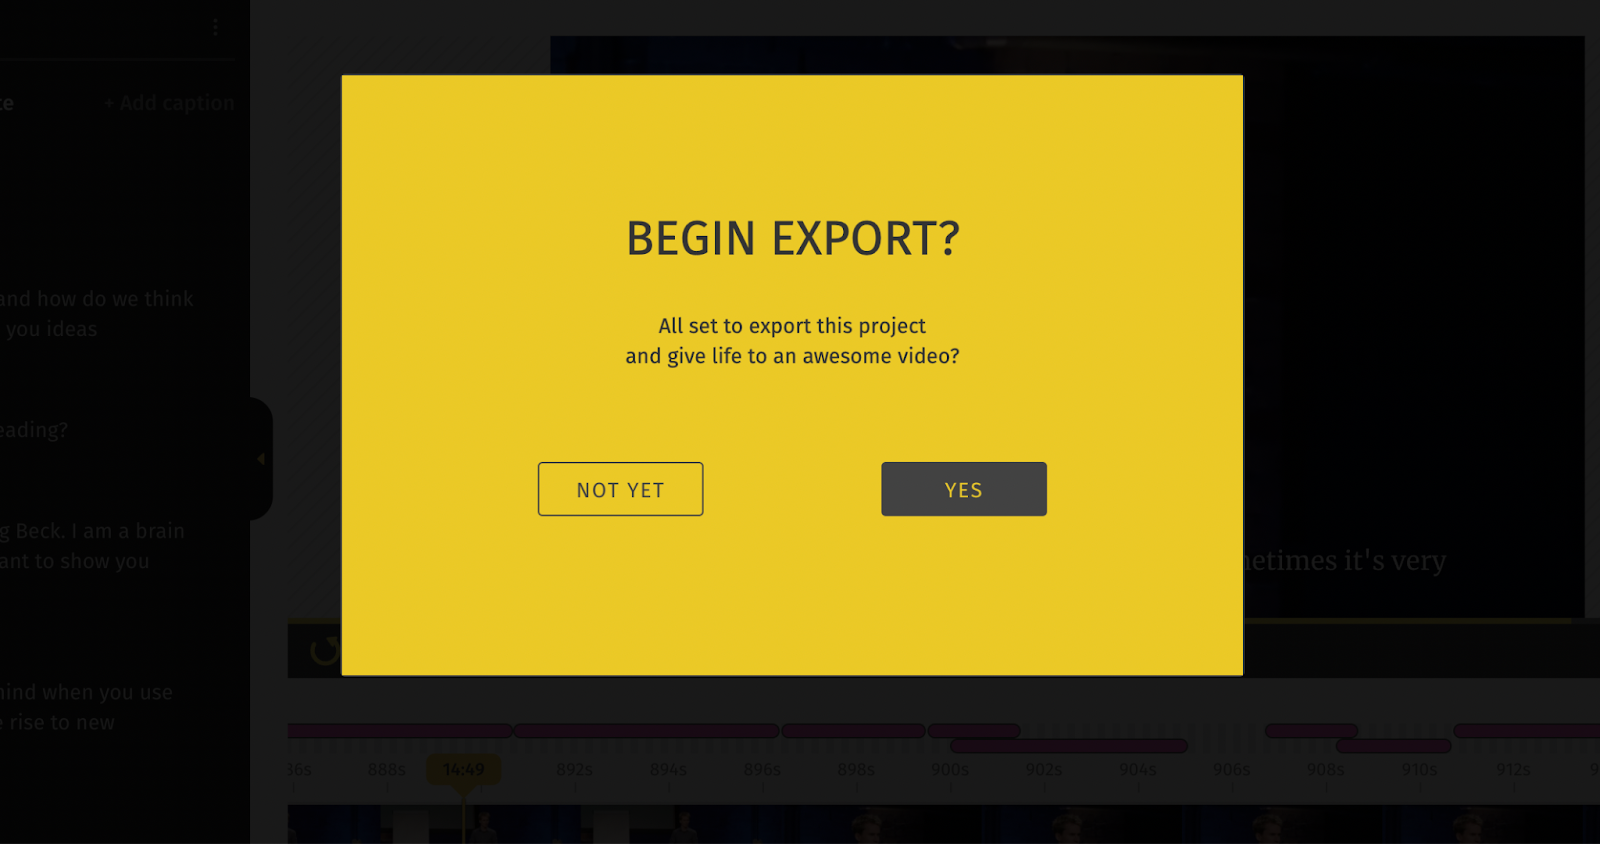
STEP 6: Export video
Now our video is done and ready to be exported. Click export.
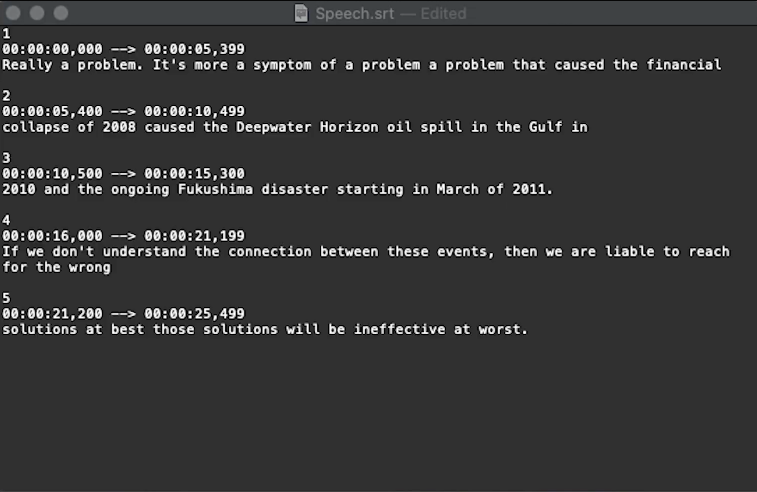
An added bonus, Typito provides you the ability to download the subtitle file. You can then use the subtitle file to improve SEO on your website or landing pages.
And that is it. A perfect video with added subtitles. So, next time you need to boost your engagement and conversion rates on social media add subtitles to your video.
What are you waiting for! Try out Typito the next time you need to add subtitles to your videos.