Many first time YouTubers and marketers are keen on creating videos and leverage the platform’s popularity to gain traffic. However, 500 hours of videos are uploaded on YouTube every minute, raising the competition bar stunningly high!
There is no place for poorly edited videos, making it imperative that you know how to edit YouTube videos easily.
Now you can create and edit YouTube videos on YouTube Studios, desktop applications, and mobile phones! While there is no dearth of tools, we must know which tools are best to optimize your Youtube videos for an excellent experience for viewers.
Here, we will break down the process of editing YouTube videos on all three platforms. So whether you are creating videos for your small business or editing one as a gift for someone special, these steps will come in handy.
How to Edit YouTube Videos?
Editing YouTube videos is now possible not only on the YouTube editor but on other tools like Typito and on smartphones as well! Let us take a detailed look into the process that snips, edits, and produces the engaging video you get to see on your YouTube feed.
Here are a few ways how you can edit your videos with ease:
- Editing Videos with YouTube Studios
- Editing Videos with Alternative Video Editing Desktop Tool
- Alternative YouTube Video Editing Android or iOS Apps
How to Edit Videos with YouTube Studio
Whether you are a new creator/marketer or a seasoned video professional, editing is an integral part of post-production, and you need the right tool to give your viewers the polished video, in this case, a polished YouTube video.
If you are just starting out, chances are that having swanky software is not your cup of tea, yet. Fortunately, we have YouTube’s web-based video editor - YouTube Studios that is easy to use, complete with all the tools you’ll need, and most importantly, free.
How to Use YouTube Video Editor
Step 1: Sign in to YouTube Studio.
Step 2: Navigate to the left sidebar and click Content.
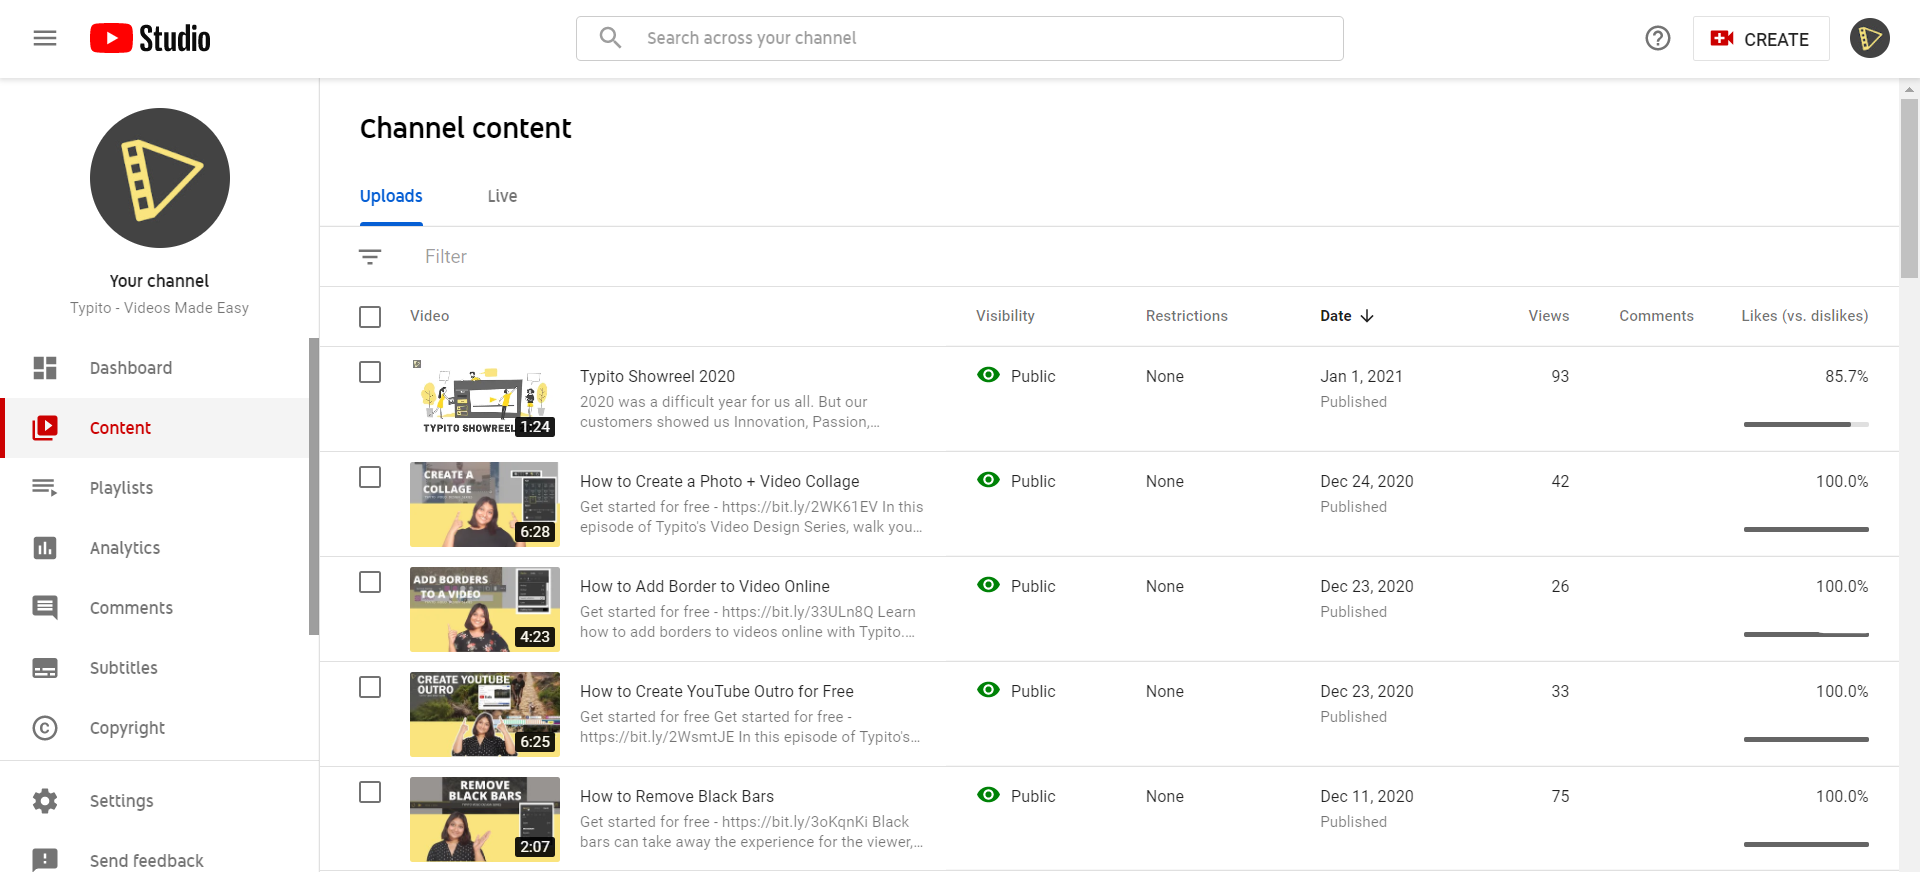
Step 3: Hover over the Uploads and click on the thumbnail of the video you want to edit.
Step 4: On the left sidebar, click on Editor.
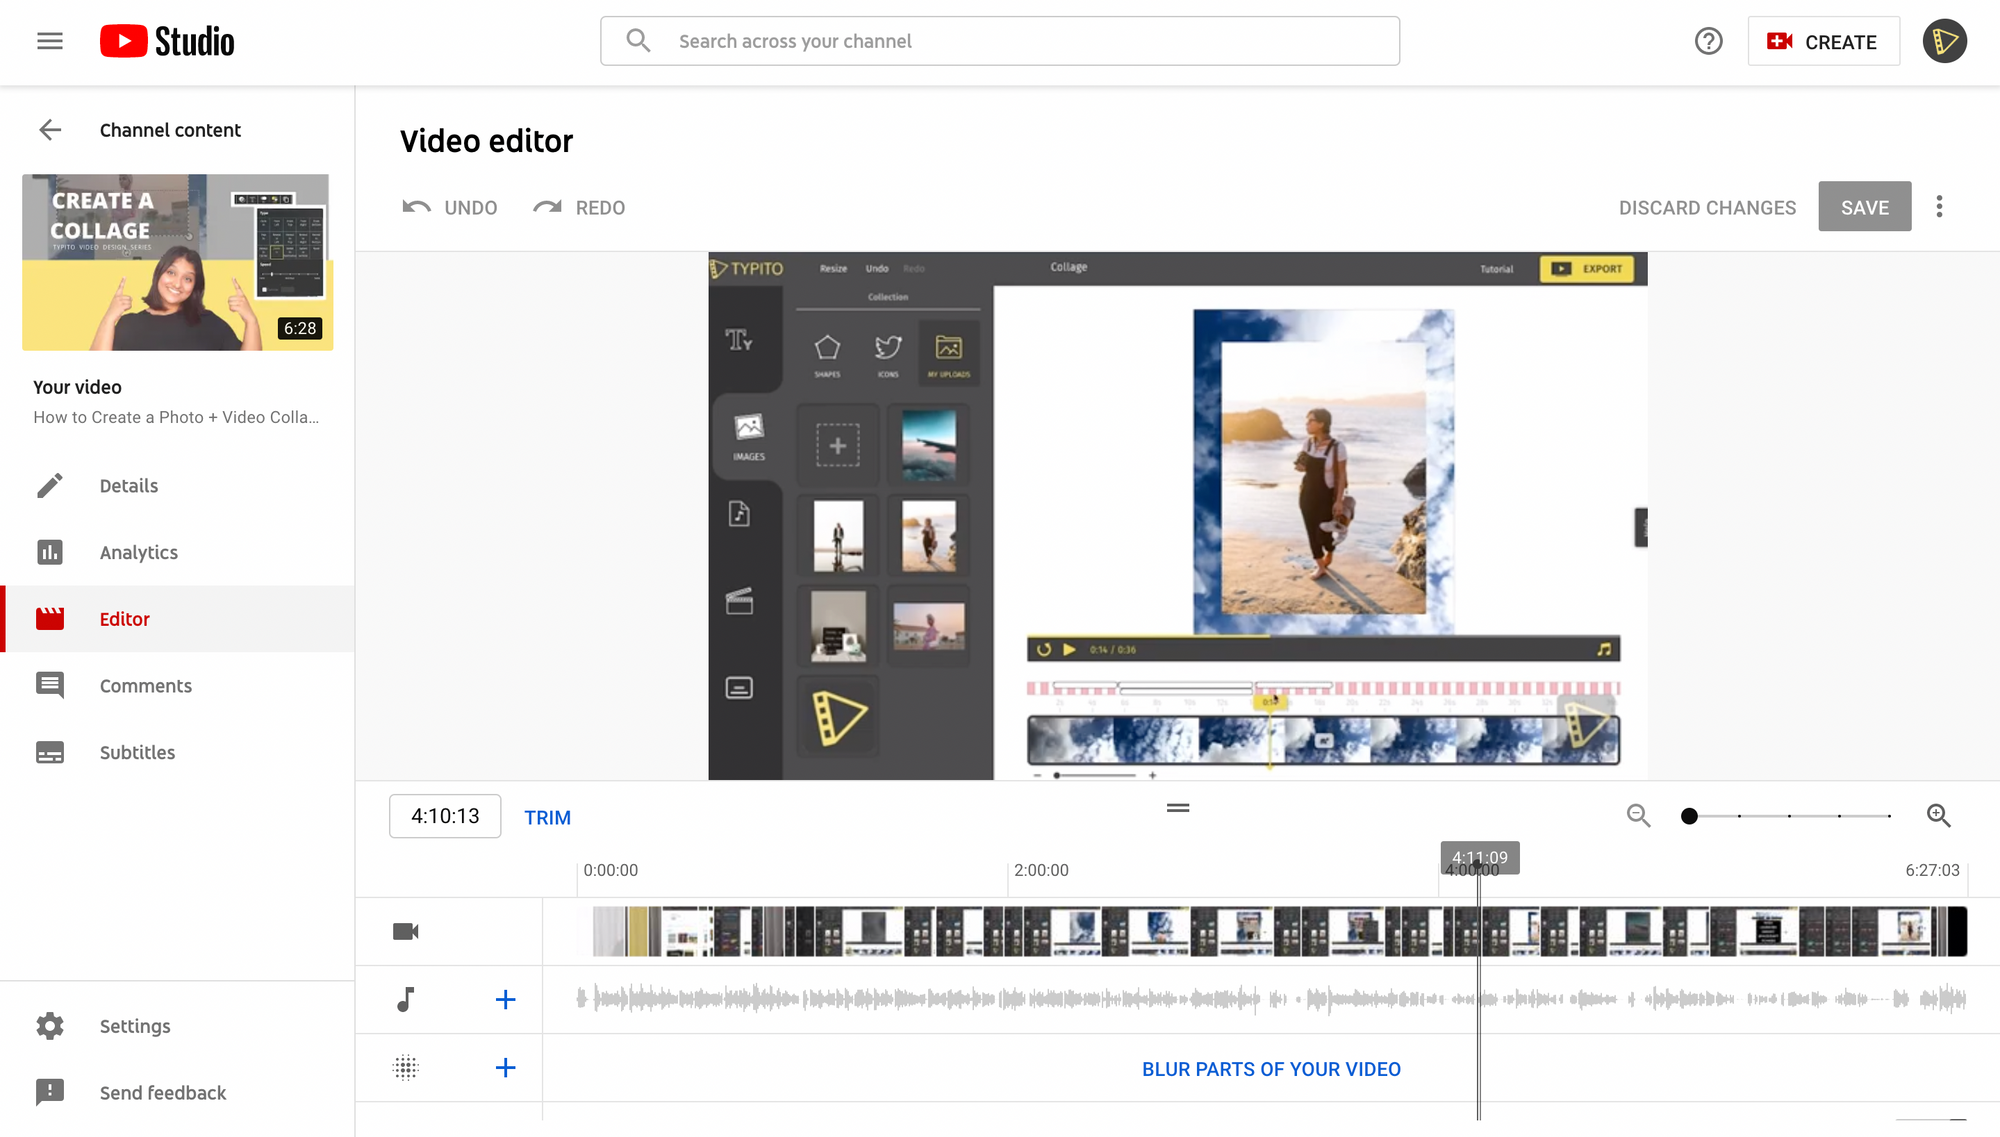
Step 5: Editing - Snip, Snip, Snip! While editing the beginning and the ending of the video, start trimming with the help of the TRIM option right next to the timeline panel. Once you click that option, blue and white lines will pop up at the sides of the timeline panel, which helps you neatly trim the parts you don’t find desirable. Assess your handiwork by clicking on the Preview button, and if satisfactory, click Save.
When you are editing the middle section of your video, select TRIM and then move to the beginning of the clip on your timeline panel and select the portion you want to trim out. Once done, click Split. Similarly, click at the end of the clip you would like to snip out and again, press Split.
Once snipped, drag the blue line right until the end or beginning of your clip and drag it to the other end, highlighting the entire length of the final video.
Again, click Preview, and if satisfied, click the Save button.
Step 6: The Proper Outro: This is where you add a CTA to your video or give your viewers the option to check out another video or playlist. To add this screen, click on Add an End Screen in your timeline panel. You have 5 templates available, and in case you are feeling adventurous, you can also create your end screen from scratch.
And you are done! However, there are more robust YouTube Studio alternatives out there that can add more elements to your YouTube video while editing all together as well.
Using Alternative YouTube Video Editing Desktop Tools
While YouTube Studios is a great option for young editors and marketers to edit their videos, the available features limit creative potential. A good video is about the trimming for concise content and adding audio and the necessary effects that make it more engaging.
Alternative tools like Typito are equipped with an easy to use tool board that allows you to create YouTube videos that are easy to understand, resonate with your target audience, and add that zing!
So how do you boost videos with editing? A simple answer would be to create engaging videos with compelling typography, brand layouts, and images.
Something that you can also explore to boost Youtube videos is instant captions that take away the hassle of adding text and subtext and thus, increasing the speed of the production process by at least 30 times! With Typito, automated captions mold as per the platform you want to upload, and in this case, YouTube.
So how do you edit YouTube videos via such tools? Let us try understanding the process with the help of Typito.
Learn how to make your YouTube video using Typito in a few easy steps.
Step 1: Choose Your Format
Login to your Typito account. If you don’t have one, you can create it on the Typito homepage for free.
Select Create Project, and you will be led to the Format Page where you have to choose a format- in this case, select Youtube.

Step 2: Choose or Upload Your Footage
You can select from Typito’s comprehensive stock footage or can upload your custom element by clicking on the upload button. If you are making a food-related video, simply type in food in the search bar and you will get relevant images and video footages for your project.
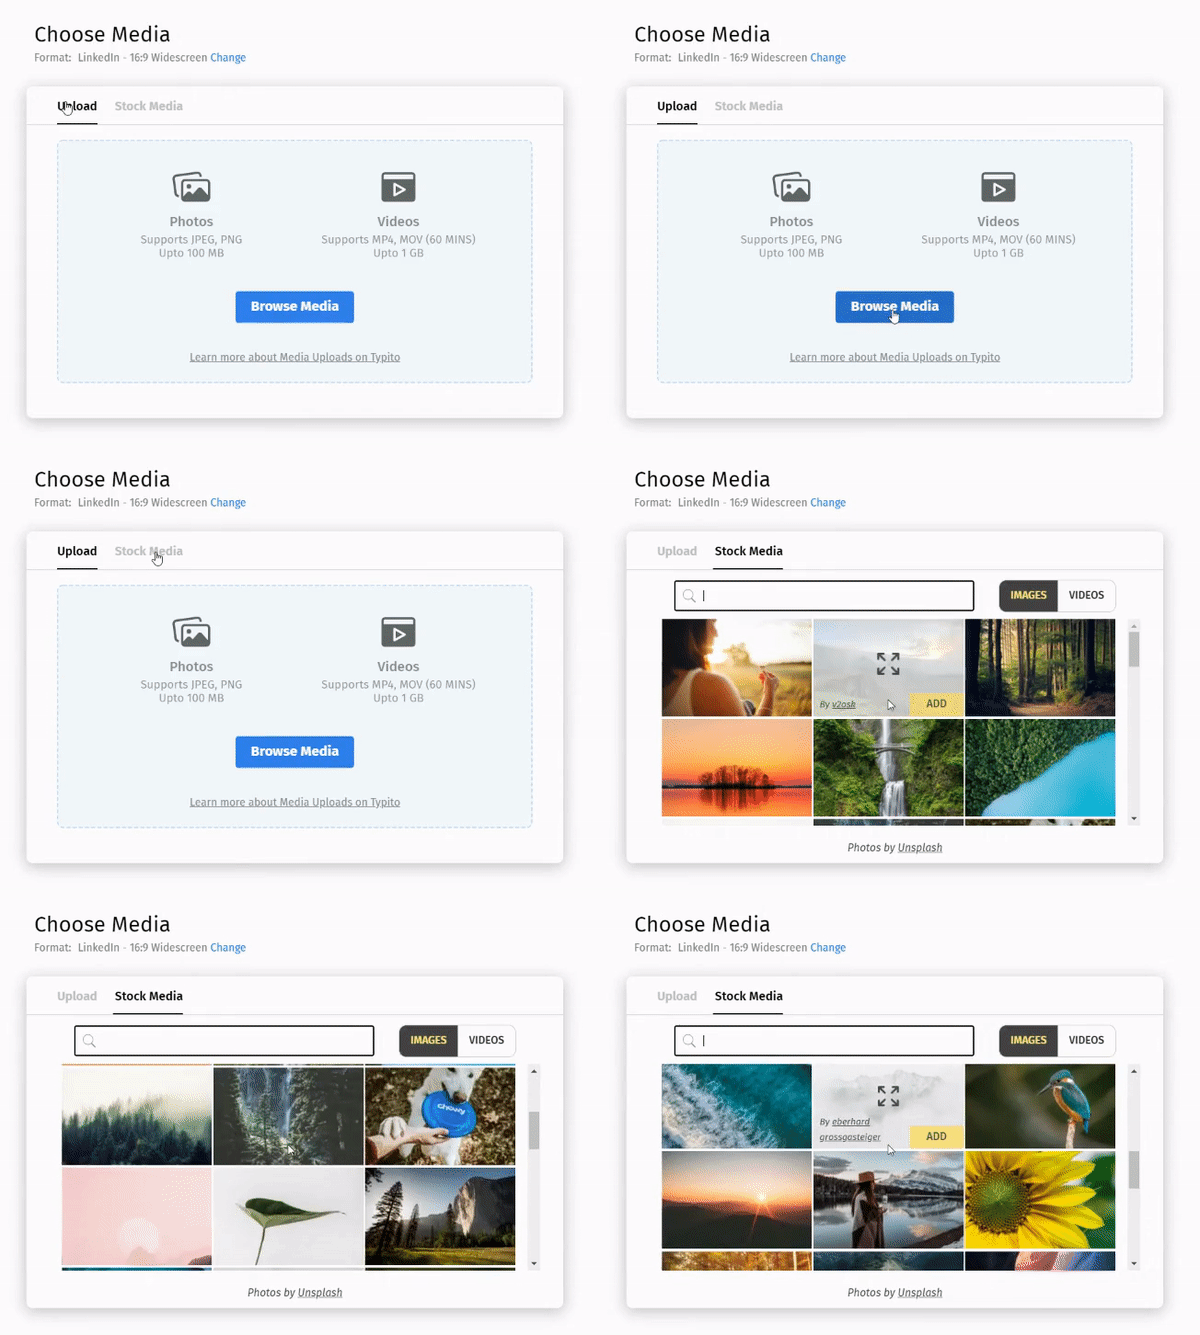
Step 3: Edit Your YouTube Video
Once you have uploaded your footage or selected stock footage of your choice, time to rearrange it on your timeline for the video. Simply select the clip and drag it across the timeline for the decided time you have in mind.

You can always clip the videos as per the specific timeline and structure the sequence to suit your requirements. Here are a few elements that are an absolute must while creating your YouTube video.
Intro: Aforementioned is the example of an intro - where the animated text is pretty much setting the tone for your video. The right intro delivers the message, the tonality, and the expectation of a video. Here, it is clear that you will be informed about the Best Salad Bars in Chicago.
So how do you get the intro in place for your Youtube Video?
It’s easy. Click on the Text option on the left panel and select the Lower Third option. These options are usually vibrant and animated that helps give your video that funky edge.
Once you have set the text, you can also clip the videos at the beginning or at the end to suit the sequence better.
Text Captions: These text captions are perfect for the details you will be filling in to explain your video. Keep in mind the contrast of the text and the background.
Captions: These days, almost all videos have subtitles or captions and you too should include those in your YouTube videos. These captions improve your message delivery and while many other tools don’t offer the feature, Typito makes captioning a breeze. Simply slide to the left panel, click on the bottom icon of captions.
Select the theme that works the best with your video and add the captions. Now, these captions can either be added manually, converted from voice-to-text if your video already has a voice-over or upload an srt. file that will read the captions and upload them to your video.
Outro: This is the final leg of the video. Once you are done with your presentation, you add the outro content. An outro content is the CTA you would want your viewer to see and further engage with your profile to increase your outreach.
Step 4: Export Your YouTube Video
Now all you have to do is quickly preview your video and Export it. You can now download the video and share it with your audience.
Using Alternative YouTube Video Editing Android or iOS Apps
Thousands of marketers and video makers ask the question - how to edit your YouTube video on your phone? Why on the phone? Well, it is easier and can be done on-the-go! The idea is to make a video on the go and upload it with minimal tools at hand.
For this, you can check out your phone apps like Kinemaster that allows you to record as well as edit your videos easily, at a simple touch.
Step 1: Record Your Video on the Phone
First, create an outline of what you want to talk about. This is your script and it helps you stay on track with the idea and keeps the message delivery clear and crisp. Once done, stick it up where you record your videos and hit the record button on your phone when you are ready.
Step 2: Upload the Recording on the App
Upload your recording and check for the video as well as audio quality. Select your footage and the app will present a tray of tools. Start from the basics and trim your video at the beginning or the end to negate any negative space. You can also choose from a plethora of video filters and enhancers to audio filters and even change your voice to a chipmunk!
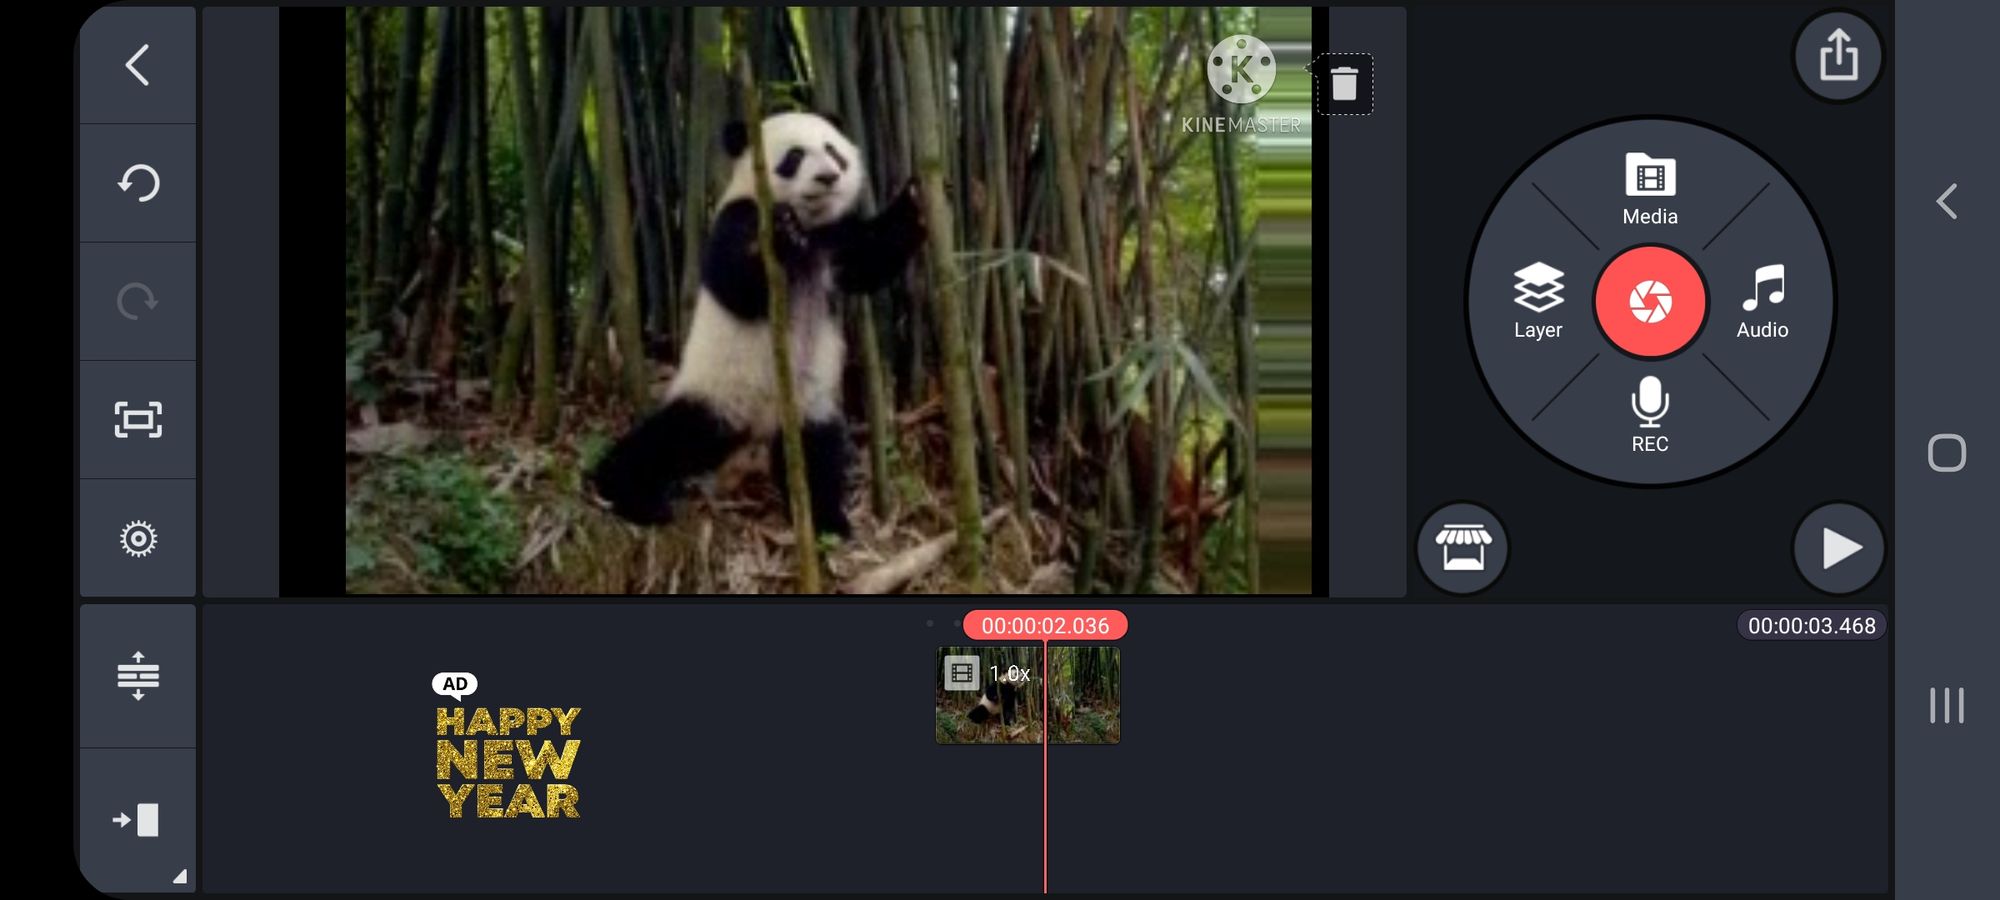
Step 4: Add the Effects
If you want to add a zing to your video or maybe captions to the same, you can simply tap on the image and select layers. You will be presented with an array of options for your text, sound, and a lot more. We selected the text option and the image below denotes how we can animate and add the captions or any other text for that matter.
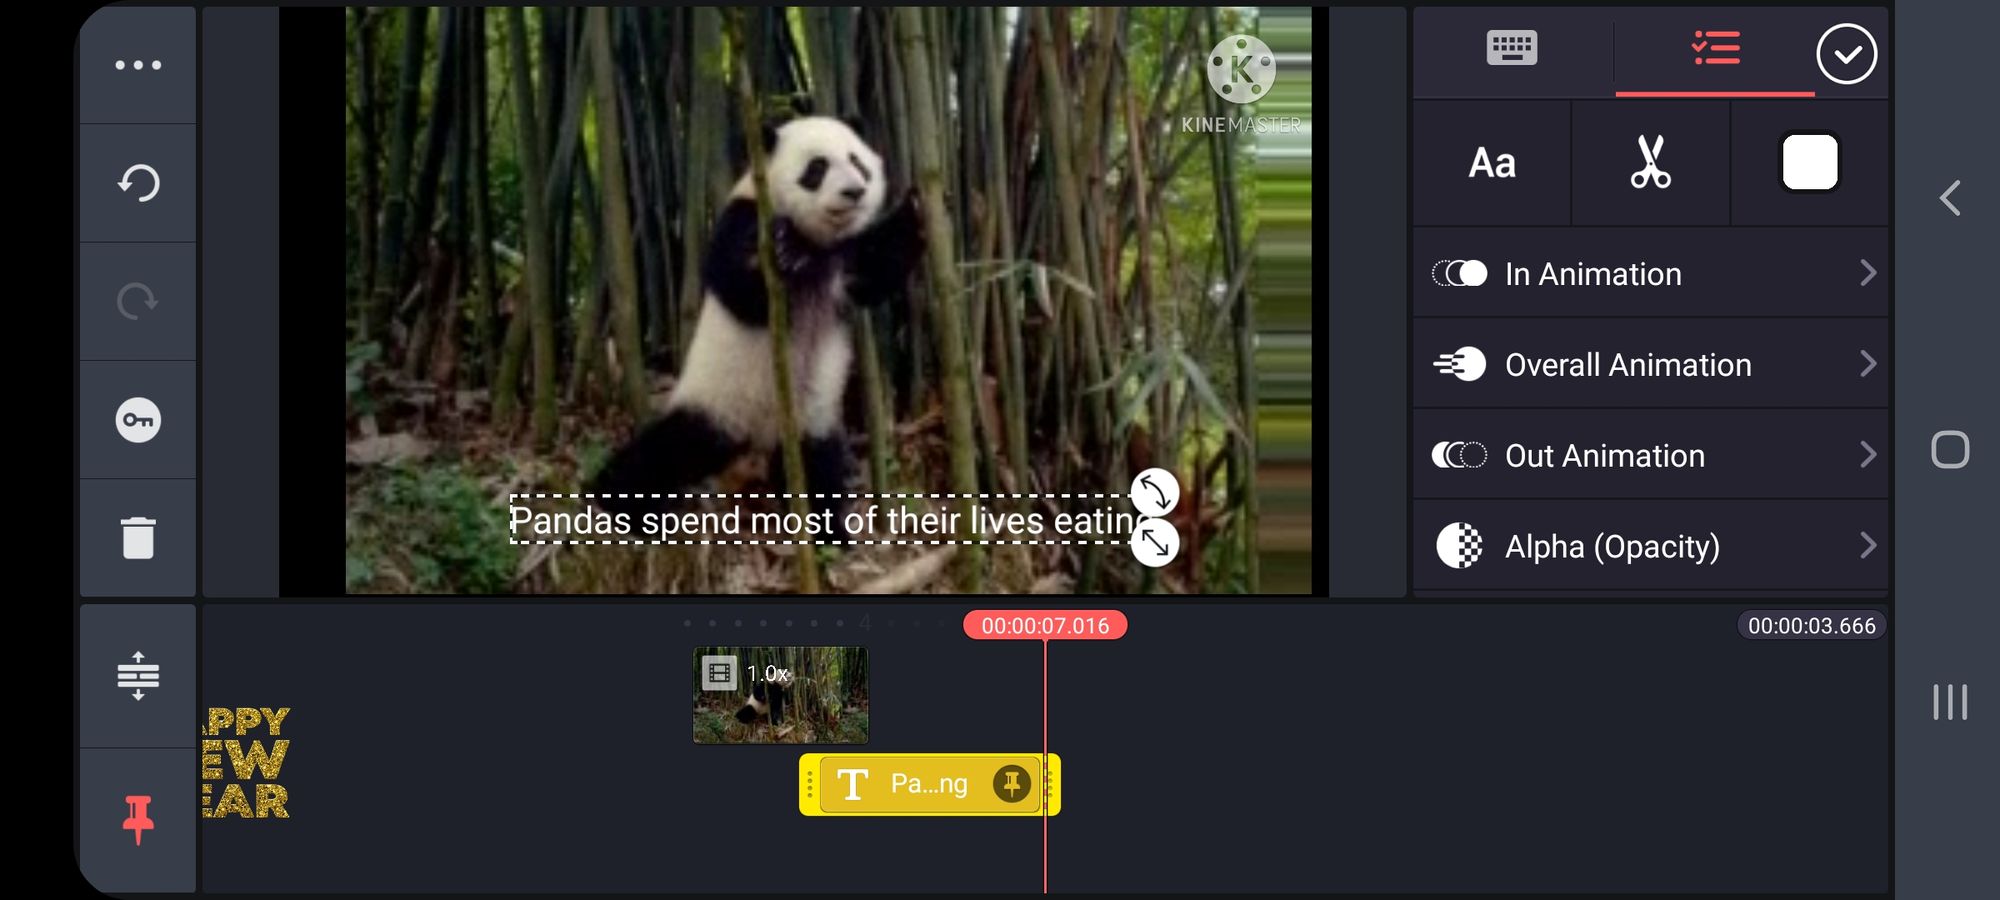
Step 5: Export and Share
Click on the upload button on the top right and select the aspect of your choice. You can choose the resolution and the frame rate as per your requirement and finally click on the export button. Your video will be downloaded and you can share it with your viewers via social media or any platform that you may fancy.
Conclusion
And that’s all folks!
Editing YouTube videos is no easy task but with the right tool, you can simplify this journey and further optimize it to enhance your marketing efforts. A good, streamlined YouTube also makes it to the Google ranks and further improves your brand's visibility as well.
So next time you want to create an impactful video without heavy capital and time investment, try Typito.


![Best YouTube Outro Templates [Tips + Inspiration]](/blog/content/images/2022/11/Blog-Articles---Featured-Images-Illos--23-.png)