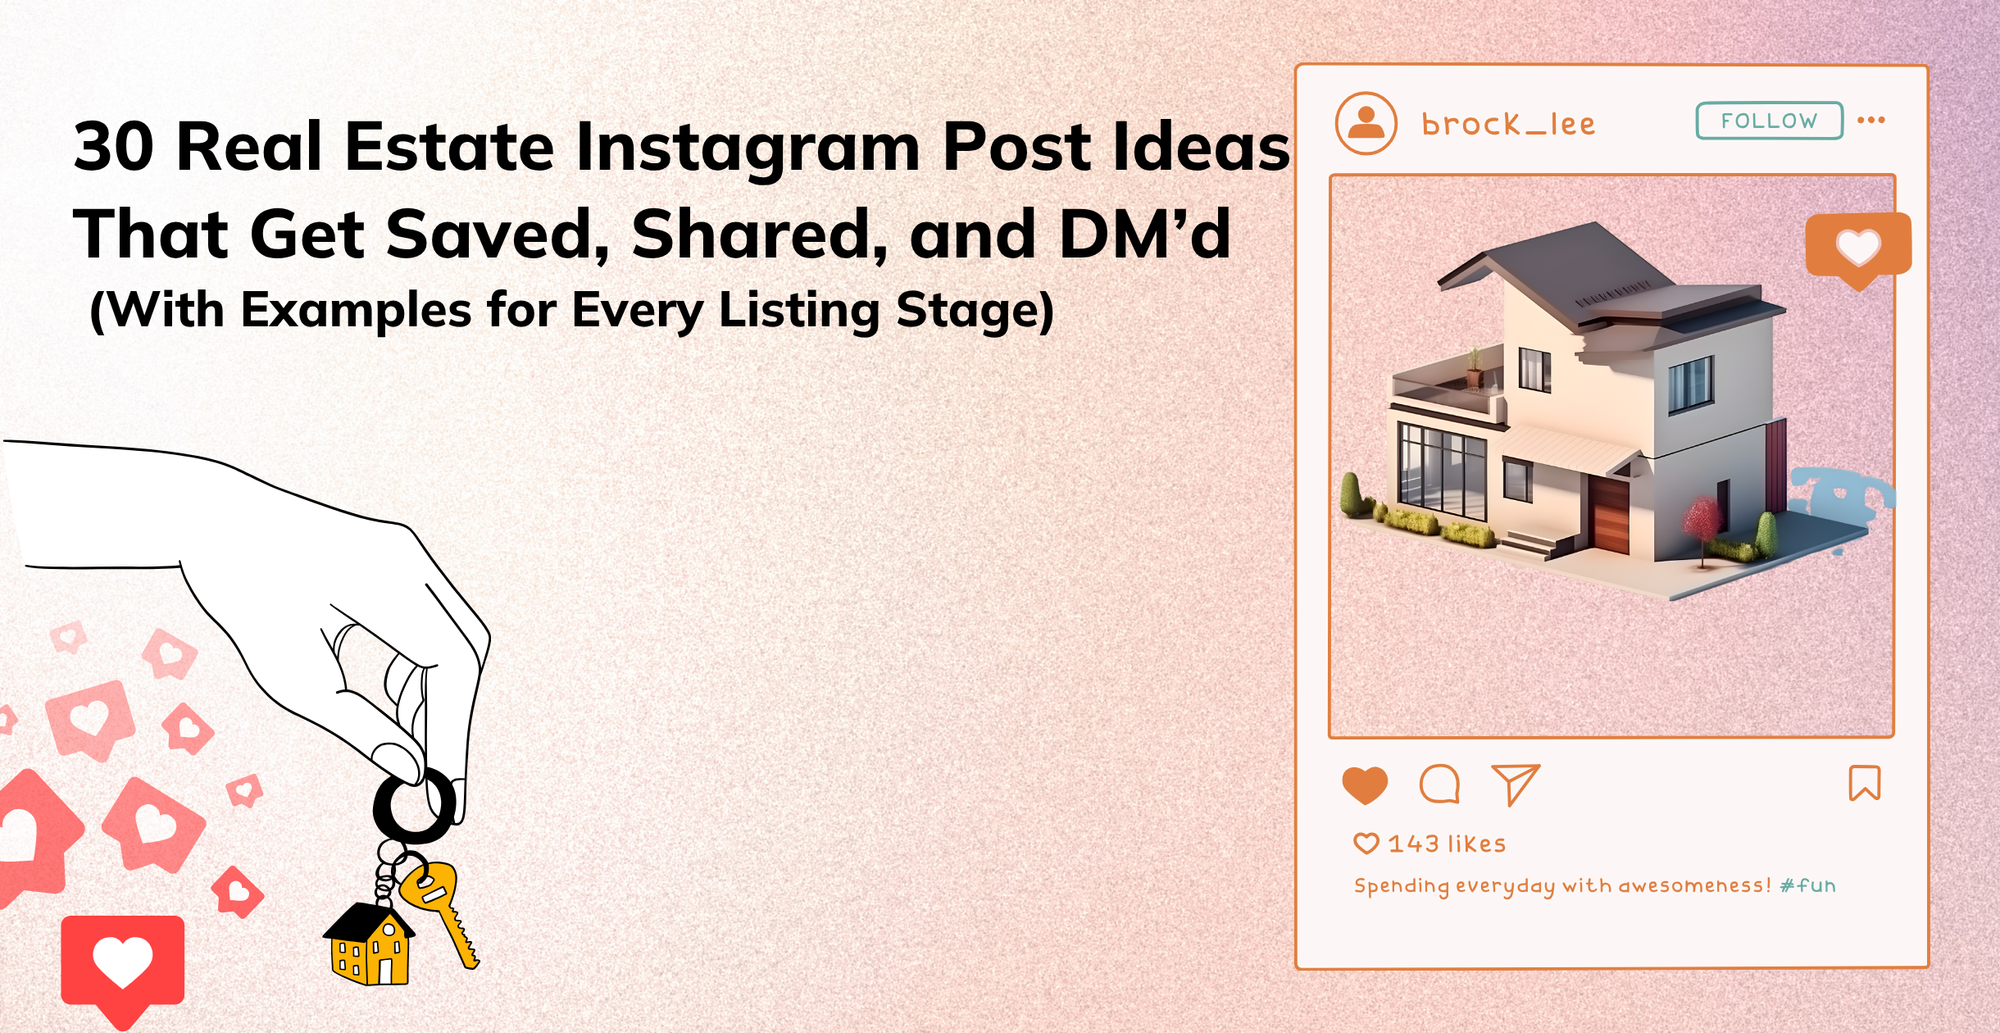
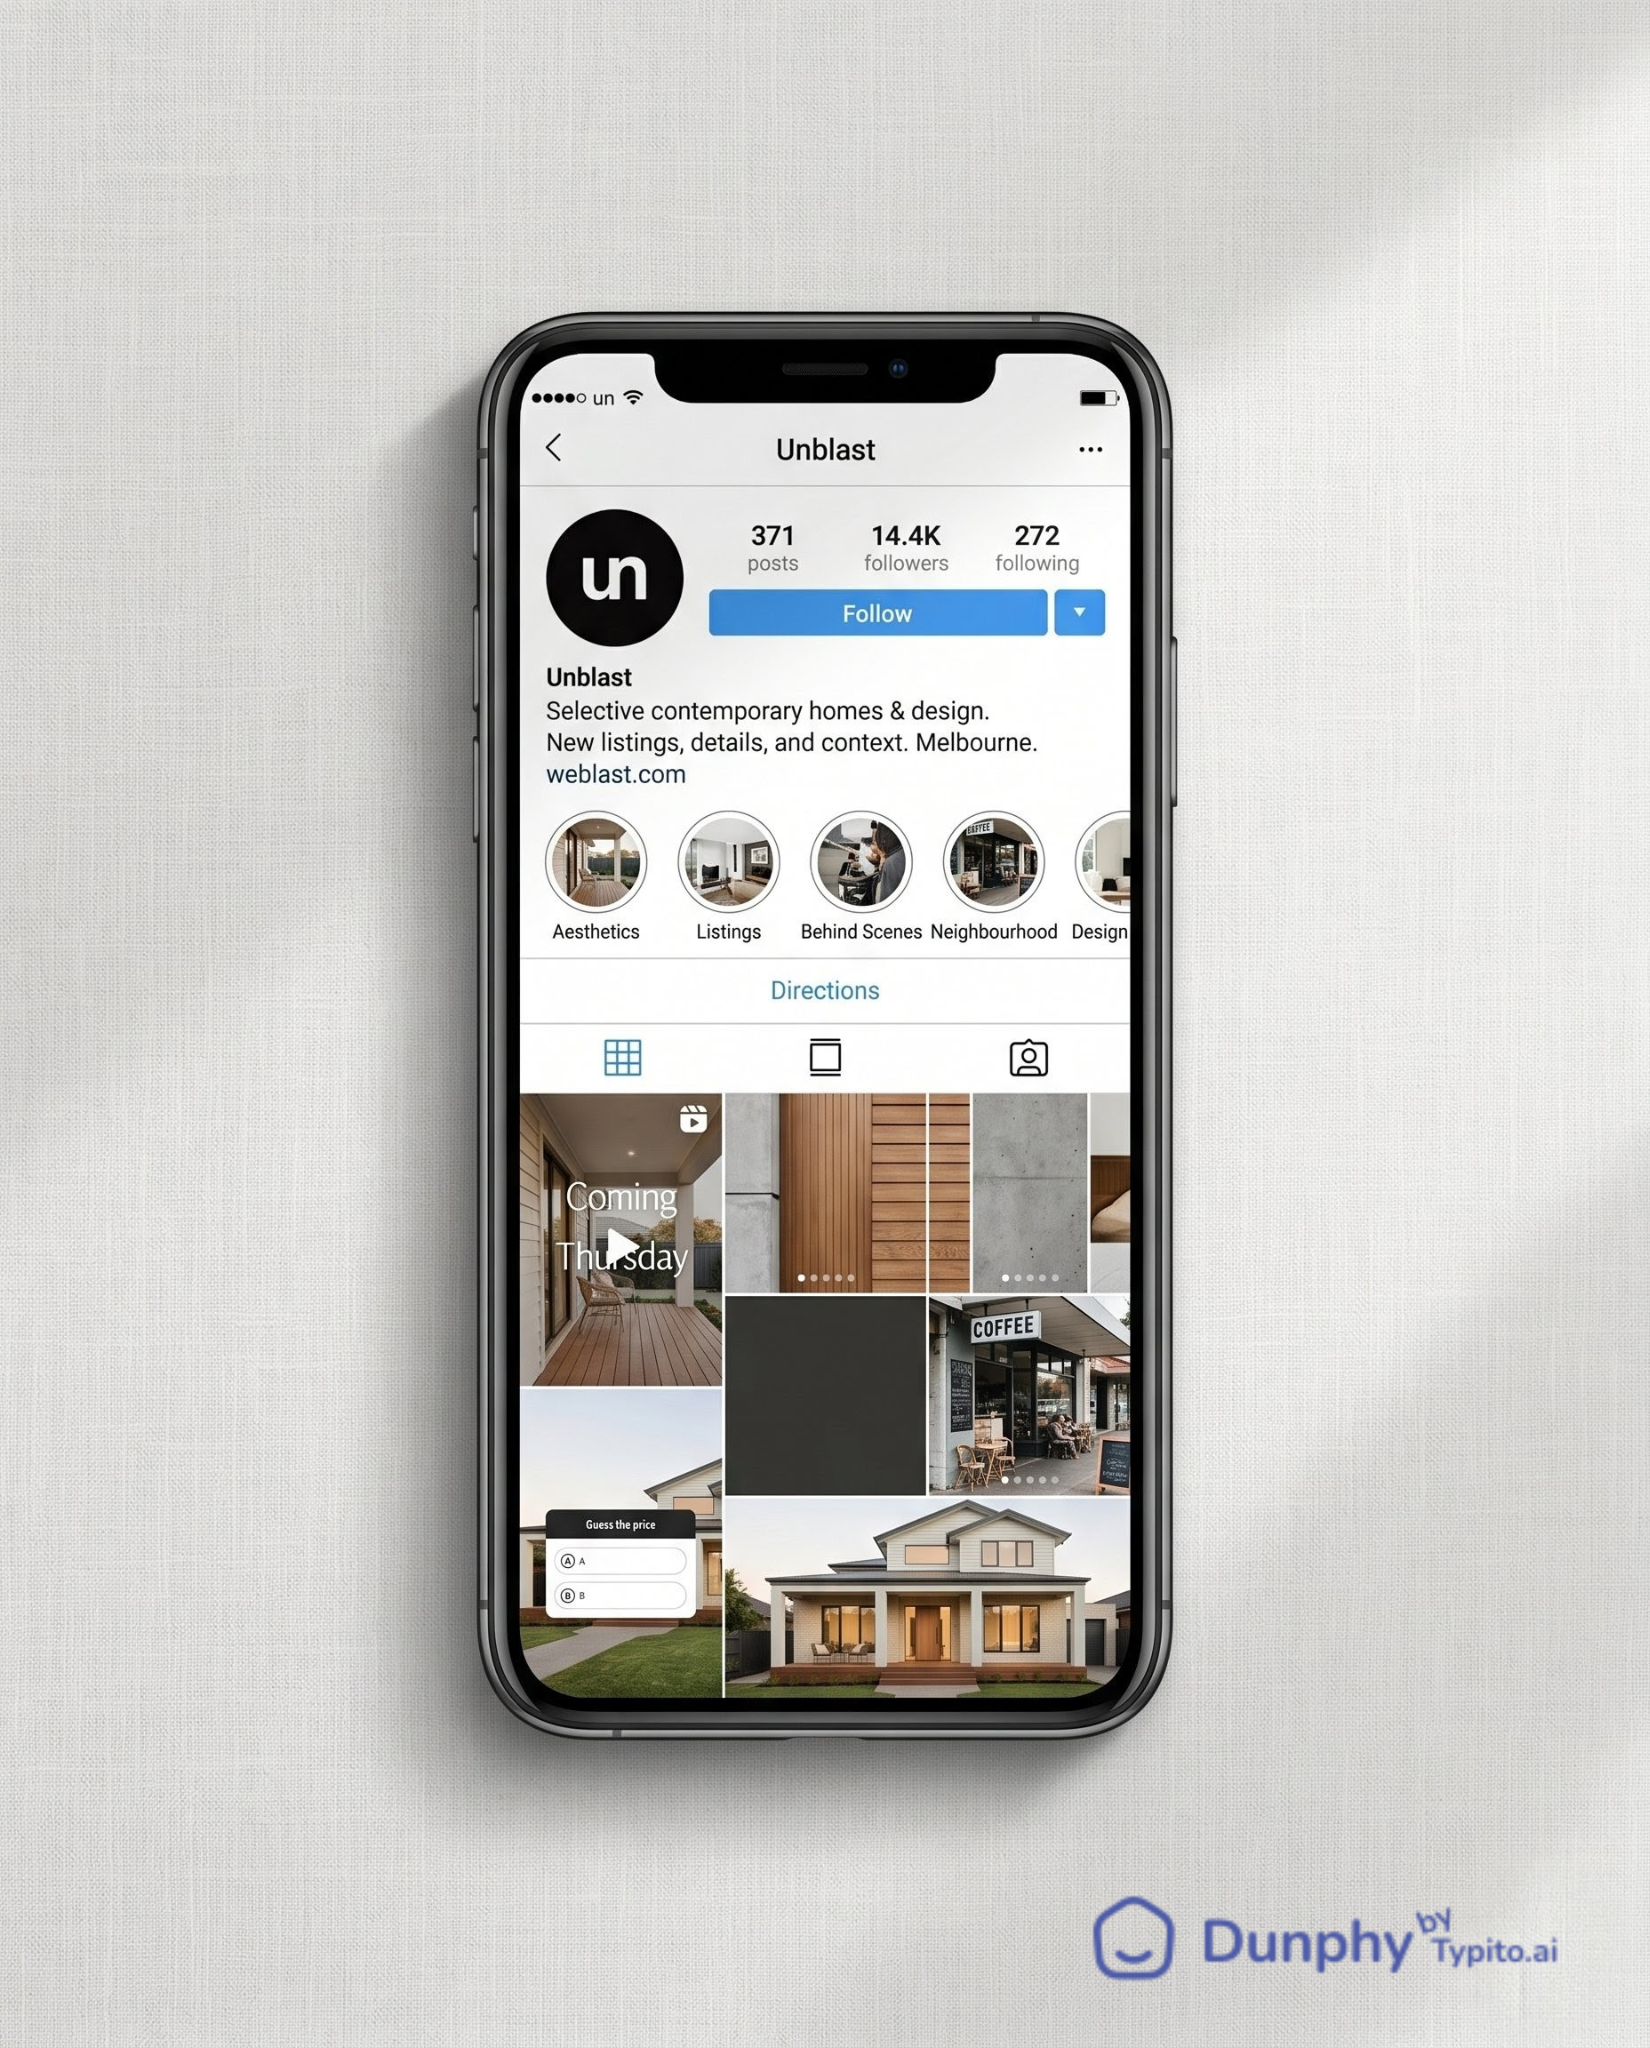
Jump to section:
- Why Instagram Real Estate Marketing Stalls Without a Post System
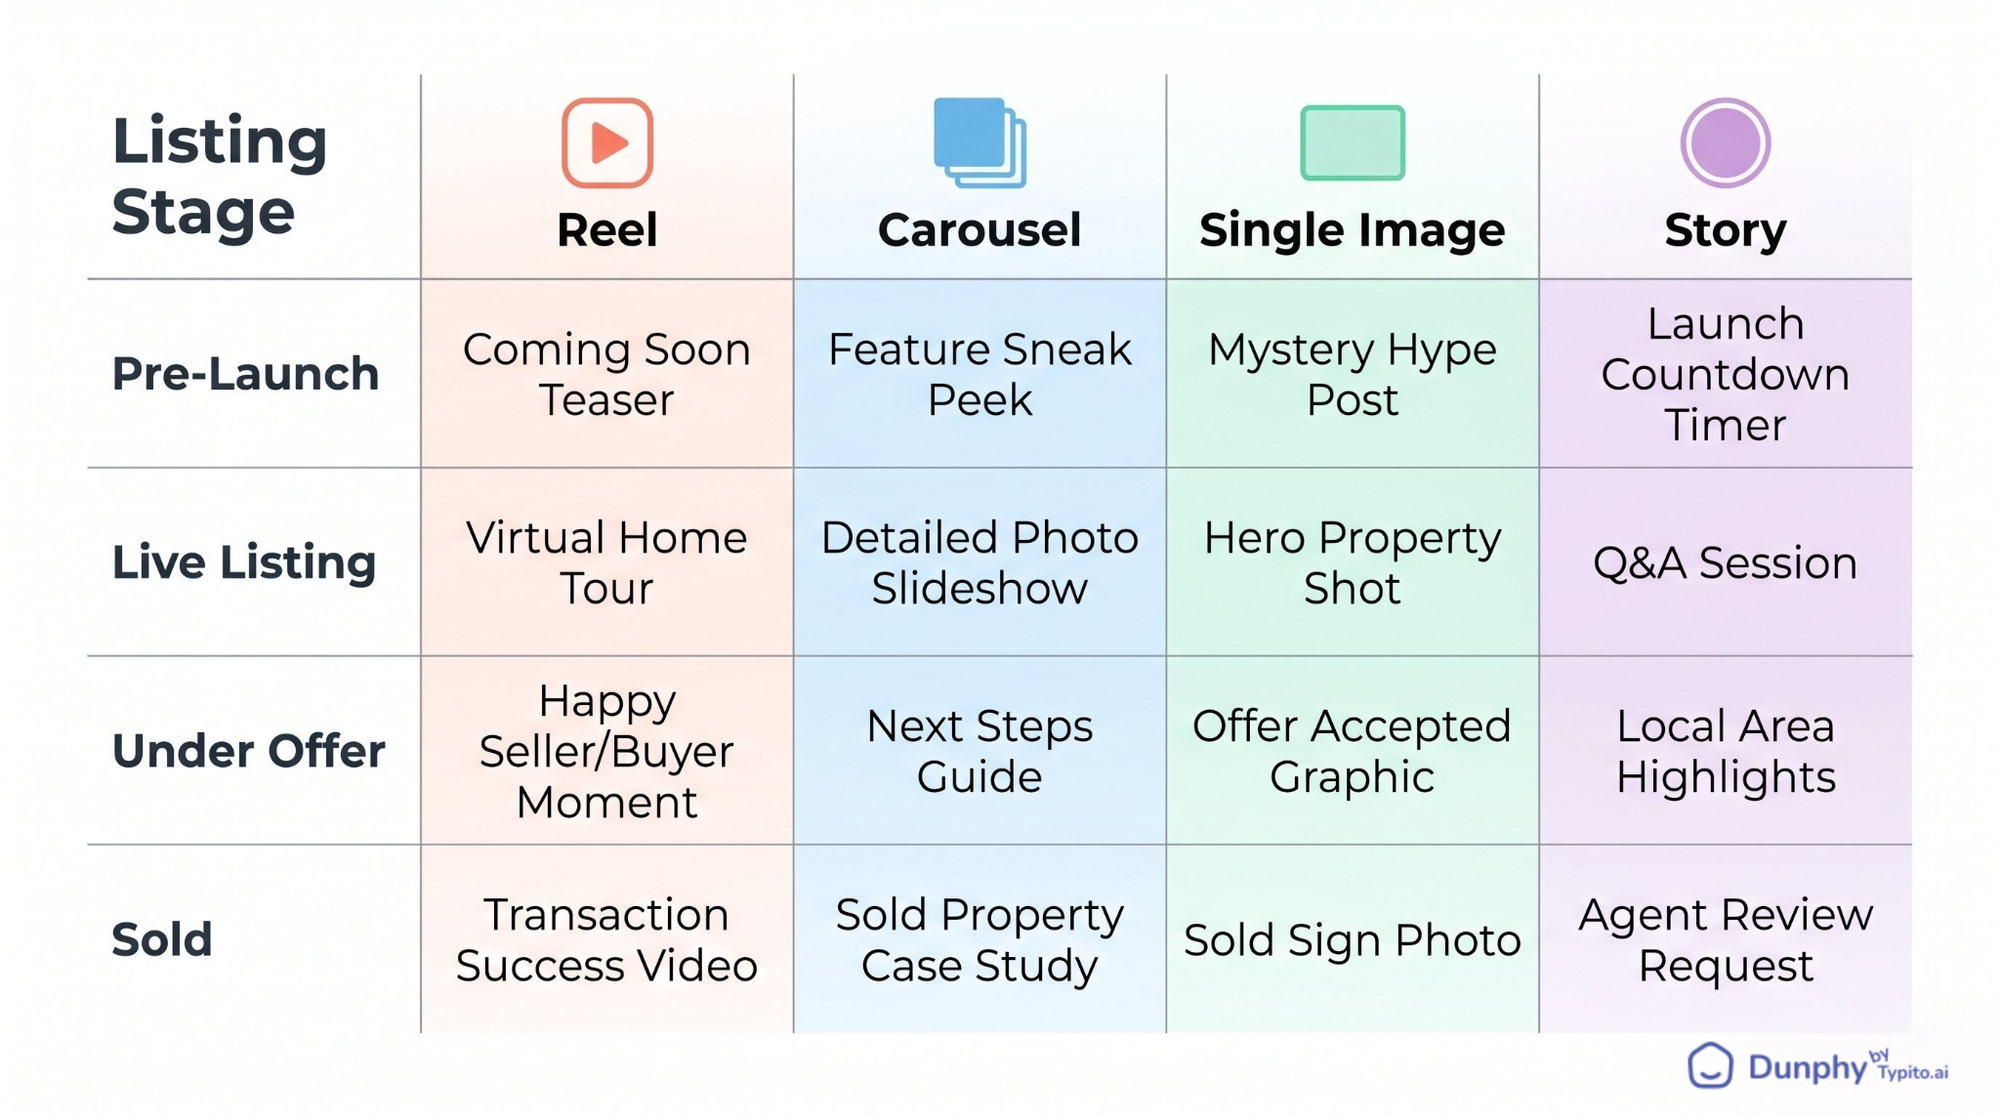
- Pre-Launch: Build Anticipation Before the Listing Goes Live
- Live Listings Get More From Photos You Have Already Shot
- Under Offer: Keep Posting While the Deal Closes
- Sold: Turn Closings Into Long-Tail Content
- No Active Listings: What to Post During Quiet Weeks
- How to Actually Execute These Every Week
- FAQ
It’s Sunday night. You’re sitting on the couch with your phone, staring at tomorrow’s empty slot on your posting calendar. You’ve already shared your two active listings, twice each this week. You scroll through other agents’ feeds looking for inspiration, and twenty minutes later, you’re uploading a stock photo with “Home is where the heart is” in Canva script. You know it won’t do anything. You post it anyway.
Here’s the thing: you don’t have an ideas problem. You have a system problem. The agents who always seem to have something fresh to post aren’t more creative than you. They’ve just figured out how to pull 8 to 10 posts from every single listing they take. One photo set. One listing. A month of content.
This article gives you 30 real estate Instagram post ideas organized by where each listing sits in its lifecycle, from the day you sign the agreement to months after it closes. Every idea comes with a format, an example, and a specific outcome it drives. Bookmark it, screenshot it, steal from it every week. And if you want to go deeper on turning one set of listing photos into content across every channel, this guide on repurposing listing photos breaks down the full approach.
Why Instagram Real Estate Marketing Stalls Without a Post System
Most agents treat Instagram like a bulletin board: something new happens, they post about it. No new listing? Nothing to post. That reactive cycle is exactly why consistency dies, and Instagram’s algorithm notices. Accounts that post sporadically get less reach on every post, which makes each post feel less worth the effort, which leads to posting even less.
The agents who actually generate listing inquiries from Instagram aren’t posting more often. They’ve just decided in advance what types of posts they’ll create from each listing. A single photo shoot becomes a week of reels, carousels, and stories. Without that system, every post is a 20-minute creative decision. With one, it’s a 2-minute scheduling task.
The 30 ideas below are grouped by listing stage so you can match them to whatever inventory you’re working right now. No filming required. Every idea works with photos you already have.
Pre-Launch: Build Anticipation Before the Listing Goes Live
These posts turn the days before a listing hits the market into a content runway.
1. The “Before I List” Teaser Reel: Film a 10-second clip on your phone walking up to the front door before staging is complete. No interior shots, just the approach, the door, and a text overlay that reads “Coming this Thursday.” This earns saves from local buyers who want to be first to see it. Example: agent walks up a tree-lined path, camera tilts up to the front porch, cut to black with “DM me for early access.”
2. The Staging Before-and-After Carousel: Three slides: empty room, staging in progress, final reveal. Works as a 3-slide carousel with no caption needed beyond “Same room, three days apart.” Earns shares from homeowners thinking about selling.
3. The “Guess the List Price” Story Poll: Post one hero exterior shot to your story with a poll sticker: two price options, one correct. This drives profile visits because curious followers tap through to see the answer, and see your other listings while they’re there.
4. The Neighbourhood Sneak Peek Single Image: Post a photo of the street, the nearest coffee shop, or the park down the block, with no listing photos at all. Caption: “Dropping a new listing in [neighbourhood] this week. Here’s why buyers are watching this pocket.” Earns DMs from buyers already interested in the area.
5. The “What Would You Change?” Story Question Box: Post one interior photo and use the question sticker: “If this were your house, what’s the first thing you’d change?” Drives replies, which signals engagement to the algorithm and pushes your next post to more feeds.
Live Listings Get More From Photos You Have Already Shot
This is where most agents run out of ideas after “Just Listed.” Don’t. You have an entire photo set sitting in your camera roll. Use it.
6. The “Just Listed” Reel (Not the Graphic): Take your MLS photos and turn them into a 15-second video with on-screen text: address, beds/baths, price, and your contact info on the final frame. Instagram’s algorithm actively prioritises video in feeds and on the Explore page, which is why reels built from listing photos consistently reach far more accounts than a static “Just Listed” graphic using the same photos. The format matters more than the content.
7. The 5-Detail Carousel: Pull five close-up photos from your listing shoot: crown molding, faucet finish, pantry shelving, fireplace tile, built-in shelving. Make a carousel titled “5 details you probably missed at [address].” This format earns saves because it rewards the swipe. Buyers screenshot the details they love.
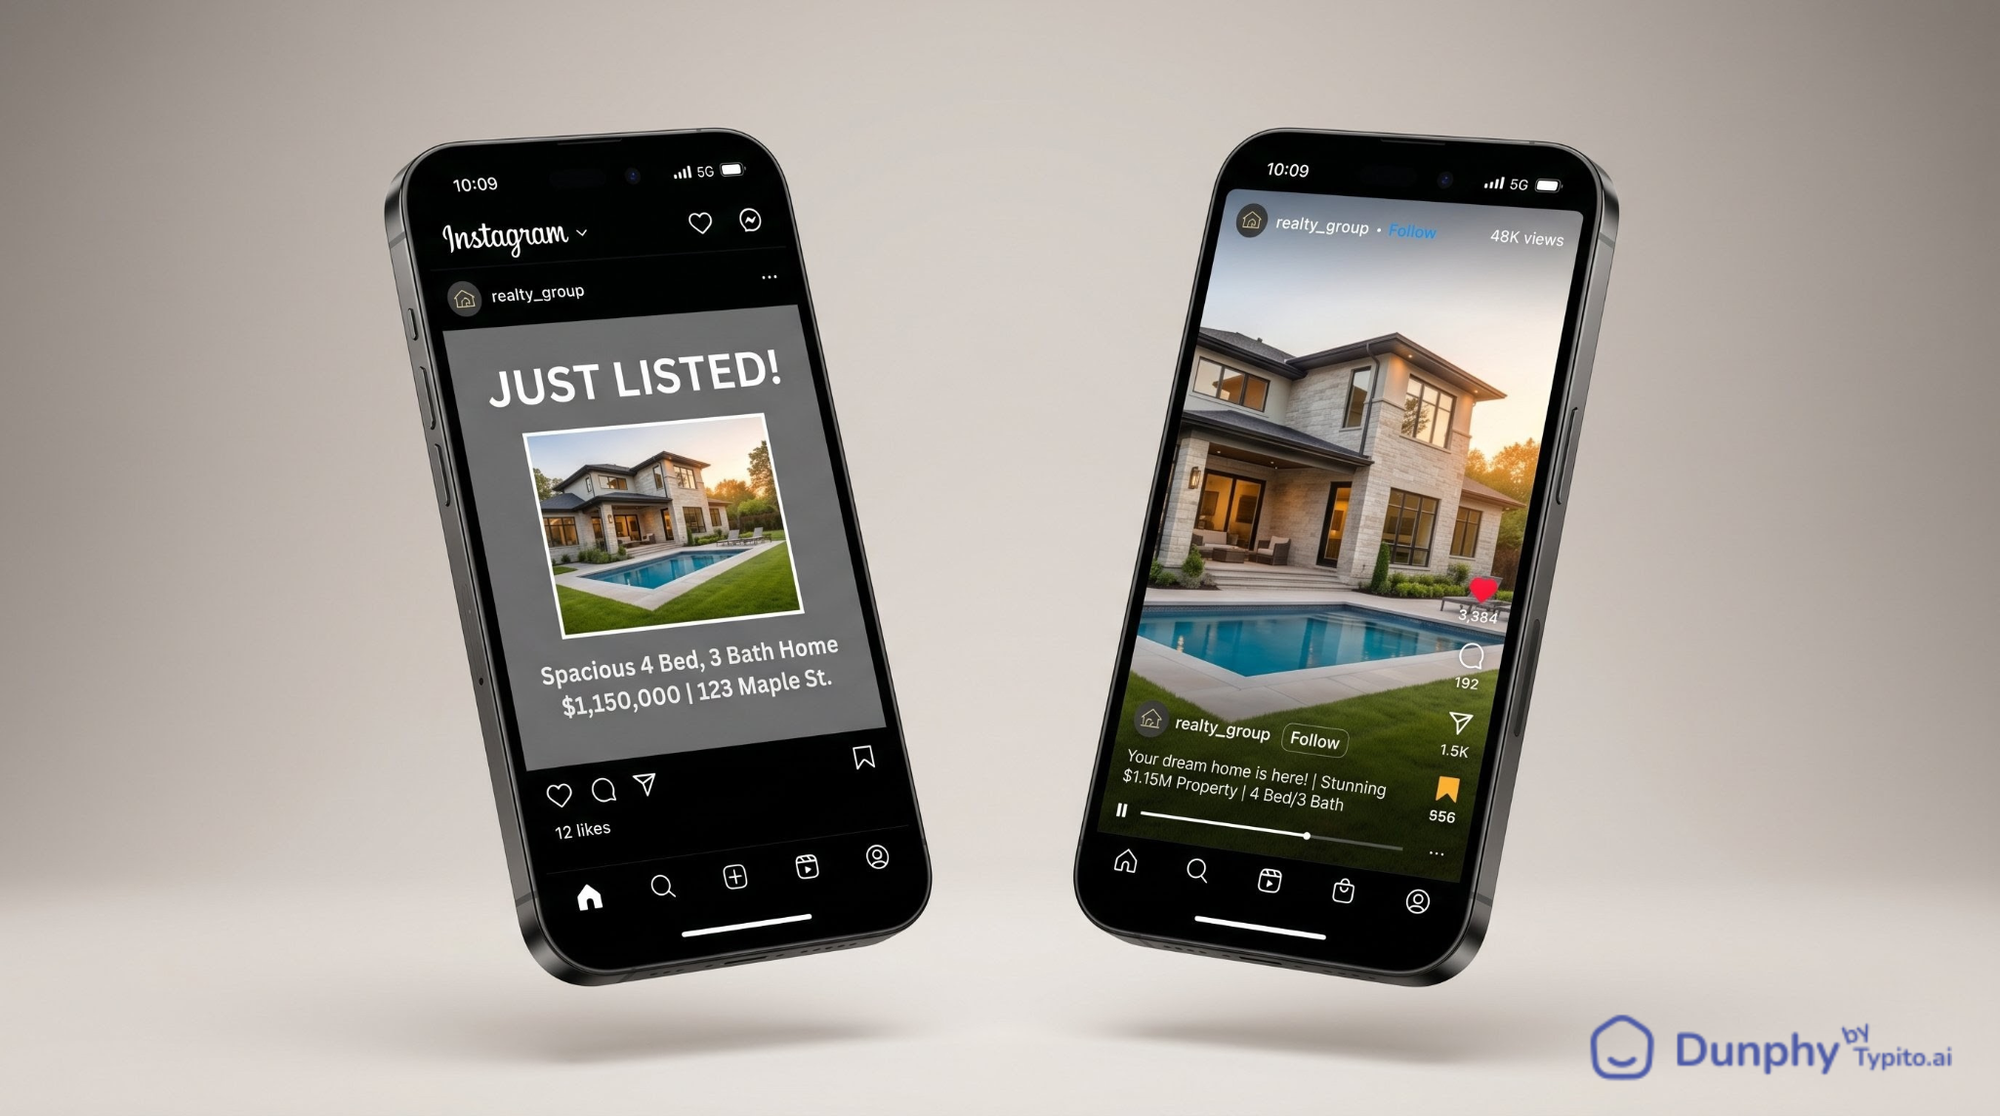
8. The Price Reveal Reel: Script it like this: three exterior shots, four interior shots, on-screen text counting down the rooms (“3 beds… 2.5 baths… chef’s kitchen… private yard…”), and the final frame reveals the price. This format gets shared in DMs between couples house-hunting together.
That price reveal reel? You can build it in Dunphy in under five minutes. Upload the same MLS photos you already have, pick a style, drop in your text overlays, and export. No editing app, no timeline dragging, no videographer. For a deeper look at listing reel formats, check out this guide to real estate reels.

9. The Floor Plan Walkthrough Story: Post your floor plan image to stories with arrows drawn on showing the flow from front door to kitchen to backyard. Buyers save these, especially relocating buyers who can’t tour in person.
10. The “What $X Gets You in [City]” Single Image: One hero shot of your listing with the price overlaid. Caption breaks down what that price point looks like in three other neighbourhoods. Earns shares from locals who love comparing markets.
11. The Neighbourhood, Not Just the Home Carousel: Slide 1 is your listing hero shot. Slides 2 to 5 are nearby spots: the coffee shop two blocks away, the park across the street, the elementary school, the restaurant everyone in the neighbourhood swears by. This earns saves from buyers researching the area, not just the house.
12. The Agent Walkthrough Reel: Record yourself walking through the property narrating one thing per room, not a full tour, just one highlight. “This pantry alone sold me on this listing.” Fifteen seconds, phone footage, no production needed. Earns DMs asking for showing links.
13. The “Open House This Weekend” Countdown Story: Three stories posted Thursday, Friday, Saturday, each one showing a different room with a countdown sticker. Creates urgency without feeling pushy.
14. The Buyer Objection Post: Single image of the listing with a caption that addresses the most common objection head-on. “Yes, it’s on a busy street. Here’s why three of my buyers didn’t care.” Earns saves from agents who want to steal your caption framework.
15. The MLS vs. Reality Reel: Show the MLS grid photo, then cut to a slow pan of the actual room. The contrast between flat grid photos and cinematic movement reliably earns shares.
Under Offer: Keep Posting While the Deal Closes
Most agents go silent between accepted offer and closing. That’s a missed window.
16. The “Under Contract” Celebration Post: Single image of the exterior with an “Under Contract” overlay. Caption tells the story: how many showings, how many offers, how fast. Earns shares from sellers wondering what their own home might attract.
17. The “What Made This One Special” Carousel: Three to four slides highlighting the features that drew the winning offer. This isn’t bragging. It’s showing future sellers what buyers actually value.
18. The Buyer’s Perspective Story: Post a story (with your client’s permission) sharing what drew them to this home over others they saw. “They toured 14 homes. Here’s what made them write the offer on this one.” Earns DMs from buyers starting their own search.
19. The Inspection Day Behind-the-Scenes: A single photo of you at the property with the inspector, no details about findings, just a caption explaining what happens during this phase. Educational posts like this earn saves from first-time buyers.
20. The “Closing Countdown” Weekly Story: Each week, post a story with the number of days until closing and one fun fact about the home or neighbourhood. Low effort, keeps you visible.
Sold: Turn Closings Into Long-Tail Content
A sold listing isn’t dead content. It’s proof of performance.
21. The “Just Sold” Stats Post: Single image with the key numbers overlaid: list price, sale price, days on market, number of offers. Earns saves from sellers evaluating agents.
22. The Client Testimonial Carousel: Slide 1 is a photo of your clients at the closing table (with permission). Slides 2 to 3 are pull quotes from their review. Slide 4 is your contact info. This format earns shares when your clients repost it to their own followers.
23. The “Sold: Lessons Learned” Reel: Fifteen seconds, three text slides: what went right, what was tricky, what you’d tell the next seller. Earns saves from other agents and future clients who appreciate transparency.
24. The Market Proof Point Single Image: Hero shot of the sold property with a caption like “Three listings in [neighbourhood] this year. All sold within 10 days.” This isn’t a market update. It’s a positioning post that earns profile visits from sellers in that area.
No Active Listings: What to Post During Quiet Weeks
Dry spells happen. These formats keep your account active and your audience growing without requiring a listing.
25. The Agent Introduction Reel: Fifteen seconds of you talking to the camera: who you are, what area you cover, one thing you do differently. Earns profile visits and follows from people who haven’t seen your content before. Pin it to the top of your grid.
26. The “Buyer FAQ” Carousel: Five slides answering the questions you get asked most: “How much do I need for a down payment?”, “What does earnest money actually mean?”, “Can I back out after inspection?” Earns saves from first-time buyers who share it with friends also starting their search.
27. The Local Business Spotlight Single Image: Photo of a business you genuinely go to: your coffee shop, your lunch spot, your barber, with a caption that explains why it matters to the neighbourhood. Earns shares from the business owner (and their followers see your profile).
28. The “What I’m Seeing This Month” Story Series: Three to four story slides with quick observations from your showings, not a full market report, just real texture. “Seeing a lot more move-in-ready inventory under $400K this month.” Earns DMs from buyers who want your take.
29. The Myth-Busting Single Image: One common misconception, debunked in the caption. “You don’t need 20% down to buy a home. Here’s what most first-time buyers actually put down.” Earns shares from buyers who want their friends to stop believing the myth too.
30. The “This Day Last Year” Throwback: Repost a listing you sold a year ago with updated context: “Sold this one for $485K last May. Comps in the same neighbourhood are now at $510K.” Earns saves from sellers tracking their equity.
How to Actually Execute These Every Week
Ideas are worthless without a system to ship them. Here’s how to turn this list into a running content calendar.
Step 1: Audit your existing listings. Open your camera roll and count every listing photo set from the last 90 days. Each set is raw material for three to five posts.
Step 2: Map post types to listing stages. Pick two or three formats from each lifecycle section above and assign them. Pre-launch gets a teaser reel and a story poll. Live listings get a reel, a carousel, and a neighbourhood post. Decide once, repeat for every listing.
Step 3: Pick three to five evergreen formats. Choose ideas from the “no active listings” section so you always have something queued, even during slow stretches.
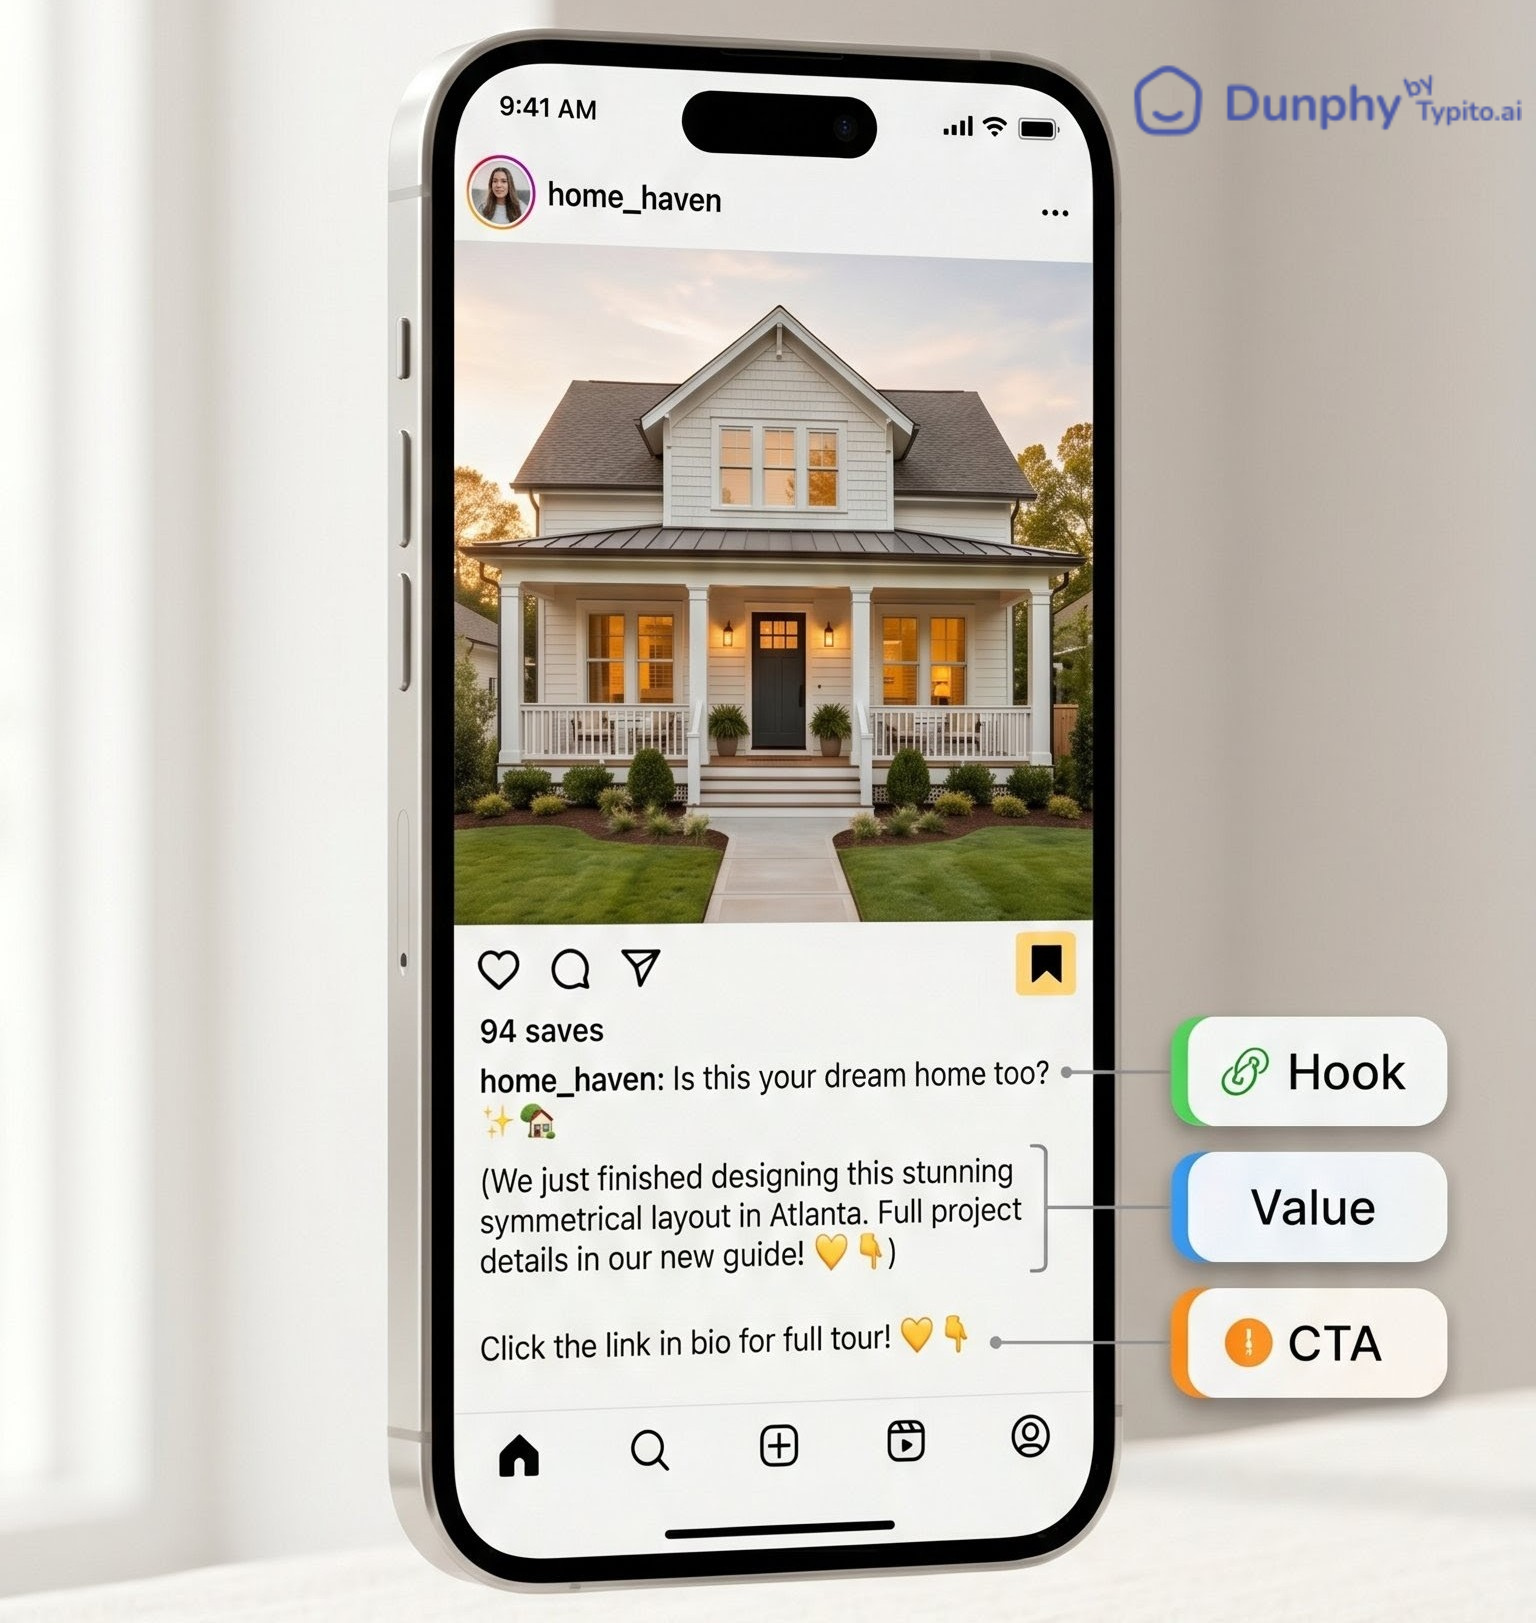
Step 4: Batch your captions. Sit down once a week and write seven to ten captions using a simple structure: hook line, value or insight, call to action. For a deeper resource on writing listing captions that actually convert, check out these caption formulas.
Step 5: Build reels and carousels from your photos. This is where most agents stall. You have great listing photos, but turning them into a reel feels like a production project: downloading an editing app, learning a timeline, syncing music, exporting at the right size. It’s a 45-minute detour for a single post, and most agents just skip it.
Dunphy exists for exactly this step. Upload your listing photos, pick a style template, add your text overlays, and get a polished reel back in minutes. No editing skills, no timeline, no videographer. The same photo set you already shot for MLS becomes a reel you can post tonight.
Step 6: Schedule a two-week buffer. Use any scheduling tool to load posts ahead so you’re never scrambling on Sunday night. A two-week buffer means you can take a vacation without your account going dark.
Step 7: Track what gets saved and shared. Likes are vanity. Saves and shares are the metrics that tell you what’s actually resonating with buyers and sellers. Check your insights weekly, note which formats earn saves, and double down on those.
FAQ
How often should real estate agents post on Instagram?
Three to five times per week is the sweet spot for most agents. That’s enough to stay visible in feeds without burning out on content creation. The key is consistency over volume: five mediocre posts are worse than three strong ones. Use the listing lifecycle framework to always have something ready.
What’s the best type of Instagram post for real estate: reels, carousels, or single images?
Reels currently get the most reach because Instagram prioritises video in the algorithm. Carousels earn the most saves because they reward the swipe and pack more value into one post. Single images work for quick updates and market proof points. The best strategy uses all three: reels for reach, carousels for saves, single images for speed.
How do I make a real estate Instagram post if I only have listing photos and no video?
You don’t need to film anything. Listing photos can be turned into reels using tools like Dunphy, which converts a set of still photos into a polished video with text overlays and transitions. Carousels are built entirely from photos. Even stories can use a single listing photo with a poll or question sticker. Your MLS photo set is more than enough.
What should real estate agents post on Instagram when they have no active listings?
Agent introduction reels, buyer FAQ carousels, local business spotlights, myth-busting posts, and throwback listings all work without active inventory. These formats build your audience and authority so that when you do have a listing, more people see it. The “no active listings” section above has six ready-to-use ideas.
Do real estate Instagram posts actually generate leads?
Yes, but not the way most agents expect. Instagram rarely produces a cold DM that turns into a closing. What it does is keep you top-of-mind so that when someone in your network is ready to buy or sell, you’re the agent they think of first. Posts that earn saves and shares extend your reach into new networks, and those second-degree connections are where most social leads originate.
Make every property listing stand out with video
Transform static photos into engaging listing videos buyers actually stop for.