
If you have ever tried editing videos, you’re familiar with how important it is to cut a video. You’d probably have the need to cut a video clip for multiple reasons during the course of putting together your video.
It could be because the video is too long and cutting it into parts could make it easier for distribution and processing - sharing videos across the web, or simply uploading it to video hosting platforms.
Having an easy way to split videos is also handy to remove extra unwanted parts or footage in the final cut like multiple retakes, moments of confusion, technical errors like shaky footage or incorrect angles, bloopers, etc.
You might have also had the need to split a video for social media. For instance, certain formats in social media have a restriction on the length. To make sure your videos fit within the specified limit, cutting your video is sometimes the only way to go.
Videos split intentionally also make great marketing promo content. Promos and trailers of shows/movies are marketing materials that are usually shorter versions of long videos. In order to make them shorter but still capture the essence of the long versions, one has to cut and edit them smartly.
Splitting videos online
While splitting videos is a simple and fairly straightforward editing technique, finding the right tool to help you easily split videos without losing your original video quality isn’t as easy. You’ll also want to choose a tool that lets you accurately split clips so there are no abrupt jump cuts in the middle of a scene.
Splitting a video online is easy with Typito. It’s an all-in-one video editor that lets you split a video with ease and accuracy. All you need to do is upload the video, find the right time frame for only your timeline, and click the cut tool. Then you can download and save it on a computer or upload it to YouTube directly.
In this article, we’ll look at multiple easy ways to help you split a video in half online without offline editing software like Premiere Pro or iMovie that you might have to install to use.
Let us dive straight into it and show you how to use the video splitter on Typito to easily split a video clip frame by frame without losing quality.
In this blog,
How to split a video in half online
Typito works straight from your browser and you don’t need to download and install any software. You can use the following steps to cut the video in half or into two equal halves.
Let’s look at the easy steps below to split your large video files in half.
Step 1: Upload your video to Typito
Head over to Typito and get started by creating a new project. From the options that appear, select the format of your video.
Next, you can upload the video that you want to cut. You can also do this just by dragging and dropping it in space. Or click to browse your system files and choose a file to upload.
Drag and drop your file to upload media onto Typito.
Once done, click on Add to Project.
Note: You can log in if you have an existing account or if you’re new you can edit your video first and sign up later. We recommend signing up so that you can come back and make multiple edits to your video whenever you want.
Step 2: Zoom in to split your video accurately
Once the video has been uploaded, it’ll appear on your timeline.
You can zoom in on your timeline so that the frames are spread out for better accuracy. To do this, make use of the sliding bar given.

Place the playhead where you want to split the video. You can see three options popping up in a floating menu bar. Click on the scissors icon. Now the video will be split into two parts.
Place the playhead on the timeline to trim the clip.
To delete the half that you no longer need, select the clip on your timeline and click on the Delete icon (indicated by the bin icon) that appears below.

Note: You can add additional media by clicking on the plus icon at the end of the timeline anytime during the editing process.
Step 3: Preview and export.
After the editing is done, preview the video once to check for errors. Make any necessary changes or edits and export the video. The export might take a few minutes. Once exported, download the video and share.

The exported video is now ready to download or share.
Note: With Typito you can split smaller videos for free but if you have a large video file that you want to split, you may need to upgrade to a plan.
How to split a video into multiple parts online
Let’s look at the easy steps below to split your video into several smaller clips
Step 1: Upload your video to Typito
Drag and drop to upload your video or click to browse your system files and choose a file to upload. Once done, click on Add to Project.
Step 2: Split your video into multiple parts
Once the video has been uploaded, it’ll appear on your timeline.
You can zoom in on your timeline by adjusting the zoom slider. Note down the timestamps for each frame or part of the video that you want to cut.

1 in the image shows the slider bar that zooms the timeline. 2 in the image indicates the timestamps of the video.
Place the playhead at the noted timestamp where you want to split the video. Click on the scissors icon from the floating action bar.
Place the playhead on the timeline and click on the scissors icon.
Repeat this at all places where you want to cut the video. Once you get multiple parts, just drag them across the timeline to rearrange the sequence of your video.
To delete any clip, place the marker in it and click on the trash can icon that appears below.
You can add transitions between clips to ensure your clips play smoothly despite the cuts.
Note: You can add additional media by clicking on the plus icon at the end of the timeline anytime during the editing process.
Step 3: Preview and export.
After the editing is done, preview the video once to check for errors. Make any changes required and export the video. The export might take a few minutes. Once exported, download the video and share.

The finished video is now ready to be downloaded or shared.
Note: With Typito you can split smaller videos for free but if you have a large video file that you want to split, you may need to upgrade to a plan.
How to trim video clips
If you’ve split your video into multiple video clips but still need to trim your clips for cleaner composition, here’s an easy way to trim video clips from the beginning or end.
Click the clip on your timeline and drag the highlight handles on either end of the clip. This trims the video and removes the unwanted part.
Here’s a complete tutorial on how to do this in detail ⇨ Trim Videos Online Easily
3 ways to get clean-cut clips
When splitting a video, you have to pay close attention to where you’re splitting the video on the time to get clean cuts and smooth transitions in the video that looks professional. Here are 3 ways to help you get clean cuts when splitting videos.
#1 Zoom in on the timeline
On Typito, you can use the sliding bar under the timeline to zoom into it. This spreads the frame across the timeline so that you can see more frames and find the exact place where you want to cut. You can get very accurate clips exactly where you intended to split a video. You'll also be able to split video clips into equal halves.

The sliding bar helps to zoom the timeline.
#2 Reduce the playback speed
Sometimes if the video is fast and the frame changes quickly, it can be quite the challenge to split it with precision.
To make it easy, slow down the playback speed. Here’s how you can do it in Typito.
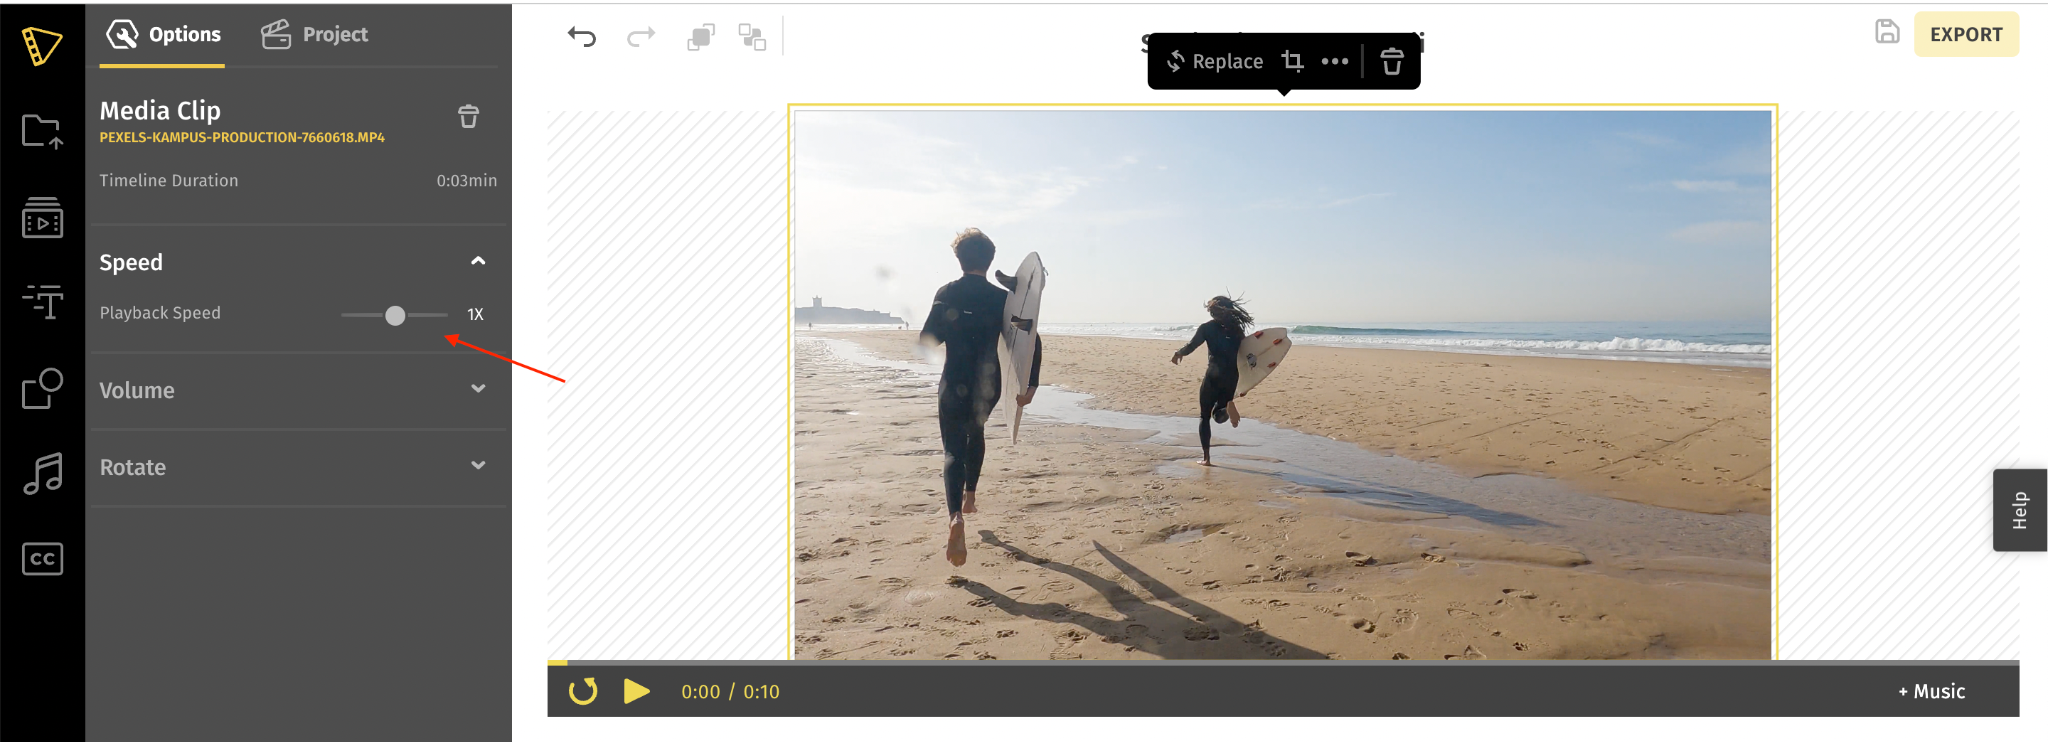
Use the sliding bar to change the playback speed.
- Select the video to be cut.
- On the left, use the sliding bar under Playback Speed to reduce the speed.
- With a very low FPS (frames per second), you can stop at the exact point where you need the video to be cut and use the scissor icon to split the clip.
#3 Take note of the timestamps
Another way is to watch the media very well beforehand and decide where the cuts are going to be. Then take down the exact timestamps of the cuts.

On Typito, use the marker to find the timestamp and place it there. Click on the scissors icon from the floating options.
In short,
A professional-looking video starts with cuts and edits that are clean. At Typito, we’ve tried our best to ensure you get smooth edits and cuts, without any hassle. You can easily cut videos, edit them to get the final cut.
Now that you know how to splice up videos, want to experience more wonders with video editing? Head over to Typito and create engaging videos right now.