
Working with text and overlays
Text is what turns a clip into a video people watch — a title, a lower third, a call to action. This guide covers text and the other overlays that behave the same way: images, shapes and icons.
Add text to your video
Once your clips are on the timeline:
1Click Text in the left rail to open the Text Style panel. Browse the collection or use the search box at the top, and hover any style to preview how it animates.
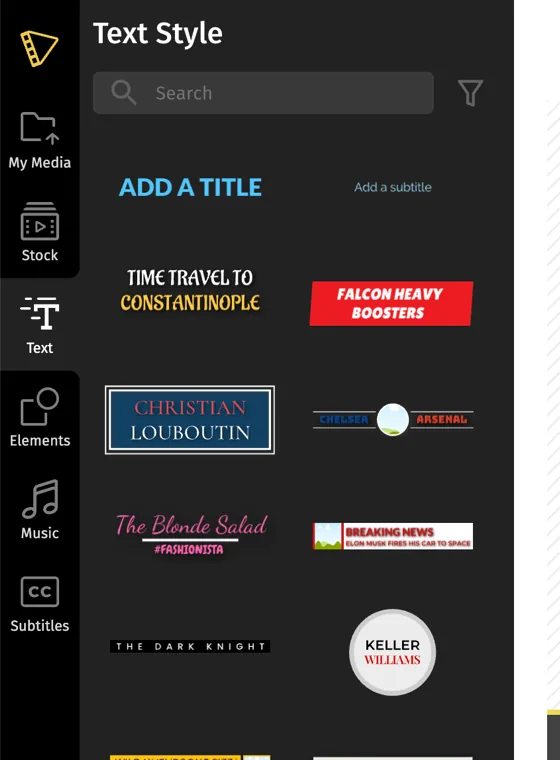
2Click a style to add it to your video.
Each effect is a designed, animated preset rather than a plain text box, so picking one that suits the moment is usually faster than styling from scratch.
Move, resize and rotate
Click the text on the canvas to select it, then:
- Move — drag it anywhere on the frame.
- Resize — drag the handle at the bottom-right corner.
- Rotate — hover the rotate icon beneath the overlay and drag left or right.
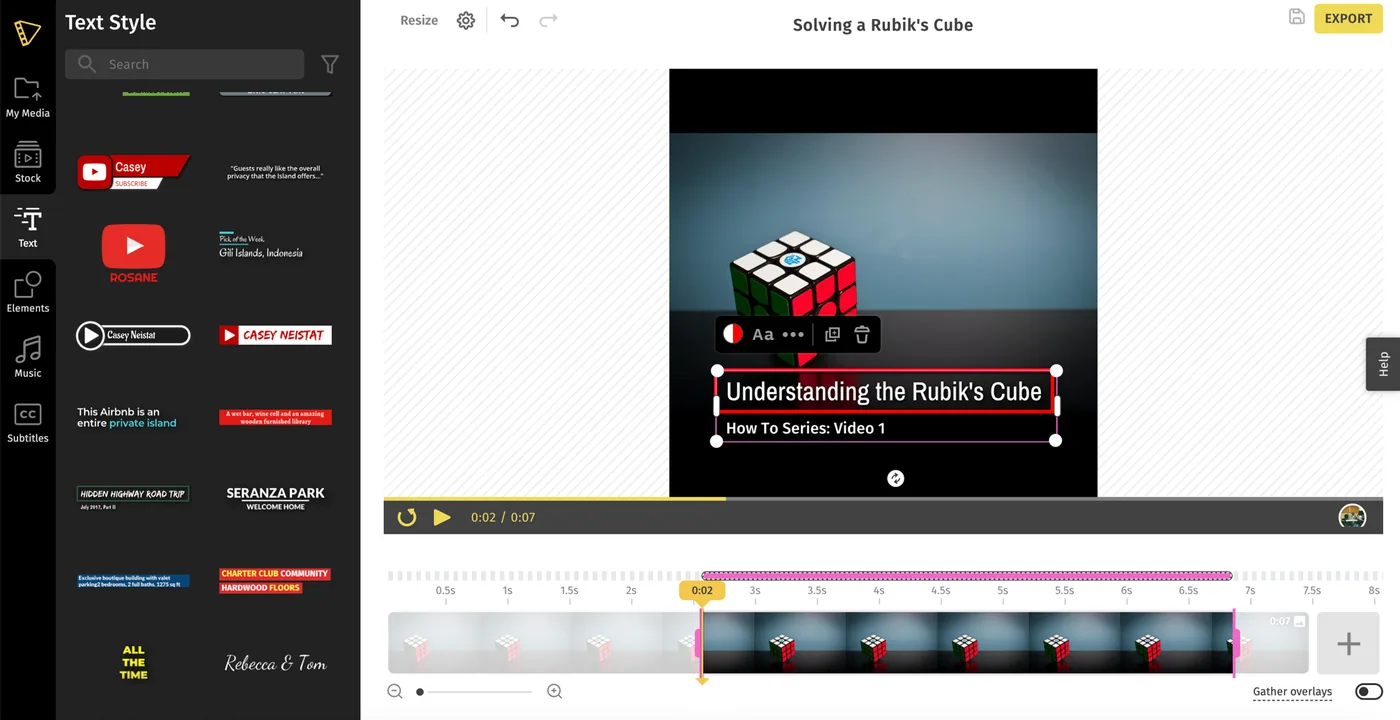
For an exact angle, open the Properties panel on the left and set the rotation numerically under Rotate. The properties panel works on anything you can select on the canvas or the timeline.
Images, shapes and icons move, resize and rotate in exactly the same way.
Change how the text looks
Selecting a text overlay opens its action bar: colour, Aa for type options, ⋯ for everything else, then duplicate and delete.
Click ⋯ to open the full Properties panel on the left.
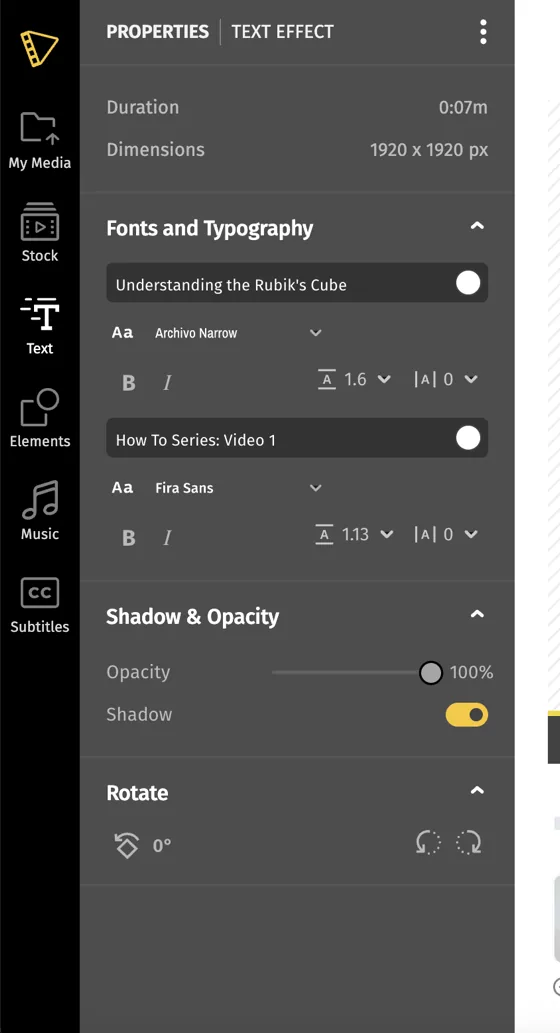
A text effect can hold more than one line of type — a title and a subtitle, say — and each gets its own controls:
- Fonts and Typography — the typeface for each line, bold and italic, line spacing and letter spacing. Typito ships 35+ fonts, and you can upload your own in any language via the Brand Kit.
- Shadow & Opacity — an opacity slider and a shadow toggle. A shadow is the quickest fix for text that's hard to read over busy footage.
- Rotate — nudge by increments or type an exact angle.
Colour and alignment sit in the action bar itself, under the colour swatch and Aa. You can colour individual words differently to make a key phrase stand out.
About text size: text overlays have no numeric font-size field — you size them by dragging the resize handle on the canvas. Captions are different and do have an explicit font-size control; see Customize your captions.
Add a background behind text
Text over a busy shot is hard to read. A translucent shape behind it fixes that in seconds:
1Open Elements in the left panel.
2Pick a rectangle and click to add it.
3Resize it to sit behind your text and lower its opacity.
4Click Send back so the shape sits behind the text rather than on top of it.
Shapes and icons
Elements aren't only for backgrounds. Use them to highlight an offer, point at something, or hide sensitive information in a screen recording.
Open Elements, choose a shape or icon, and click to add it. Select it on the canvas to open the action bar, where you can change its colour and opacity or open the full properties panel.
Control how long an overlay stays on screen
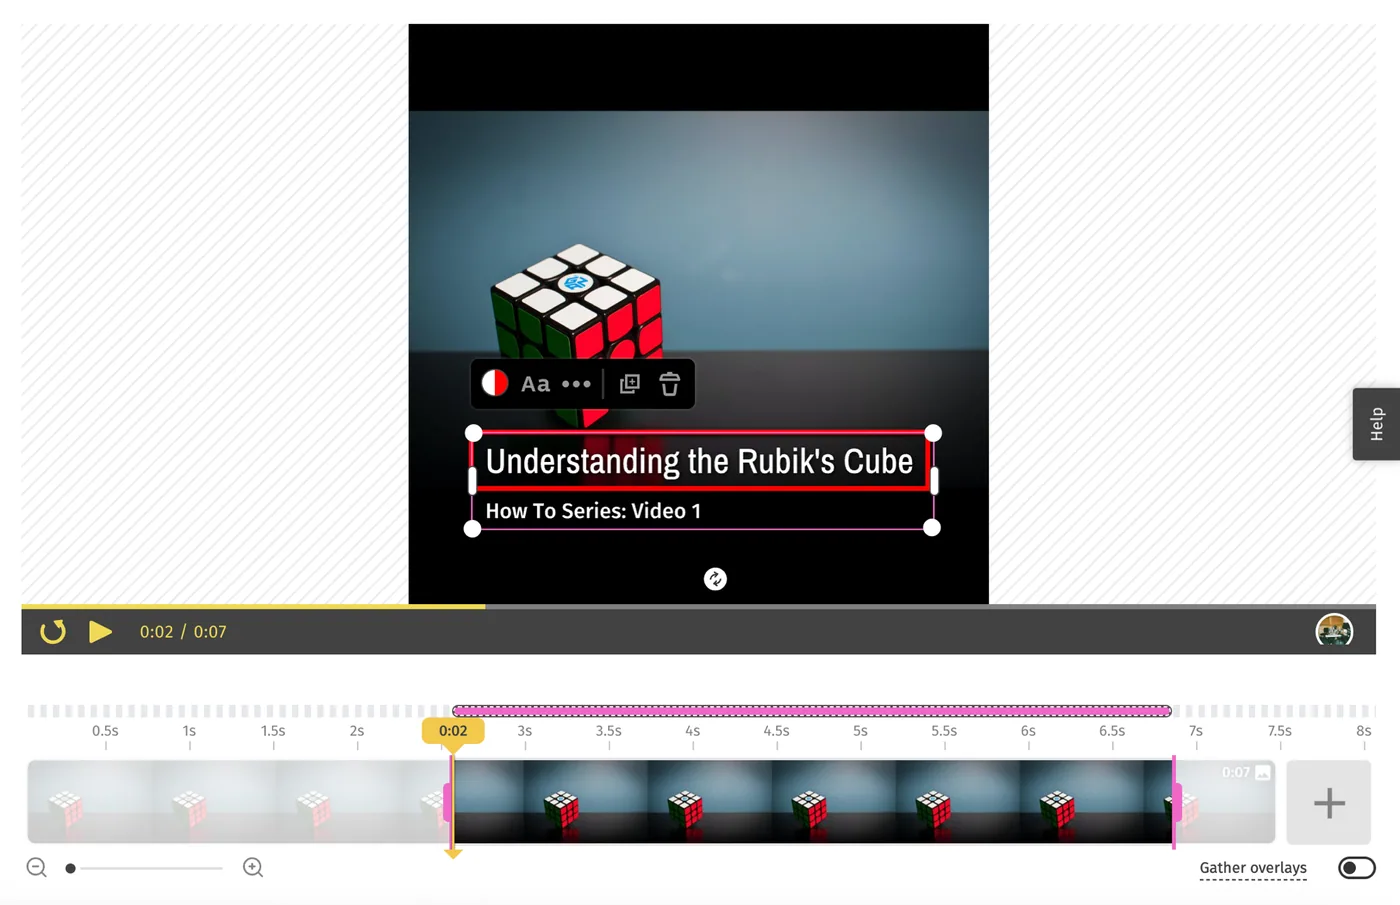
Select any overlay and look at the timeline: two handles appear, marking a highlighted region. That region is exactly how long the overlay is visible.
Drag the left and right handles to change when it appears and disappears.
Work with several overlays at once
Click and drag across the canvas to select multiple overlays together — the fast way to reposition a group or change their duration in one go.
With several selected, click Options in the action bar to change alignment, colour or animation for all of them at the same time.
Keep overlays attached to their clip
By default, moving a clip along the timeline leaves its overlays where they were — rarely what you want once a video is nearly finished.
Turn on Gather Overlays at the bottom-right of the timeline. With it enabled, overlays travel with the clip they sit on, so re-ordering clips doesn't pull your titles out of sync.
Save overlays to reuse in other projects
If you use the same lower third or badge across videos, save it once:
1Select the overlay and click the copy icon in the action bar.
2Click Add to Clipboard .
3Find it later under My Media → Clipboard , in any project.
You can also paste a copied overlay straight onto the timeline with ⌘V / Ctrl + V.
This works for text, images, shapes, icons, and a group of overlays selected together. Teams use it to keep branding consistent without rebuilding it each time.
For fonts, colours and logos you want available everywhere by default, use the Brand Kit instead.
Adding text in other languages
Upload a font that supports your language through the Brand Kit and it becomes available to every text overlay. See Adding a custom font (in any language).